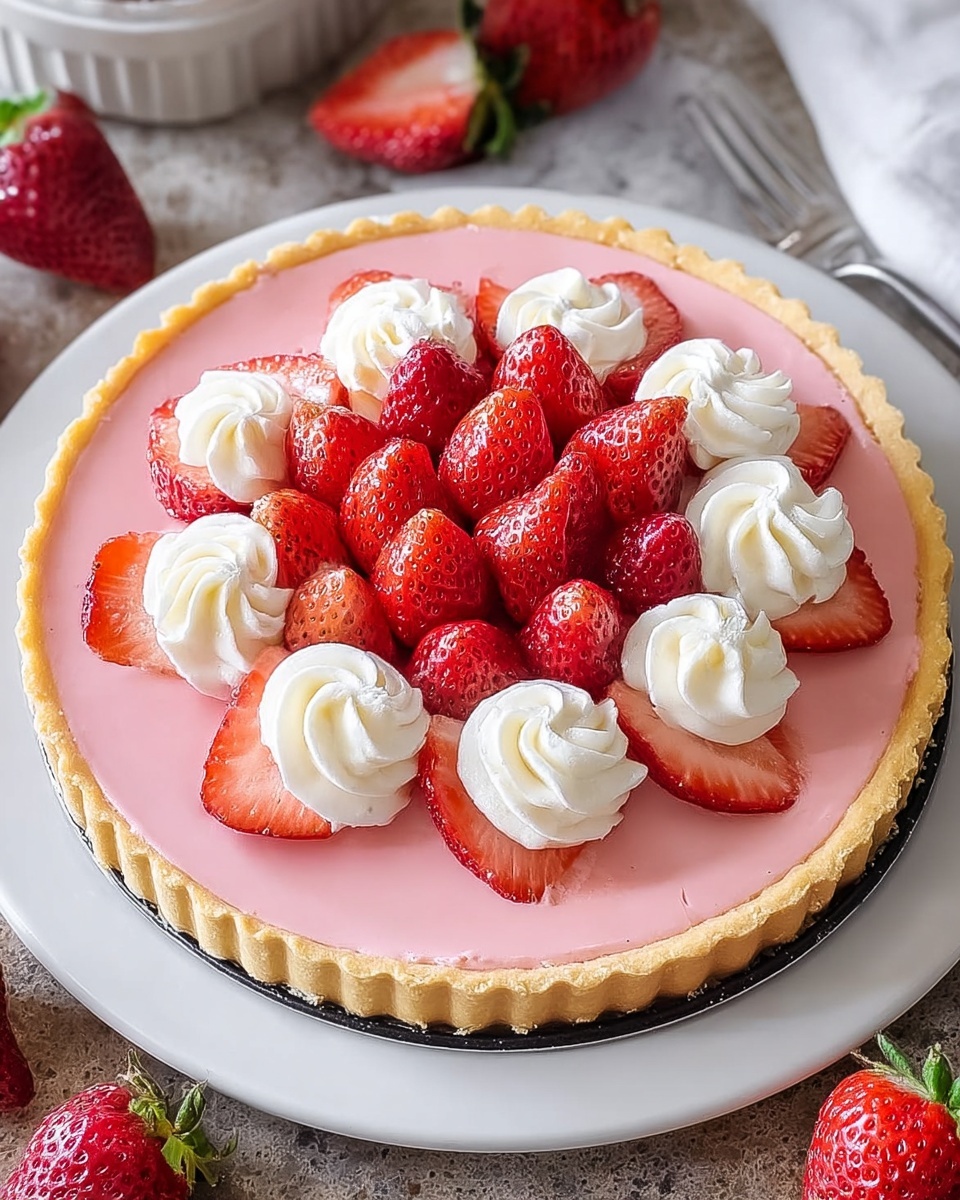
If you’re searching for a dessert that captures the essence of fresh berries with a light and luscious texture, this Whipped Strawberry Tart Recipe is an absolute must-try. Imagine a crisp, buttery crust paired with cloud-like whipped cream and crowned by vibrant ripe strawberries glazed to perfection. It’s a stunning centerpiece for any gathering and a delightful way to celebrate the strawberry season. Let me walk you through how simple it is to create this show-stopping tart that tastes as amazing as it looks.
Ingredients You’ll Need
This Whipped Strawberry Tart Recipe relies on simple, wholesome ingredients that work harmoniously to deliver an impressive balance of flavors and textures. Each element plays its role, whether it’s the crispness of the tart shell or the creamy softness of the filling.
- All-purpose flour: The foundation for the tart crust providing structure and a tender crumb.
- Unsalted butter, cold and cubed: Essential for flakiness and rich buttery flavor in the crust.
- Granulated sugar: Adds a subtle sweetness to the dough without overpowering.
- Salt: Enhances all flavors, balancing sweetness and richness.
- Ice water: Just enough to bring the dough together while keeping it tender.
- Heavy cream, cold: The star ingredient for the airy, whipped filling.
- Powdered sugar: Sweetens the whipped cream without graininess.
- Vanilla extract: Brings warmth and depth to the cream’s flavor.
- Fresh strawberries, hulled and sliced: The vibrant, juicy topping for freshness and color.
- Strawberry or apricot jam: Used as a glaze to give the berries a beautiful shine and extra fruitiness.
- Water: Helps to thin out the jam glaze for easy brushing.
How to Make Whipped Strawberry Tart Recipe
Step 1: Combine Dry Ingredients
Start by whisking together the flour, granulated sugar, and salt in a large bowl. This ensures that your dry ingredients are evenly mixed before introducing the butter.
Step 2: Cut in the Butter
Next, add the cold, cubed butter to the flour mixture. Use a pastry blender or your fingertips to cut it in until the mixture resembles coarse crumbs. This step is key for that flaky texture in the crust.
Step 3: Add Ice Water
Slowly add ice water, one tablespoon at a time, mixing gently until the dough just comes together. Avoid overworking here to keep the crust tender.
Step 4: Form the Dough and Chill
Shape the dough into a disk, wrap it tightly, and refrigerate for at least 30 minutes. Chilling relaxes the gluten and keeps the butter cold, which prevents a tough crust.
Step 5: Roll Out the Dough
Lightly flour your surface and roll the dough into a 12-inch circle. This size will perfectly fit a 9-inch tart pan, giving you a bit of overhang for trimming.
Step 6: Transfer to Tart Pan
Carefully move the rolled dough to your tart pan with a removable bottom. Press it in evenly along the bottom and sides, trimming any extra dough hanging over.
Step 7: Pre-Bake the Crust
Dock the bottom of the dough with a fork to prevent bubbling, then line it with parchment paper and fill it with pie weights or dried beans. This keeps the crust flat while baking.
Step 8: Bake
Bake the crust at 375°F (190°C) for 15 minutes; then remove the weights and parchment paper and bake for another 5-7 minutes until the crust is a lovely golden brown.
Step 9: Cool Completely
Allow the baked crust to cool fully in the tart pan before filling. This prevents your whipped cream from melting.
Step 10: Chill Mixing Equipment
Pop your mixing bowl and whisk attachment in the freezer for 15-20 minutes. Chilled equipment helps the cream whip faster and hold its structure better.
Step 11: Whip the Cream
Pour cold heavy cream into the chilled bowl and begin beating at medium speed until soft peaks form. This means the cream holds a gentle peak that softly bends.
Step 12: Add Sweeteners and Vanilla
Gradually add powdered sugar and vanilla extract while continuing to beat until stiff peaks form. Be careful not to overwhip to prevent turning it grainy or buttery.
Step 13: Fill the Tart Crust
Spoon the fluffy whipped cream into your cooled tart shell, gently spreading it out evenly for a smooth, inviting surface.
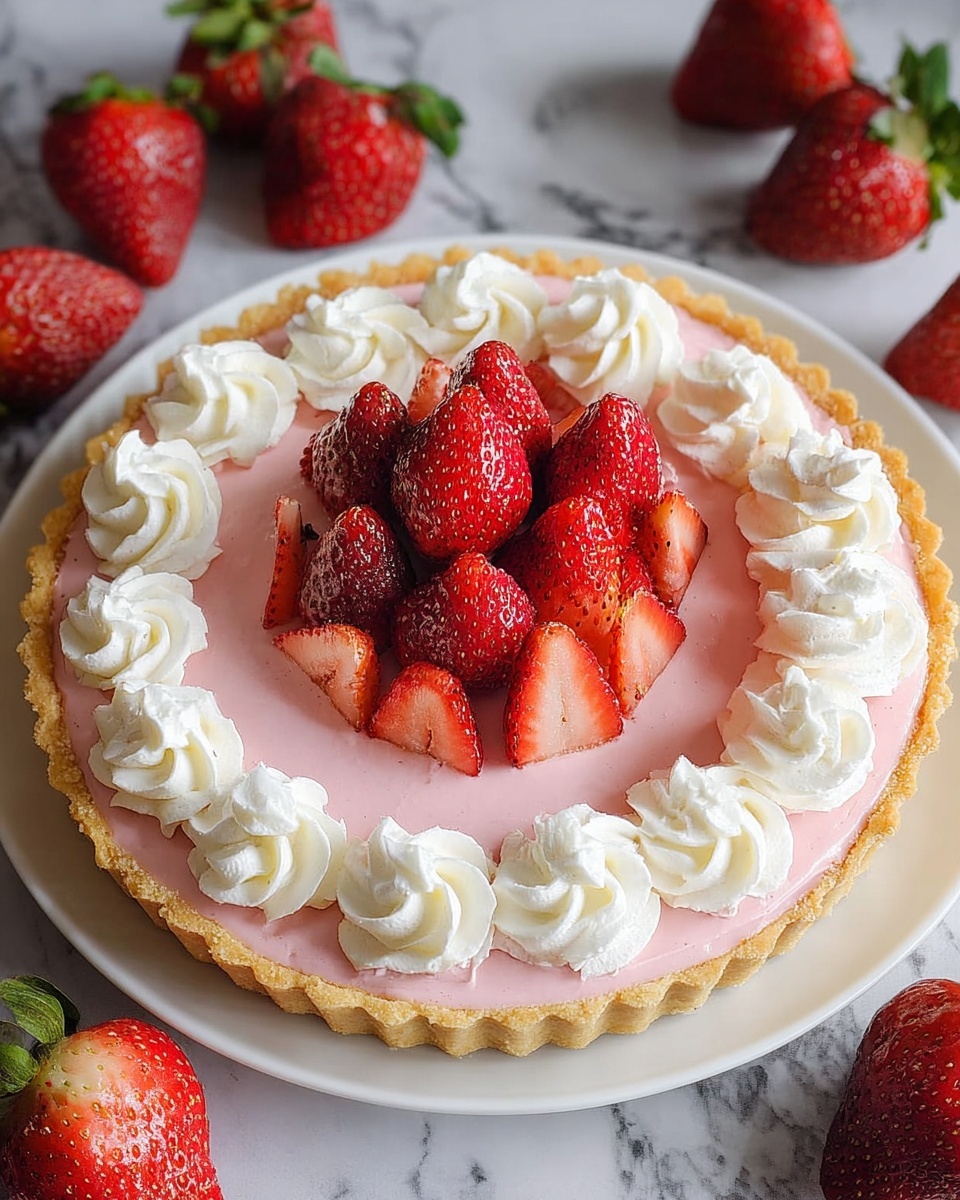
Step 14: Arrange the Strawberries
Decoratively lay sliced strawberries over the cream. Whether you create concentric circles or a pretty spiral, take your time – presentation counts!
Step 15: Prepare the Glaze
Warm strawberry or apricot jam with a little water over low heat, stirring until smooth. Strain it through a fine sieve so the glaze is silky and clump-free.
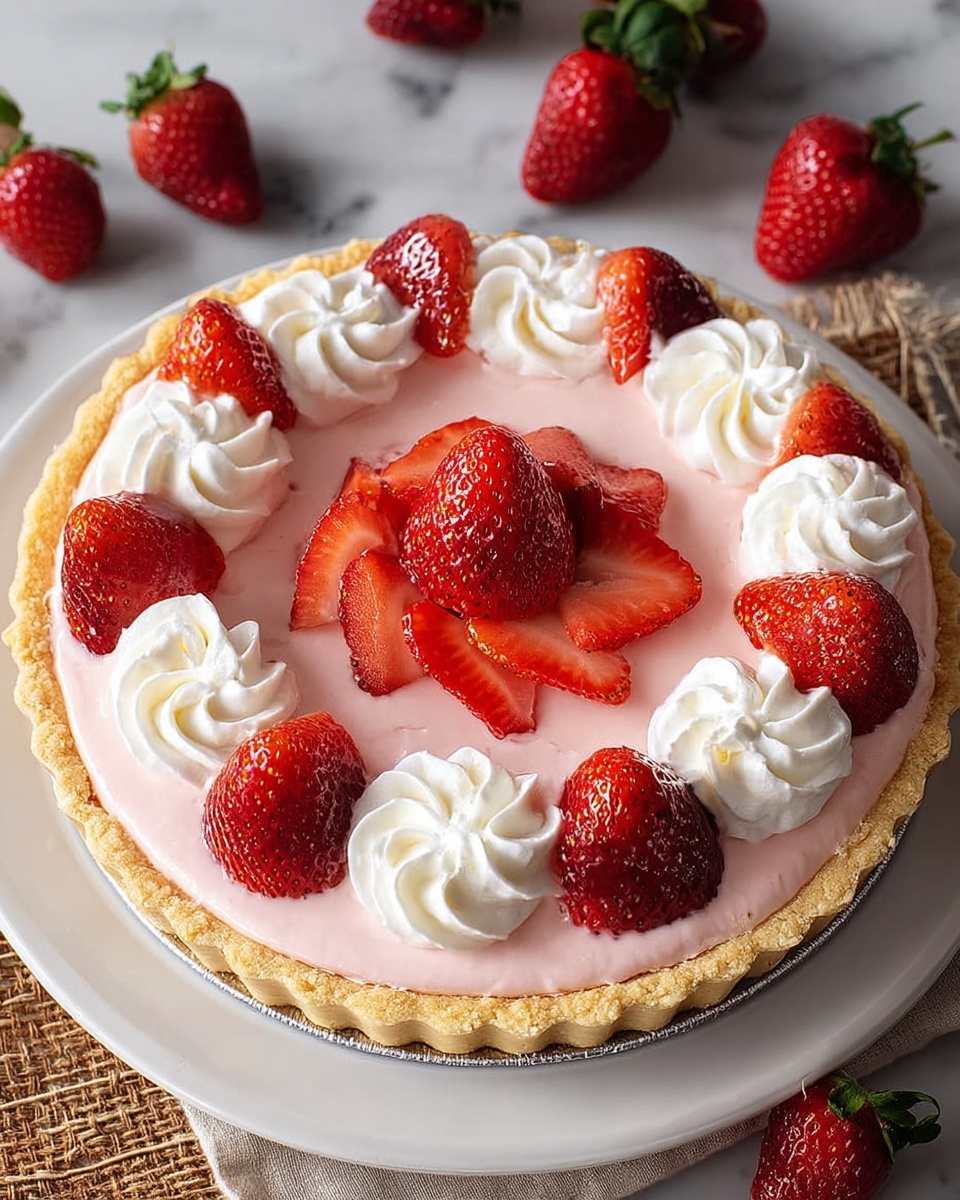
Step 16: Glaze the Strawberries
Brush the warm glaze gently over the strawberries to give them an irresistible shine and seal in their fresh flavor.
Step 17: Chill the Tart
Refrigerate the tart for at least 30 minutes to let everything set and flavors meld before serving. The wait is worth it!
How to Serve Whipped Strawberry Tart Recipe
Garnishes
Adding a few fresh mint leaves or a dusting of powdered sugar can elevate the tart’s appearance and add complementary freshness or delicate sweetness to every bite.
Side Dishes
This tart pairs beautifully with a scoop of vanilla bean ice cream or a dollop of lemon curd on the side to brighten the palate. A light, crisp sparkling wine is also a great match for celebrations.
Creative Ways to Present
Try serving mini versions of this tart in individual tartlets for a charming party platter. Alternatively, layer the whipped cream and strawberries into parfait glasses for a casual yet elegant dessert twist.
Make Ahead and Storage
Storing Leftovers
Keep leftover tart covered in the fridge for up to 2 days to preserve freshness. Due to the whipped cream topping, it’s best enjoyed sooner rather than later.
Freezing
Freezing this tart is not recommended because the whipped cream can lose its texture and become watery. If you must freeze, do so before adding the whipped cream and strawberries, then thaw and assemble before serving.
Reheating
Since this is a cold dessert, reheating is unnecessary. If you prefer, let the tart sit at room temperature for 10-15 minutes before serving to soften the cream slightly, enhancing flavors.
FAQs
Can I use frozen strawberries for this Whipped Strawberry Tart Recipe?
Fresh strawberries are ideal because they hold their shape and provide a bright, juicy flavor. Frozen strawberries tend to release too much water, which can make the tart soggy.
What type of tart pan works best?
A 9-inch tart pan with a removable bottom is perfect for this recipe. It allows easy removal of the tart without damaging the beautiful crust.
Can I make the crust gluten-free?
Yes! Substitute the all-purpose flour with a gluten-free baking blend and be cautious with water amounts since different flours absorb liquids differently. The texture might vary slightly.
How long can I whip the cream in advance?
Whipped cream is best used immediately for maximum fluffiness. If you whip ahead, keep it refrigerated and give it a quick whisk before filling the tart to revive its texture.
Is it possible to make this tart vegan?
To make a vegan version, use plant-based butter and cream substitutes. However, whipping plant-based creams can be tricky, so opt for brands formulated specifically for whipping to get the closest result.
Final Thoughts
There is something truly special about the Whipped Strawberry Tart Recipe that makes it a treasured dessert to serve year-round, especially when strawberries are at their peak. I promise once you try this, you’ll have a new favorite that combines a buttery crust with fluffy cream and juicy, glistening strawberries — pure joy in every bite. Go ahead, bake one today, and share that sweet happiness with your loved ones!
Print
Whipped Strawberry Tart Recipe
- Prep Time: 45 minutes
- Cook Time: 15 minutes
- Total Time: 1 hour
- Yield: 8 servings
- Category: Dessert
- Method: Baking
- Cuisine: American
Description
This Whipped Strawberry Tart features a buttery, flaky pre-baked crust filled with lightly sweetened, fluffy whipped cream and topped with fresh, sliced strawberries glazed with a shiny fruit jam. It’s a beautiful and refreshing dessert perfect for spring and summer gatherings.
Ingredients
For the Tart Crust
- 1 ½ cups all-purpose flour
- ½ cup unsalted butter, cold and cubed
- ¼ cup granulated sugar
- ¼ teaspoon salt
- 4–6 tablespoons ice water
For the Whipped Cream Filling
- 2 cups heavy cream, cold
- ½ cup powdered sugar
- 1 teaspoon vanilla extract
- Pinch of salt
For the Topping and Glaze
- 1 pound fresh strawberries, hulled and sliced
- 2 tablespoons strawberry jam or apricot jam
- 1 tablespoon water
Instructions
- Combine Dry Ingredients: In a large bowl, whisk together the flour, sugar, and salt to evenly distribute the ingredients for the crust.
- Cut in the Butter: Add the cold, cubed butter to the flour mixture. Use a pastry blender or your fingertips to incorporate the butter until the mixture resembles coarse crumbs, ensuring a flaky crust texture.
- Add Ice Water: Gradually add ice water, one tablespoon at a time, mixing gently just until the dough begins to come together. Avoid overmixing to keep the crust tender.
- Form the Dough: Shape the dough into a disk, wrap it tightly in plastic wrap, and chill in the refrigerator for at least 30 minutes to firm up the butter.
- Roll Out the Dough: On a lightly floured surface, roll the chilled dough into a 12-inch circle, large enough to fit your tart pan.
- Transfer to Tart Pan: Carefully place the dough into a 9-inch tart pan with a removable bottom. Press it firmly into the bottom and sides, then trim any excess dough hanging over the edges.
- Pre-Bake the Crust: Dock the bottom with a fork to prevent puffing. Line with parchment paper, fill with pie weights or dried beans to weigh down the crust.
- Bake: Bake in a preheated oven at 375°F (190°C) for 15 minutes. Remove weights and parchment, then bake another 5-7 minutes until golden and cooked through.
- Cool: Allow the tart crust to cool completely in the pan before adding any filling.
- Chill Equipment: Place your mixing bowl and whisk attachment in the freezer for 15-20 minutes to ensure the cream whips properly.
- Whip the Cream: Pour cold heavy cream into the chilled bowl. Beat on medium speed until soft peaks form.
- Add Sweeteners: Gradually add powdered sugar, vanilla, and a pinch of salt while continuing to whip until stiff peaks form, taking care not to overbeat.
- Fill the Crust: Spoon the whipped cream evenly into the cooled tart shell, smoothing the top gently.
- Arrange Strawberries: Decoratively place sliced strawberries over the whipped cream to cover the surface.
- Prepare the Glaze: In a small saucepan over low heat, warm the strawberry or apricot jam with water, stirring until smooth. Strain to remove any solids.
- Glaze the Strawberries: Using a pastry brush, coat the strawberries with the warm glaze to give a shiny, appetizing finish.
- Chill: Refrigerate the completed tart for at least 30 minutes to set and chill before serving.
Notes
- Ensure the butter and cream are very cold for the best texture in crust and whipped cream.
- Do not overmix the dough or the cream to avoid toughness or butter turning to liquid.
- Using a removable-bottom tart pan makes it easier to serve slices neat and clean.
- The glaze not only adds shine but helps keep the strawberries fresh and prevents them from drying out.
- You can substitute apricot jam for strawberry jam if preferred.
- Chilling times can be extended if preparing ahead of time for convenience.

