
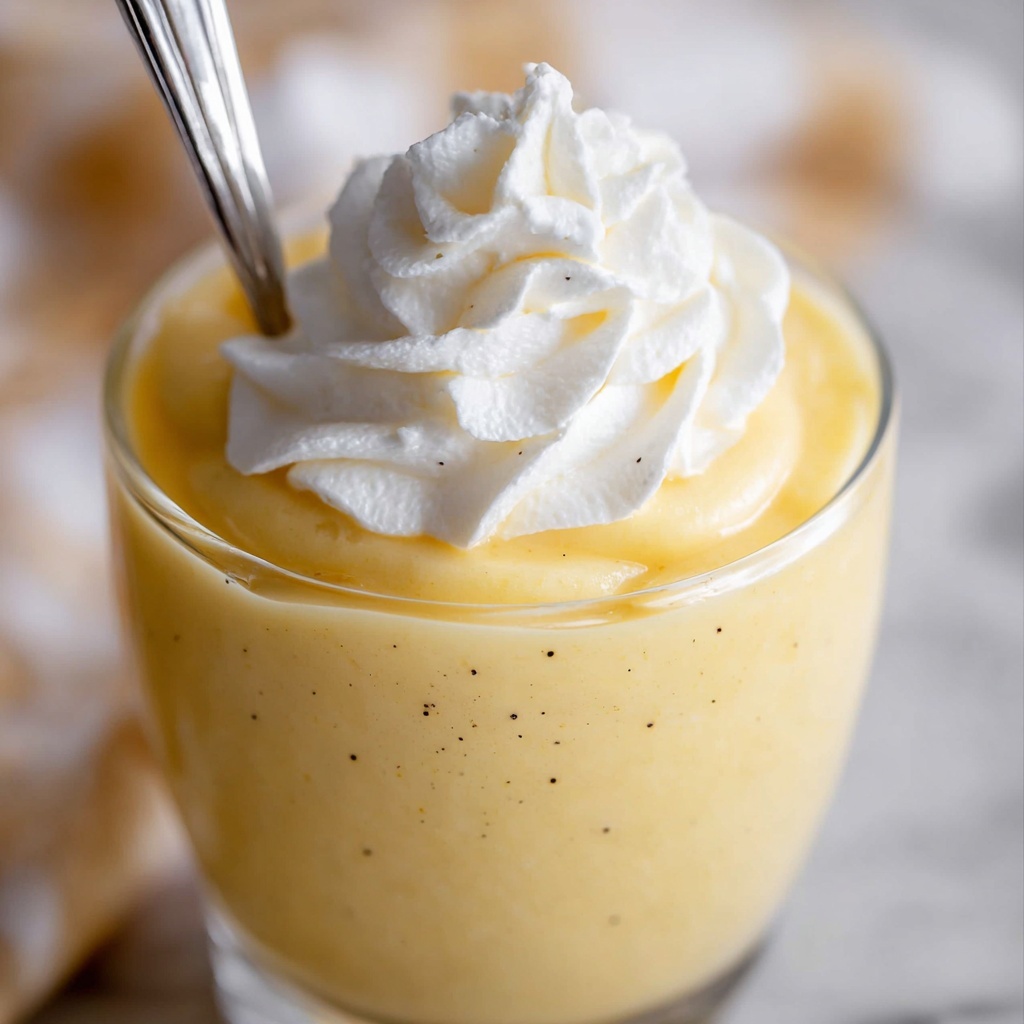
There is something truly magical about making a classic dessert from scratch, and this Vanilla Pudding from Scratch Recipe is no exception. Creamy, luscious, and packed with the warm richness of real vanilla, this pudding elevates a humble treat into an unforgettable experience. Whether you are craving a cozy night in or want to impress friends with a homemade dessert, this pudding hits all the right notes with its perfectly silky texture and comforting flavor—a true testament to the joy of cooking from scratch.
Ingredients You’ll Need
Believe it or not, creating rich vanilla pudding only requires a handful of simple ingredients, but each plays a crucial role in delivering the perfect taste, texture, and color. From the egg yolks that give the pudding thickness and creaminess to the vanilla bean that infuses it with that signature fragrance, everything matters.
- 4 large egg yolks: These build the creamy base and create that luscious, smooth texture you want in good pudding.
- 1/2 cup granulated sugar: Adds sweetness and balances the flavors beautifully.
- 1/2 cup packed brown sugar: Gives a subtle caramel undertone that deepens the pudding’s complexity; you can swap it for granulated sugar if you want a cleaner vanilla flavor.
- 1/2 teaspoon kosher salt: Enhances all the flavors and keeps the sweetness from overwhelming your palate.
- 3 tablespoons cornstarch: The natural thickener that ensures your pudding has that silky, custard-like consistency.
- 1 cup whole milk (cold): Used to create a smooth mixture with your egg yolks and sugar before heating.
- 2 cups whole milk (warm): Warmed up and infused with vanilla to bring out that rich vanilla aroma.
- 1 vanilla bean (or 1 tablespoon vanilla extract): The star of the show, giving the pudding its iconic warm, comforting flavor.
- 2 tablespoons butter: Added at the end for shine, richness, and a velvety finish.
How to Make Vanilla Pudding from Scratch Recipe
Step 1: Combine the Egg Yolks and Sugars
Start by adding 4 large egg yolks to a 3-quart saucepan that’s off the heat—using the pan just like a bowl for now makes cleanup easier. Then add your 1/2 cup granulated sugar, 1/2 cup packed brown sugar, 1/2 teaspoon kosher salt, and 3 tablespoons cornstarch. The combination of brown and granulated sugar enriches the flavor and helps the pudding develop a lovely color as it cooks. This step sets the foundation for that custardy texture we all adore.
Step 2: Mix in Cold Milk Until Smooth
Next, pour in 1 cup of cold whole milk and beat the mixture on high speed with a hand mixer for at least a full minute. This ensures all the dry ingredients dissolve and blends everything into a perfectly smooth batter that will cook evenly without lumps. The cold milk tempers the egg yolks as you mix, setting you up for a silky pudding later on.
Step 3: Warm the Milk and Add Vanilla
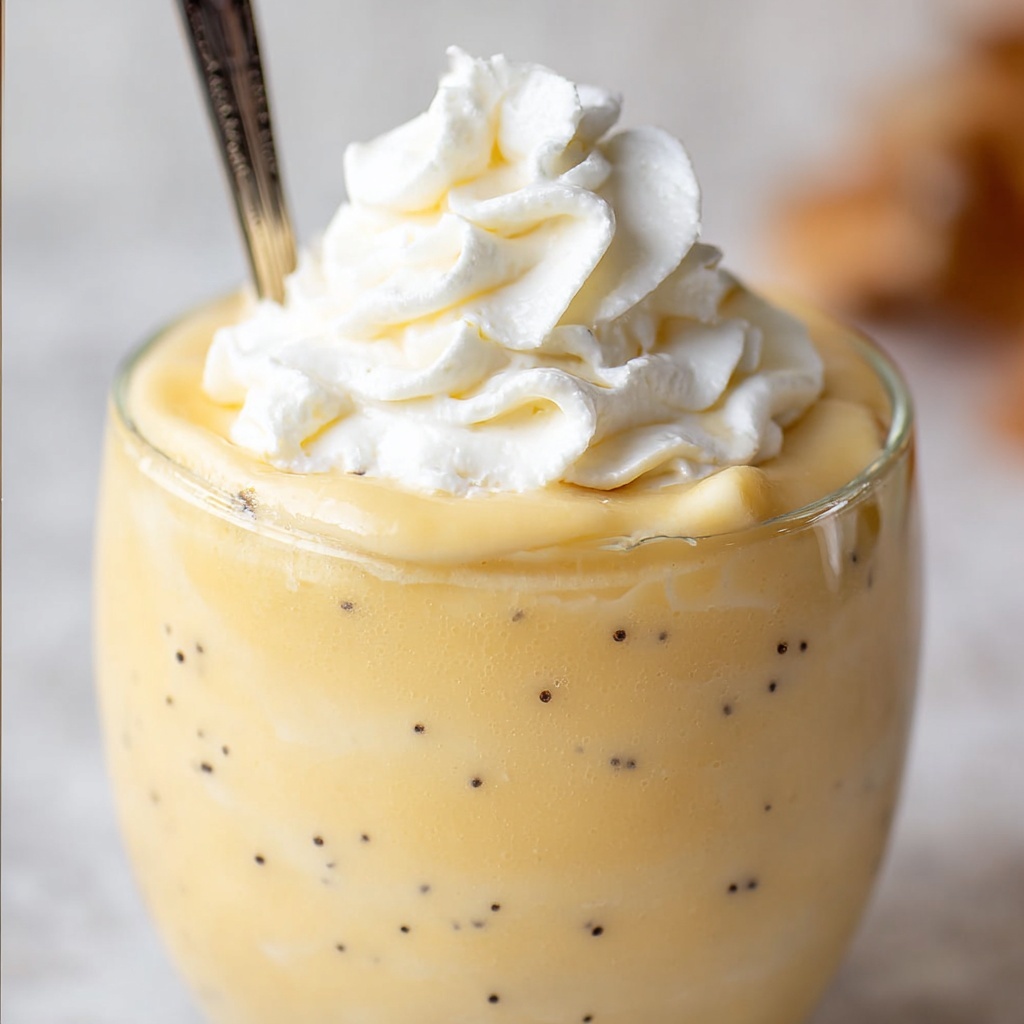
In a separate heatproof vessel, add the remaining 2 cups of whole milk. If you’re using a vanilla bean, slice it lengthwise and scrape those fragrant seeds right into the milk, then drop the pod in too. Heat this in the microwave for 2 to 3 minutes, watching closely until it just starts bubbling and foaming at the edges. This warming step helps release those heavenly vanilla notes and preps the milk to thicken your pudding beautifully.
Step 4: Temper the Eggs with Hot Milk
Turn the hand mixer to medium and slowly pour the hot milk into your egg mixture while mixing constantly. This careful tempering raises the egg yolks’ temperature gently, preventing curdling and preserving a smooth texture in your pudding. It’s okay if a subtle film forms on top during this step—that’s perfectly normal!
Step 5: Cook Until Thickened
Move the entire pot to your stove set on medium heat. Now, the key is attention: whisk constantly, focusing on the edges and corners to avoid scorching. In just a few minutes, you’ll notice the mixture thickening and finally bubbling. Once it reaches a gentle boil, whisk vigorously for about 15 to 45 seconds to activate the starch fully and lock in that luscious thickness we’re aiming for.
Step 6: Whip for Fluffiness and Add Butter
Remove the pot from heat and use the hand mixer once more to beat the pudding thoroughly. This step introduces air, giving your pudding a delightfully light and fluffy texture that makes each spoonful feel extra special. Stir in 2 tablespoons of butter, and if you skipped the vanilla bean earlier, add 1 tablespoon of vanilla extract right now to finish with a burst of aromatic vanilla goodness.
Step 7: Strain and Chill
For that ultra-smooth texture, pour your pudding through a fine sieve into a clean bowl. Then, cover it immediately with plastic wrap pressed directly onto the surface of the pudding to prevent a pesky skin from forming. Give it at least 2 to 4 hours in the refrigerator to fully set and chill. If you’re impatient like me, a quick 30-minute chill in the freezer speeds things up—but don’t forget to transfer it to the fridge afterward to preserve the perfect texture.
How to Serve Vanilla Pudding from Scratch Recipe
Garnishes
Vanilla pudding is a canvas for creativity. Dust it with a sprinkle of ground cinnamon or nutmeg for a subtle warmth, or add a dollop of fresh whipped cream to amp up the creaminess. Fresh berries or a mint sprig can bring a fresh contrast, making every bite feel like a celebration.
Side Dishes
Pair your pudding with iconic treats like crunchy Nilla wafers or classic graham crackers to add texture and nostalgic flavor. A scoop of vanilla bean ice cream alongside can turn this simple pudding into a decadent dessert platter. Light cookies or biscotti also complement the smooth pudding beautifully.
Creative Ways to Present
Impress your guests by layering the pudding in parfait glasses with alternating layers of crumbled cookies and fruit. Or serve it in pretty ramekins topped with toasted coconut flakes or chopped nuts for a delightful crunch. You can even pipe the chilled pudding into mini tart shells for an elegant handheld treat.
Make Ahead and Storage
Storing Leftovers
Once your pudding is made, store any leftovers in an airtight container in the refrigerator. It will keep nicely for up to 3 days, maintaining that silky texture and rich flavor. Just be sure to rewhisk gently before serving to refresh its smoothness.
Freezing
Freezing is not recommended for this pudding because the starch and liquid separate during thawing, resulting in a watery, less appealing texture. Keep your pudding refrigerated instead to preserve that perfect creamy consistency.
Reheating
If you prefer your pudding a bit warmer, gently reheat it on the stove over low heat while stirring constantly. Avoid high heat or microwaving at full power to prevent curdling or uneven texture. Once warmed, whisk it lightly to restore creaminess before serving.
FAQs
Can I use vanilla extract instead of a vanilla bean?
Absolutely! If you don’t have a vanilla bean, 1 tablespoon of good-quality vanilla extract swapped in step 6 will give you wonderful vanilla flavor. Just add it after the pudding has cooked and been removed from heat.
Is it necessary to whisk constantly while cooking?
Yes, constant whisking helps prevent lumps and keeps the pudding from sticking or burning around the edges, ensuring a smooth and silky texture.
Can I make this pudding dairy-free?
You can substitute the whole milk with your favorite plant-based milk, like almond or oat milk, but keep in mind the pudding’s texture and richness might be slightly different without the full fat content of dairy milk.
What is the role of cornstarch in this recipe?
Cornstarch acts as a thickening agent, helping the pudding to firm up and get that custard-like consistency without needing long cooking times or eggs only.
How long does it take for the pudding to set?
Refrigerating the pudding for 2 to 4 hours usually does the trick. The pudding thickens and chills during this time, making it perfect for serving cold. You can speed this along with a brief freezer rest if needed.
Final Thoughts
There’s nothing quite like the satisfaction of savoring a homemade dessert you crafted with love, and this Vanilla Pudding from Scratch Recipe delivers just that. It’s creamy, comforting, and incredibly simple to make with everyday ingredients. Whether you’re a pudding fan or new to making desserts from scratch, I promise this recipe will quickly become a favorite you’ll want to share again and again. So go ahead, give this delightful pudding a try and treat yourself to a truly classic, homemade indulgence!
Print
Vanilla Pudding from Scratch Recipe
- Prep Time: 5 minutes
- Cook Time: 5 minutes
- Total Time: 10 minutes plus 2-4 hours chilling time
- Yield: 6 servings
- Category: Dessert
- Method: Stovetop
- Cuisine: American
Description
This homemade Vanilla Pudding from scratch is a creamy, smooth, and light dessert made with simple ingredients including egg yolks, sugars, milk, cornstarch, vanilla, and butter. It is cooked on the stovetop and chilled to set, resulting in a decadent treat perfect for any occasion.
Ingredients
Custard Base
- 4 large egg yolks
- 1/2 cup granulated sugar
- 1/2 cup packed brown sugar (can be replaced with granulated sugar)
- 1/2 teaspoon kosher salt
- 3 tablespoons cornstarch
- 1 cup whole milk (cold)
- 2 cups whole milk (warm)
Flavorings and Finishing
- 1 vanilla bean (or 1 tablespoon vanilla extract)
- 2 tablespoons butter
Instructions
- Combine egg yolks and dry ingredients: In a 3-quart saucepan off the heat, whisk together 4 large egg yolks, 1/2 cup granulated sugar, 1/2 cup packed brown sugar (or all granulated sugar if preferred), 1/2 teaspoon kosher salt, and 3 tablespoons cornstarch until well combined.
- Add cold milk and beat: Pour 1 cup of cold whole milk into the egg mixture and use a hand mixer on high speed for at least 1 minute until completely smooth.
- Heat milk with vanilla: In a microwave-safe container, add 2 cups whole milk. If using a vanilla bean, split it and scrape the seeds into the milk, then add the pod as well. Microwave for 2-3 minutes until the milk bubbles at the edges, then remove immediately and discard the pod.
- Temper the eggs with hot milk: With the hand mixer running on medium speed, slowly pour the hot milk into the egg mixture, straining if desired to remove vanilla pod bits, to gently raise the temperature of the eggs and prevent curdling.
- Beat then cook: Continue beating until the mixture is foamy, then place the pot over medium heat on the stove. Stir constantly with a whisk, especially at the edges and corners, until the pudding starts to bubble, about 2-3 minutes. Whisk vigorously for another 15-45 seconds to thicken fully.
- Whip and flavor: Remove from heat and beat again with the hand mixer to incorporate air for a light, fluffy texture. Stir in 2 tablespoons of butter and 1 tablespoon vanilla extract if you didn’t use a vanilla bean.
- Strain for smoothness (optional): For an extra smooth texture, pass the pudding through a fine sieve into another bowl.
- Cover and chill: Immediately press plastic wrap directly onto the surface of the pudding to prevent a skin from forming. Refrigerate for at least 2-4 hours until set. You may chill in the freezer for 30 minutes initially to speed cooling, but then transfer to the fridge.
- Serve: Before serving, remove the plastic wrap and whisk the pudding to smooth it out. Serve cold with whipped cream and optional additions like Nilla wafers or crumbled graham crackers.
Notes
- Replacing brown sugar with granulated sugar will produce a purer vanilla flavor without caramel undertones.
- Using a vanilla bean adds a richer, more aromatic taste compared to vanilla extract.
- Beating the pudding mixture thoroughly after cooking introduces air, resulting in a lighter texture.
- Pressing plastic wrap onto the surface prevents formation of an unappealing skin on the pudding.
- Freezing pudding is not recommended as it can degrade texture, causing it to become watery upon thawing.
- Save egg whites for another use like an omelette or meringue to avoid waste.

