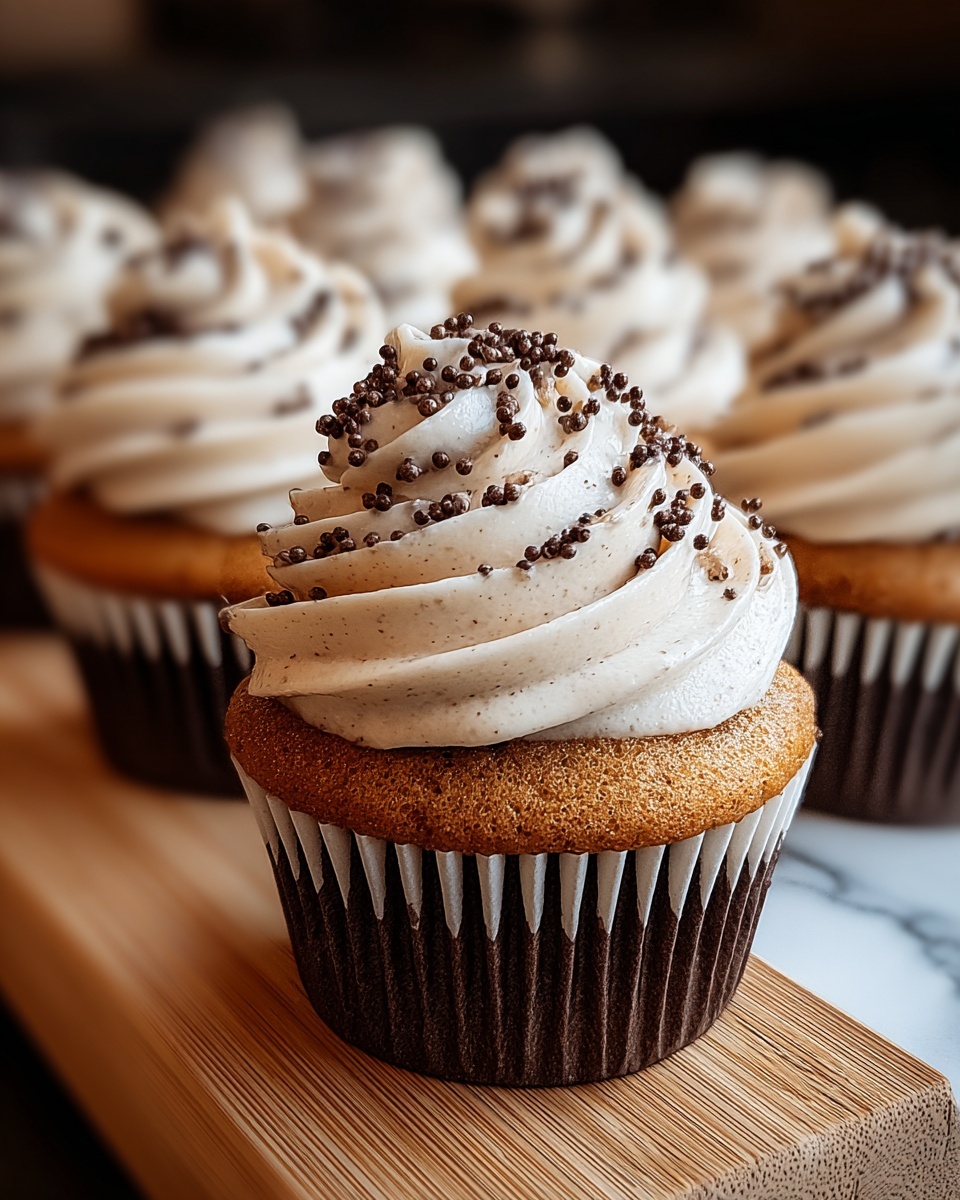
If you adore the classic Italian dessert but want to enjoy it in a fun, handheld form, this Tiramisu Cupcakes Recipe is exactly what you need. Featuring moist coffee-infused cupcakes paired with a luscious mascarpone filling and finished with a dusting of cocoa powder, these cupcakes bring all the beloved flavors of tiramisu into every bite. Whether for a special occasion or simply indulging your sweet tooth, these cupcakes offer a delightful twist that is sure to impress and satisfy.
Ingredients You’ll Need
Every ingredient here is simple yet plays a crucial role in creating the perfect balance of flavors and textures you expect from tiramisu in cupcake form. From the rich coffee to the creamy mascarpone, each component works harmoniously to bring this dessert to life.
- All-Purpose Flour: The base of the cupcakes, providing structure and a tender crumb.
- Baking Powder: Helps the cupcakes rise beautifully and become light and fluffy.
- Salt: Enhances the flavors of both the cupcake and filling.
- Sugar: Sweetens the cupcake batter just right without overpowering.
- Unsalted Butter: Adds richness and moisture to the cupcake.
- Eggs: Bind ingredients together and give cupcakes their lift.
- Milk: Keeps the cupcakes moist and tender with a smooth texture.
- Strong Brewed Coffee (cooled): Infuses the cupcakes with that unmistakable tiramisu flavor.
- Vanilla Extract: Adds a warm, fragrant note that complements the coffee and mascarpone.
- Mascarpone Cheese: Creates the rich and creamy filling essential to tiramisu.
- Heavy Cream: Whipped into the mascarpone for a light, fluffy texture.
- Powdered Sugar: Sweetens and smooths the mascarpone filling without graininess.
- Strong Brewed Coffee (for syrup): Combined with sugar to soak the cupcakes and intensify coffee flavor.
- Cocoa Powder: Dusting on top adds the classic chocolate note and a beautiful finish.
- Dark Chocolate Shavings (optional): Adds an elegant touch and extra chocolate flavor.
How to Make Tiramisu Cupcakes Recipe
Step 1: Prepare the Cupcake Batter
Start by preheating your oven to 350°F (175°C) and lining a muffin tin with cupcake liners to ensure easy removal and a neat appearance. This preparation step sets the stage for perfectly baked cupcakes.
Step 2: Combine Dry Ingredients
In a medium bowl, whisk together the all-purpose flour, baking powder, and salt. This combination guarantees that the cupcakes will rise evenly and have a balanced flavor foundation.
Step 3: Cream Butter and Sugar
In a separate large bowl, beat the unsalted butter and sugar until the mixture turns light and fluffy, which ensures a tender crumb. Then, add eggs one at a time, mixing well after each to incorporate air for lift.
Step 4: Mix Dry Ingredients with Wet
Gradually add the flour mixture to the butter and sugar blend, alternating with the milk. This careful mixing prevents overworking the batter, keeping cupcakes soft and moist. Start and finish with dry ingredients for the best texture.
Step 5: Add Coffee and Vanilla
Stir in the cooled strong brewed coffee and vanilla extract. This step infuses the batter with the unmistakable tiramisu coffee flavor that makes this recipe so special.
Step 6: Bake the Cupcakes
Divide the batter evenly into the prepared liners, filling each about two-thirds full, which allows room for rising without overflowing. Bake for 18 to 20 minutes until a toothpick inserted comes out clean, then let them cool completely before moving on.
Step 7: Prepare the Mascarpone Filling
While cupcakes cool, whisk together mascarpone cheese, heavy cream, powdered sugar, and vanilla extract until the mixture is smooth and slightly thickened. This luscious filling will be the creamy heart of your cupcakes.
Step 8: Make the Coffee Syrup
Heat brewed coffee and sugar over medium heat, stirring until the sugar dissolves completely to create a rich syrup. Allow it to cool; this will be used to soak the cupcake centers, adding moistness and depth.
Step 9: Hollow and Soak the Cupcakes
Using a spoon or cupcake corer, carefully remove the center of each cooled cupcake to create a pocket. Brush each hollow with the coffee syrup, allowing it to soak in and boost coffee flavor within.
Step 10: Fill the Cupcakes
Fill each hollowed cupcake with the mascarpone cream, making sure the filling is generous and smooth. This adds that creamy dreamy center reminiscent of classic tiramisu.
Step 11: Add Toppings
Lightly dust the tops of the filled cupcakes with cocoa powder for a beautiful and authentic tiramisu finish. Optionally, sprinkle dark chocolate shavings for an extra touch of elegance and flavor.
Step 12: Chill Before Serving
Refrigerate the cupcakes for about 30 minutes before serving. This resting period lets all the flavors meld perfectly, resulting in a dessert that’s indulgent and irresistible.
How to Serve Tiramisu Cupcakes Recipe
Garnishes
Simple garnishes like a dusting of cocoa powder or finely grated dark chocolate give your tiramisu cupcakes that classic look and a bit of extra flavor. Fresh mint leaves or a few coffee beans on top can also elevate presentation beautifully.
Side Dishes
Serve these cupcakes alongside a light dessert wine or a frothy cappuccino for a delightful Italian-inspired pairing. Fresh berries on the side add a burst of color and a fresh contrast to the creamy richness.
Creative Ways to Present
Consider serving your tiramisu cupcakes in elegant cupcake wrappers or small glass jars for a trendy look. You can also stack them with mini spoons for an interactive dessert platter at parties, making every bite feel like a celebration.
Make Ahead and Storage
Storing Leftovers
Keep leftover tiramisu cupcakes in an airtight container in the refrigerator for up to 3 days. This helps maintain the mascarpone filling’s freshness and the cupcakes’ moist texture.
Freezing
If you want to keep these treats longer, freeze them without the cocoa topping to prevent moisture issues. Wrap cupcakes individually and store in a freezer-safe container for up to 1 month. Thaw overnight in the fridge before serving.
Reheating
Because of the creamy filling, gently bring cupcakes to room temperature or enjoy them chilled. Reheating in a microwave is not recommended as it can separate the filling and affect texture.
FAQs
Can I use instant coffee instead of brewed coffee for the coffee flavor?
Yes, instant coffee can work in a pinch, but brewed coffee provides a richer, more authentic taste, especially in the syrup where flavor concentration is key.
Is there a substitute for mascarpone cheese?
You can use a mix of cream cheese and heavy cream as a substitute, but mascarpone’s unique creamy texture and mild sweetness make it the best choice for this recipe.
Can these cupcakes be made gluten-free?
Absolutely! Substitute the all-purpose flour with a gluten-free flour blend designed for baking, and ensure your other ingredients are gluten-free for a safe and delicious alternative.
How long should I chill the cupcakes before serving?
A chill time of about 30 minutes is ideal to let the flavors meld and the filling set, but they can be refrigerated for longer if needed without losing quality.
What’s the best way to dust cocoa powder without making a mess?
Using a fine mesh sieve to sprinkle cocoa powder gently over the cupcakes ensures even coverage and prevents clumping or mess on your presentation surface.
Final Thoughts
Making and sharing this Tiramisu Cupcakes Recipe is like bringing a little slice of Italy into your home with every bite. They’re fun to bake, impressive to serve, and utterly delicious to enjoy, so I encourage you to give it a try and wow your friends and family with your culinary creativity. Once you taste these cupcakes, tiramisu will never be the same again!
Print
Tiramisu Cupcakes Recipe
- Prep Time: 30 minutes
- Cook Time: 20 minutes
- Total Time: 50 minutes
- Yield: 12 cupcakes
- Category: Dessert
- Method: Baking
- Cuisine: Italian
Description
These Tiramisu Cupcakes capture the classic Italian dessert’s rich flavors in a convenient and delightful cupcake form. Moist coffee-infused cupcakes are filled with a creamy mascarpone mixture, soaked with sweet coffee syrup, and topped with a dusting of cocoa powder and optional dark chocolate shavings, making for an irresistible treat perfect for gatherings or special occasions.
Ingredients
For the Cupcakes:
- 1 3/4 cups all-purpose flour
- 1 1/2 teaspoons baking powder
- 1/2 teaspoon salt
- 1 cup sugar
- 1/2 cup unsalted butter, softened
- 2 large eggs
- 1/2 cup milk
- 1/2 cup strong brewed coffee, cooled
- 1 teaspoon vanilla extract
For the Mascarpone Filling:
- 8 ounces mascarpone cheese
- 1/2 cup heavy cream
- 1 cup powdered sugar
- 1 teaspoon vanilla extract
For the Coffee Syrup:
- 1/2 cup strong brewed coffee
- 1/4 cup sugar
For Topping:
- Cocoa powder, for dusting
- Dark chocolate shavings (optional)
Instructions
- Prepare the Cupcakes: Preheat your oven to 350°F (175°C) and line a 12-cup muffin tin with cupcake liners for easy removal.
- Mix Dry Ingredients: In a medium bowl, whisk together the all-purpose flour, baking powder, and salt to evenly distribute the leavening agents.
- Cream Butter and Sugar: In a separate large bowl, beat the softened unsalted butter and sugar together until light and fluffy, which helps to create a tender crumb.
- Add Eggs: Incorporate the eggs one at a time into the butter and sugar mixture, beating thoroughly after each addition to ensure the batter is smooth and homogenous.
- Combine Dry and Wet Ingredients: Gradually mix the dry ingredients into the wet mixture alternating with the milk, beginning and ending with the dry ingredients, to maintain batter consistency.
- Add Coffee and Vanilla: Stir in the cooled brewed coffee and vanilla extract gently to infuse the batter with coffee flavor without overmixing.
- Fill Cupcake Liners: Portion the batter evenly among the cupcake liners, filling each about two-thirds full to allow for rising.
- Bake: Bake in the preheated oven for 18–20 minutes, or until a toothpick inserted into the center comes out clean. Remove cupcakes and allow them to cool completely.
- Prepare Mascarpone Filling: In a medium bowl, whisk together mascarpone cheese, heavy cream, powdered sugar, and vanilla extract until the mixture is smooth and slightly thickened, perfect for filling.
- Make Coffee Syrup: Heat brewed coffee and sugar in a small saucepan over medium heat, stirring until the sugar dissolves completely. Remove from heat and let it cool to room temperature.
- Hollow Cupcakes: Once cupcakes have cooled, use a small spoon or cupcake corer to carefully remove the center of each cupcake, creating space for the filling.
- Soak Cupcakes: Brush the hollowed centers with the cooled coffee syrup to saturate and intensify the coffee flavor.
- Fill Cupcakes: Spoon or pipe the mascarpone filling into the hollowed cupcakes, filling them generously.
- Add Toppings: Dust the tops with cocoa powder and optionally garnish with dark chocolate shavings for an elegant finish.
- Chill and Serve: Refrigerate the cupcakes for about 30 minutes before serving to let the flavors meld beautifully and the filling set slightly.
Notes
- Ensure the coffee used in both the batter and syrup is strong for the best tiramisu flavor.
- You can substitute mascarpone cheese with a mix of cream cheese and heavy cream if mascarpone is unavailable, but the flavor will be slightly different.
- Allow cupcakes to cool completely before coring and filling to maintain their shape.
- For an adult version, consider adding a tablespoon of coffee liqueur to the coffee syrup.
- Store leftover cupcakes in an airtight container in the refrigerator for up to 3 days.

