
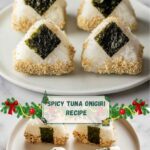
If you are craving a hand-held snack bursting with bold flavors and delightful textures, this Spicy Tuna Onigiri Recipe will become your new go-to. Combining gently seasoned sushi rice with a creamy, spicy tuna filling, wrapped in crisp nori and finished with a sprinkle of furikake, these onigiri are pure magic. Whether you need a quick lunch, an impressive party appetizer, or a tasty travel-friendly treat, this recipe delivers all the umami goodness in every bite and keeps things refreshingly simple.
Ingredients You’ll Need
Each ingredient in this Spicy Tuna Onigiri Recipe plays a vital role, contributing layers of flavor and texture that marry beautifully in the finished dish. From the soft, vinegared rice to the spicy, creamy tuna filling and the crunchy furikake, everything works together to create a snack that is both satisfying and memorable.
- 4 cups cooked sushi rice: The sticky, vinegared base perfect for shaping holds everything together perfectly.
- 1 tablespoon rice wine vinegar: Adds a subtle tanginess that brightens the rice and balances the richness of the tuna.
- 1 (5-ounce) can of tuna: The star protein that is both convenient and flavorful for the filling.
- 2 tablespoons Kewpie mayonnaise: Creamy and slightly sweet mayo that blends seamlessly with the tuna.
- 1 tablespoon sriracha or other chili paste: Brings the perfect kick of spice to wake up your taste buds.
- Pinch of salt: Enhances all the flavors without overpowering them.
- 1 sheet of nori: Adds a slightly salty crunch and traditional Japanese touch to the onigiri.
- 2 tablespoons furikake seasoning: A savory sprinkle of sesame seeds, seaweed, and spices for an irresistible finish.
How to Make Spicy Tuna Onigiri Recipe
Step 1: Season the Sushi Rice
Start by gently folding the rice wine vinegar into your warm cooked sushi rice. This step ensures each grain is perfectly seasoned, giving the rice a subtle tang and that classic sushi flavor that makes onigiri so addictive. Be careful not to mash the rice—keep the grains fluffy yet sticky enough to mold.
Step 2: Prepare the Spicy Tuna Filling
In a bowl, mix the canned tuna with Kewpie mayonnaise, sriracha, and a pinch of salt. The mayo adds creaminess while the sriracha injects heat, creating a smooth yet zesty filling. Stir thoroughly until well combined so every bite bursts with flavor.
Step 3: Shape the Onigiri
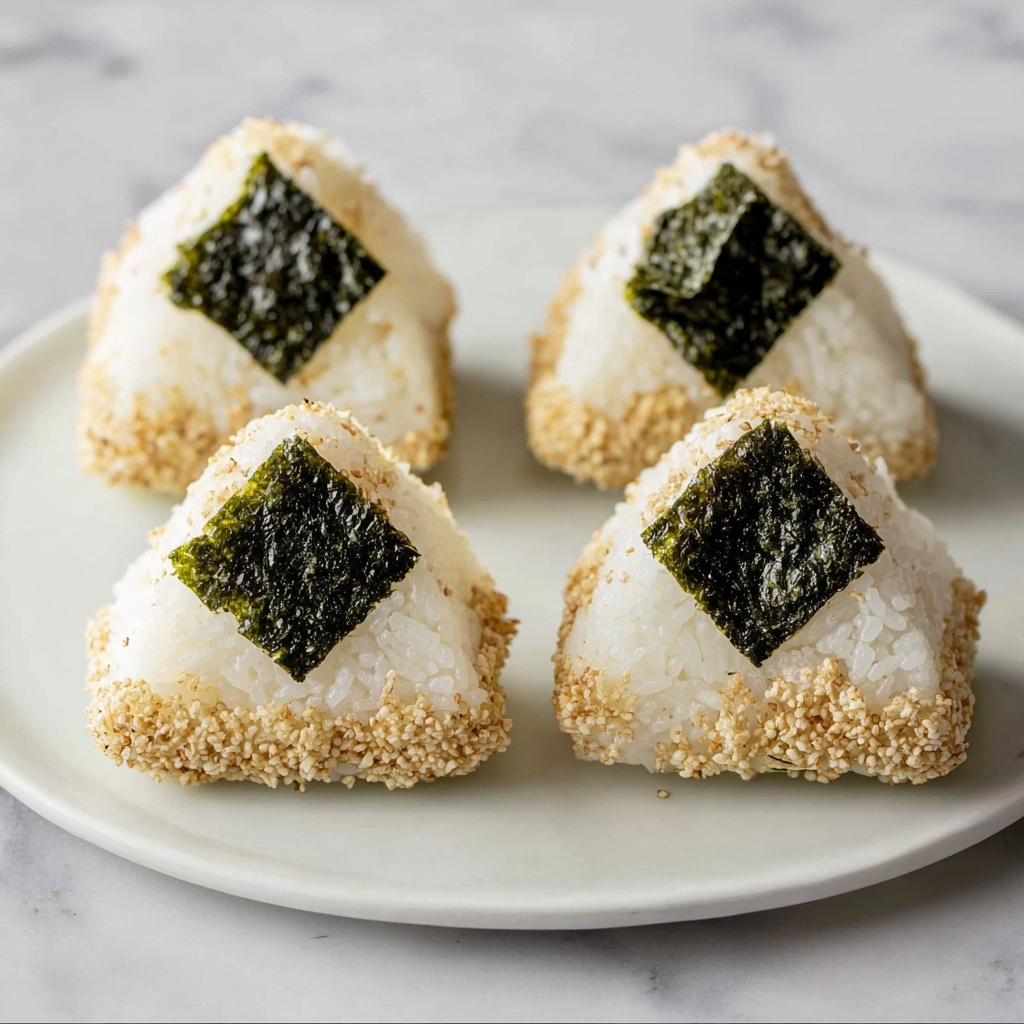
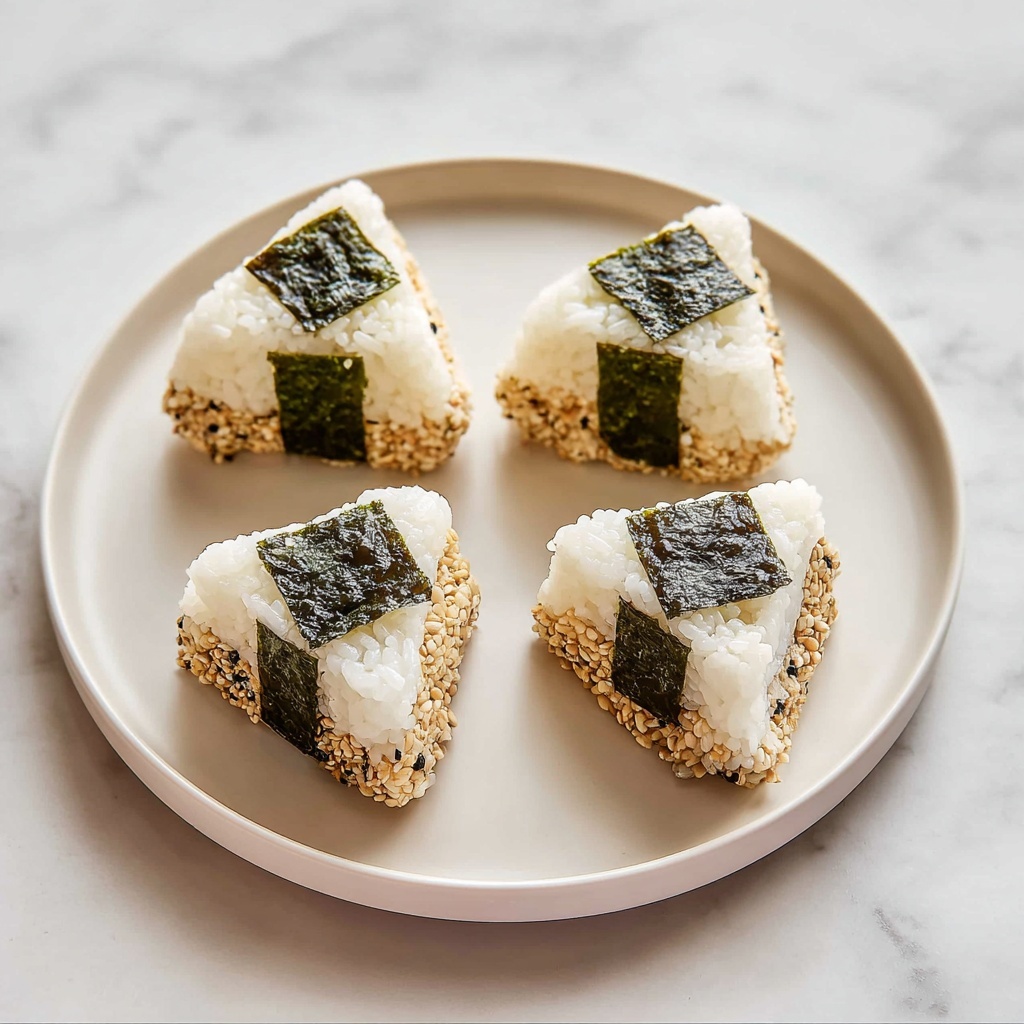
Wet your hands with water to prevent sticking, then take about 1/3 cup of rice and press it into your palm or an onigiri mold. Press your thumb into the center to form a small cavity and fill it with about a tablespoon of the spicy tuna. Cover the filling with more rice—roughly 2 1/2 tablespoons—then firmly press and shape into a neat triangle. Using an onigiri mold makes this step easier, but hand shaping brings a personal touch.
Step 4: Repeat Until All Ingredients Are Used
Keep forming onigiri in the same way, making sure each one gets a generous filling and that the rice layers are evenly pressed. This process is simple, fun, and oddly satisfying as your batch of flavorful rice balls takes shape.
Step 5: Add the Nori Wrap
Cut the nori sheet into strips about 3 inches long and 1 inch wide, then wrap each strip snugly around the base of each onigiri. This not only adds texture and a hint of saltiness but also makes the onigiri easier and less messy to hold while eating.
Step 6: Coat with Furikake
Pour furikake seasoning onto a plate and gently press the bottom edges of the onigiri onto the furikake. This final touch fills each bite with added flavor and a delightful crunch, elevating the whole experience to something truly special.
Step 7: Serve or Store
Serve your spicy tuna onigiri right away to enjoy that fresh nori crispness, or wrap them in plastic wrap and refrigerate for up to three days. They make a fantastic grab-and-go snack anytime you need an energizing pick-me-up.
How to Serve Spicy Tuna Onigiri Recipe
Garnishes
Fresh garnishes like thinly sliced green onions, toasted sesame seeds, or a sprinkle of shichimi togarashi can add vibrant color and layers of flavor to your onigiri. These little extras make the presentation pop and let you customize the spice level and texture.
Side Dishes
Serve your spicy tuna onigiri alongside a light miso soup, a crisp seaweed salad, or pickled vegetables to create a balanced meal that satisfies every craving. These sides complement the savory rice balls and lift the meal with refreshing contrasts.
Creative Ways to Present
For a fun twist, assemble a bento box with an assortment of onigiri varieties, colorful veggies, and dipping sauces. You can also cut the onigiri into bite-sized pieces for party platters or skewer them with a few pieces of pickled radish for a playful appetizer experience.
Make Ahead and Storage
Storing Leftovers
If you have leftovers, wrap each onigiri tightly in plastic wrap and store them in the refrigerator. They keep well for up to three days, letting you enjoy a quick snack without compromising texture. Just avoid leaving them out too long to keep the rice fresh.
Freezing
You can freeze spicy tuna onigiri by wrapping each piece individually in plastic wrap and placing them in a freezer-safe bag. Although freezing might soften the texture slightly, it’s still a convenient option for meal prep. Thaw overnight in the fridge before eating.
Reheating
To reheat, remove the plastic wrap and warm the onigiri in a microwave for about 30 seconds or until heated through. If you want the nori crisp again, wrap the onigiri loosely in kitchen paper and dry-toast briefly in a pan, just enough to bring back that lovely crunch.
FAQs
Can I use fresh tuna instead of canned tuna?
Absolutely! Fresh tuna can be diced and mixed with the mayo and sriracha for a fresher taste, but be sure it is sushi-grade for safety. Simply treat the fresh tuna gently to maintain a perfect texture.
What can I substitute for Kewpie mayonnaise?
If you don’t have Kewpie mayo, regular Japanese-style mayonnaise or even a mild, creamy mayo will work. Kewpie’s slight sweetness and richness add a special nuance, but you can still create delicious spicy tuna onigiri without it.
Is there a vegetarian version of this recipe?
You can swap the tuna for ingredients like mashed avocado with sriracha or spiced chickpeas to create a comforting vegetarian onigiri that still packs a flavorful punch.
How spicy is this recipe?
The spice level depends on how much sriracha you add. One tablespoon gives a nice kick but isn’t overwhelming. Feel free to adjust the quantity to suit your tolerance and taste preferences.
Do I need an onigiri mold to shape the rice balls?
Nope! You can simply use your hands to shape the onigiri into triangles or ovals. The mold just helps make the shapes more uniform and is handy if you’re making a large batch.
Final Thoughts
This Spicy Tuna Onigiri Recipe is such a joyful blend of flavors and textures that once you try it, you’ll find yourself making it again and again. It’s quick, fuss-free, and endlessly satisfying—a perfect snack or light meal that brings a taste of Japan right to your kitchen. So grab your rice, open that tuna can, and get ready for a delicious adventure!
Print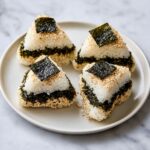
Spicy Tuna Onigiri Recipe
- Prep Time: 10 minutes
- Cook Time: 0 minutes
- Total Time: 10 minutes
- Yield: 8 onigiri
- Category: Snack
- Method: No-Cook
- Cuisine: Japanese
- Diet: Low Fat
Description
Spicy Tuna Onigiri is a delicious Japanese rice ball stuffed with a flavorful mixture of tuna, Kewpie mayonnaise, and sriracha, wrapped in nori seaweed and coated with furikake seasoning. Perfect as a quick snack or lunch, these onigiri combine creamy, spicy, and savory flavors in a convenient handheld bite.
Ingredients
Rice
- 4 cups cooked sushi rice
- 1 tablespoon rice wine vinegar
Filling
- 1 (5-ounce) can tuna
- 2 tablespoons Kewpie mayonnaise
- 1 tablespoon sriracha or other chili paste
- Pinch of salt
Toppings and Wrapping
- 1 sheet of nori
- 2 tablespoons furikake seasoning
Instructions
- Prepare the rice: Pour the rice wine vinegar onto the cooked sushi rice and gently stir to combine, enhancing the rice’s flavor and stickiness necessary for shaping.
- Make the filling: In a bowl, combine the tuna, Kewpie mayonnaise, sriracha, and a pinch of salt. Stir thoroughly until the mixture is smooth and evenly blended, creating a creamy, spicy filling.
- Shape the onigiri: Wet your hands to prevent rice from sticking, then press approximately 1/3 cup of rice into your palm or an onigiri mold. Using your thumb, create a small well in the center of the rice. Fill this well with 1 tablespoon of the tuna mixture, then cover with another 2 1/2 tablespoons of rice. Press everything firmly together and mold into a triangular shape by hand or press the lid of the onigiri mold onto the rice and remove the mold carefully.
- Repeat shaping: Continue the process until all the rice and tuna mixture are used up, ensuring each onigiri is filled and well-formed.
- Prepare the nori: Cut the nori sheet into 3-inch long strips that are about 1 inch wide. Wrap one strip around the base of each onigiri to add texture and flavor.
- Add furikake seasoning: Spread the furikake seasoning on a plate, then gently dip the sides of each onigiri into the seasoning to coat with a thin, flavorful layer.
- Serve or store: Enjoy the onigiri immediately for best freshness, or wrap each piece tightly in plastic wrap and store them in the refrigerator for up to 3 days.
Notes
- Use freshly cooked sushi rice for the best texture and flavor.
- Wet your hands thoroughly before shaping to prevent sticking.
- Adjust the amount of sriracha according to your preferred spice level.
- If you don’t have an onigiri mold, shaping by hand works just as well with practice.
- Furikake seasoning can be found in Asian grocery stores or online and adds a delightful umami flavor.
- Consume refrigerated onigiri within 3 days for safety and optimal taste.

