
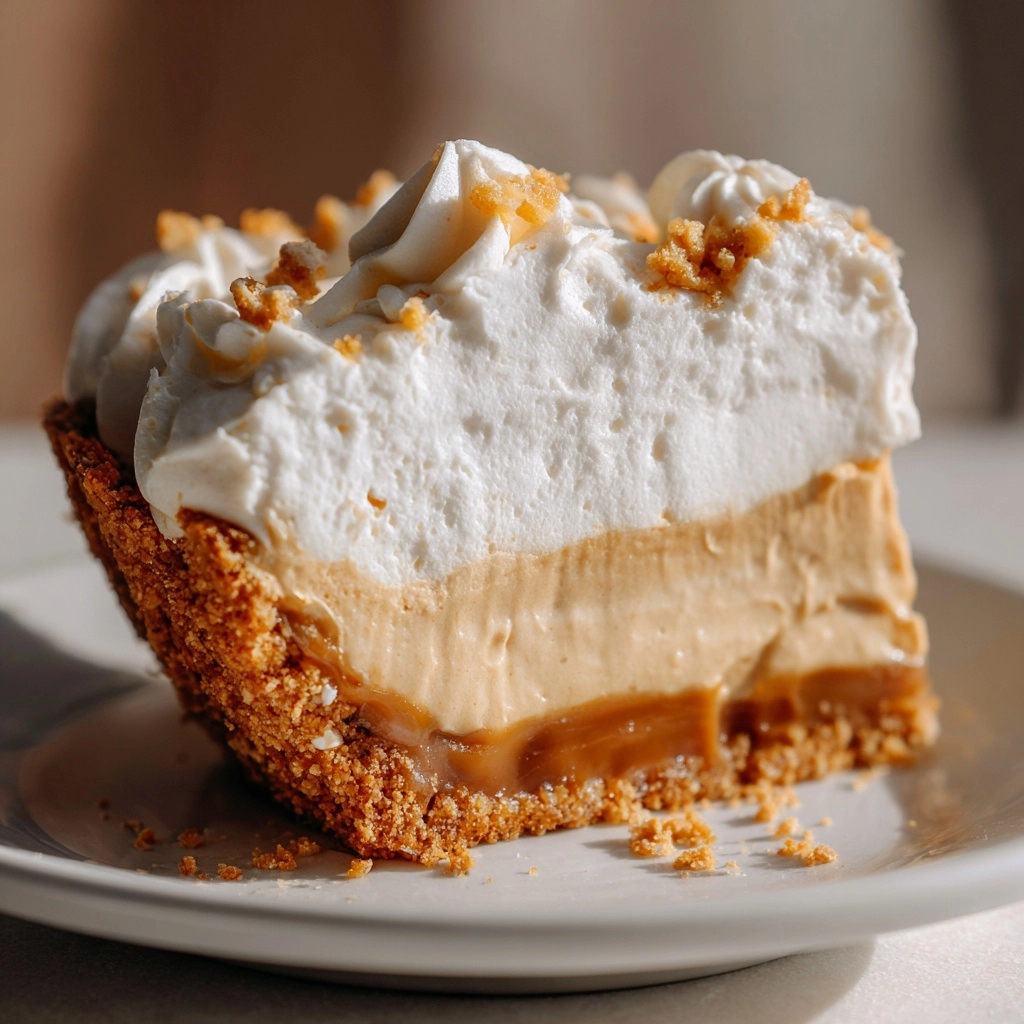
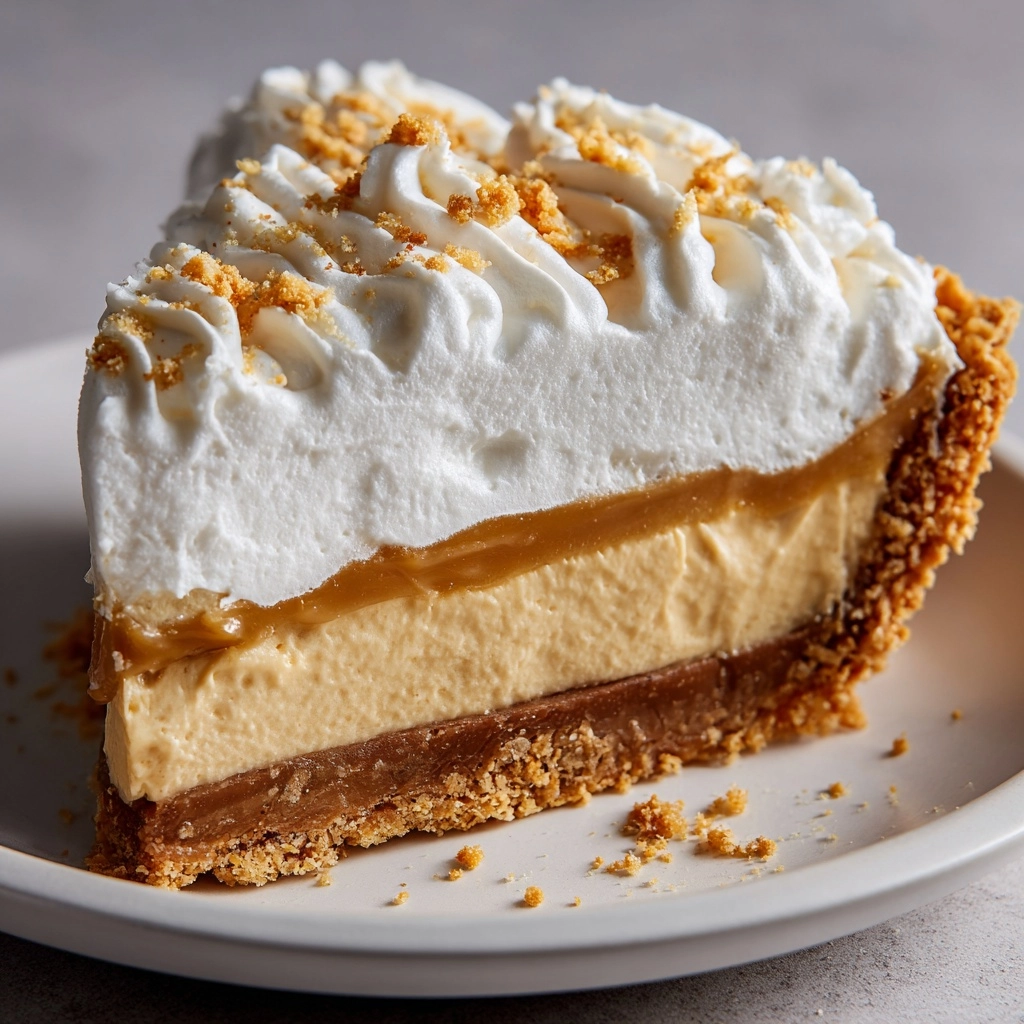
If you adore the creamy, dreamy combination of peanut butter and sweet dessert, this Peanut Butter Pie Recipe is about to become your new best friend in the kitchen. It’s an irresistibly smooth, fluffy pie that balances the rich, nutty flavor of peanut butter with the lightness of whipped topping and cream cheese, all nestled inside a crunchy graham cracker crust. Whether you’re looking for a quick make-ahead treat or a show-stopping dessert for your next gathering, this no-bake delight answers the call with ease and mouthwatering results.
Ingredients You’ll Need
This Peanut Butter Pie Recipe keeps things refreshingly simple, relying on a handful of pantry staples that come together for a luscious, perfect texture and flavor harmony.
- Pre-made graham cracker crust: Provides a buttery, crunchy base that complements the creamy filling perfectly.
- Creamy peanut butter: The star of the show, bringing rich nuttiness and smoothness to every bite.
- Cream cheese, softened: Adds a slight tanginess and enhances the pie’s creamy texture.
- Powdered sugar: Sweetens and helps stabilize the filling’s fluffiness.
- Vanilla extract: A subtle flavor boost that rounds out the sweetness beautifully.
- Whipped topping: Lightens the filling, making each slice airy and delightful.
- Chocolate syrup, chopped peanuts, or whipped cream (optional): For finishing touches that add visual appeal and additional bursts of flavor.
How to Make Peanut Butter Pie Recipe
Step 1: Blend Cream Cheese and Peanut Butter
Start by beating the softened cream cheese and creamy peanut butter in a large mixing bowl until you get a perfectly smooth and luscious mixture. This creates the foundation of that signature velvety texture you’ll love.
Step 2: Add Sweetness and Flavor
Stir in powdered sugar and vanilla extract until everything is fully combined. The sweetness balances the peanut butter’s savory richness, while vanilla adds depth to the filling’s flavor profile.
Step 3: Fold in the Whipped Topping
Gently fold the whipped topping into the peanut butter mixture with care, so it stays light and airy—no streaks showing. This step is key to achieving that fluffy, melt-in-your-mouth consistency.
Step 4: Fill the Crust and Chill
Pour the creamy filling into your pre-made graham cracker crust, smoothing out the top with a spatula. Cover the pie and refrigerate for at least 4 hours, allowing it to set and the flavors to meld together deliciously.
How to Serve Peanut Butter Pie Recipe
Garnishes
Before serving, take your pie to the next level by drizzling chocolate syrup over the top, sprinkling chopped peanuts for crunch, or adding dollops of whipped cream. These simple touches invite extra indulgence and beautiful presentation.
Side Dishes
This peanut butter pie pairs wonderfully with fresh fruits like sliced bananas or strawberries, which add a refreshing contrast and a pop of color on your dessert plate. A scoop of vanilla ice cream also complements the creamy richness perfectly.
Creative Ways to Present
For a fun twist, try serving individual mini peanut butter pies in small jars or ramekins, topped with layered chocolate and peanut butter swirls. Or add a sprinkle of sea salt on top to balance the sweetness and deepen the flavors beautifully.
Make Ahead and Storage
Storing Leftovers
This pie stores beautifully in the refrigerator, covered tightly with plastic wrap or an airtight lid, for up to 3 days. The flavor deepens over time, making leftovers even more enjoyable.
Freezing
You can freeze your peanut butter pie for longer storage. Wrap it securely in plastic wrap and foil to prevent freezer burn. When ready, thaw it in the fridge overnight; the texture firms up and creates a slightly different but equally delightful experience.
Reheating
Since this is a chilled dessert, it’s best enjoyed cold. Just remove it from the fridge before serving to allow it to soften slightly for the perfect scoopable texture. Avoid microwaving, as it will compromise the filling’s consistency.
FAQs
Can I make this pie without a pre-made crust?
Absolutely! You can easily make your own graham cracker crust by mixing crushed graham crackers with melted butter and pressing it into your pie pan. Bake it for about 8 minutes at 350°F, then let it cool before filling.
Is it possible to use natural peanut butter in this recipe?
You can use natural peanut butter, but since it tends to be less creamy and more oily, consider stirring it well before measuring to ensure even consistency. The pie might be slightly less firm but still delicious.
How can I make this pie vegan?
To make a vegan version, substitute the cream cheese and whipped topping with vegan-friendly alternatives like cashew-based cream cheese and coconut whipped cream, and choose a vegan graham cracker crust.
Can I add chocolate to the filling?
Definitely! Folding in some mini chocolate chips or swirling melted chocolate through the peanut butter filling adds a decadent chocolate twist that peanut butter lovers will adore.
What’s the best way to serve this pie at a party?
Cut the pie into small, manageable slices or serve it in mini dessert cups with individual garnishes. This makes it easy for guests to enjoy without fuss and highlights the pie’s creamy texture and gorgeous flavor.
Final Thoughts
This Peanut Butter Pie Recipe is a true crowd-pleaser that’s as simple to make as it is delicious to eat. Whether you’re a peanut butter enthusiast or just searching for an easy, no-bake dessert that wows, this pie hits every mark. Give it a try, and I promise it’ll become a cherished staple in your dessert rotation!
Print
Peanut Butter Pie Recipe
- Prep Time: 10 minutes
- Cook Time: 0 minutes
- Total Time: 4 hours 10 minutes
- Yield: 8 slices
- Category: Dessert
- Method: No-Cook
- Cuisine: American
- Diet: Vegetarian
Description
This creamy and delicious Peanut Butter Pie is a no-bake dessert perfect for any occasion. Featuring a smooth blend of peanut butter, cream cheese, and whipped topping in a crunchy graham cracker crust, this pie is easy to prepare and can be made ahead for convenient serving. Garnish with chocolate syrup, chopped peanuts, or whipped cream for an extra special treat.
Ingredients
Pie Base
- 1 pre-made graham cracker crust (9-inch)
Filling
- 1 cup creamy peanut butter
- 8 oz cream cheese, softened
- 1 cup powdered sugar
- 1 tsp vanilla extract
- 8 oz whipped topping (such as Cool Whip), thawed
Optional Garnish
- Chocolate syrup
- Chopped peanuts
- Whipped cream
Instructions
- Prepare the filling: In a large mixing bowl, beat the softened cream cheese and creamy peanut butter together until the mixture is smooth and creamy with no lumps.
- Add sweetness and flavor: Mix in the powdered sugar and vanilla extract, thoroughly combining all ingredients to create a sweet and flavorful filling base.
- Fold in whipped topping: Gently fold the thawed whipped topping into the peanut butter mixture until fully incorporated and smooth with no streaks visible, maintaining a light and airy texture.
- Assemble the pie: Spoon the creamy filling evenly into the pre-made graham cracker crust, smoothing the top with a spatula for an even surface.
- Chill to set: Cover the pie and refrigerate for at least 4 hours, allowing the filling to firm up and the flavors to meld together.
- Garnish and serve: Before serving, add optional toppings such as chocolate syrup, chopped peanuts, or a dollop of whipped cream to enhance presentation and flavor.
Notes
- For a richer flavor, use a chocolate cookie crust instead of graham cracker crust.
- This pie can be frozen to achieve a firmer texture; thaw slightly before serving.
- Perfect as a make-ahead dessert for holidays, potlucks, and gatherings.


