
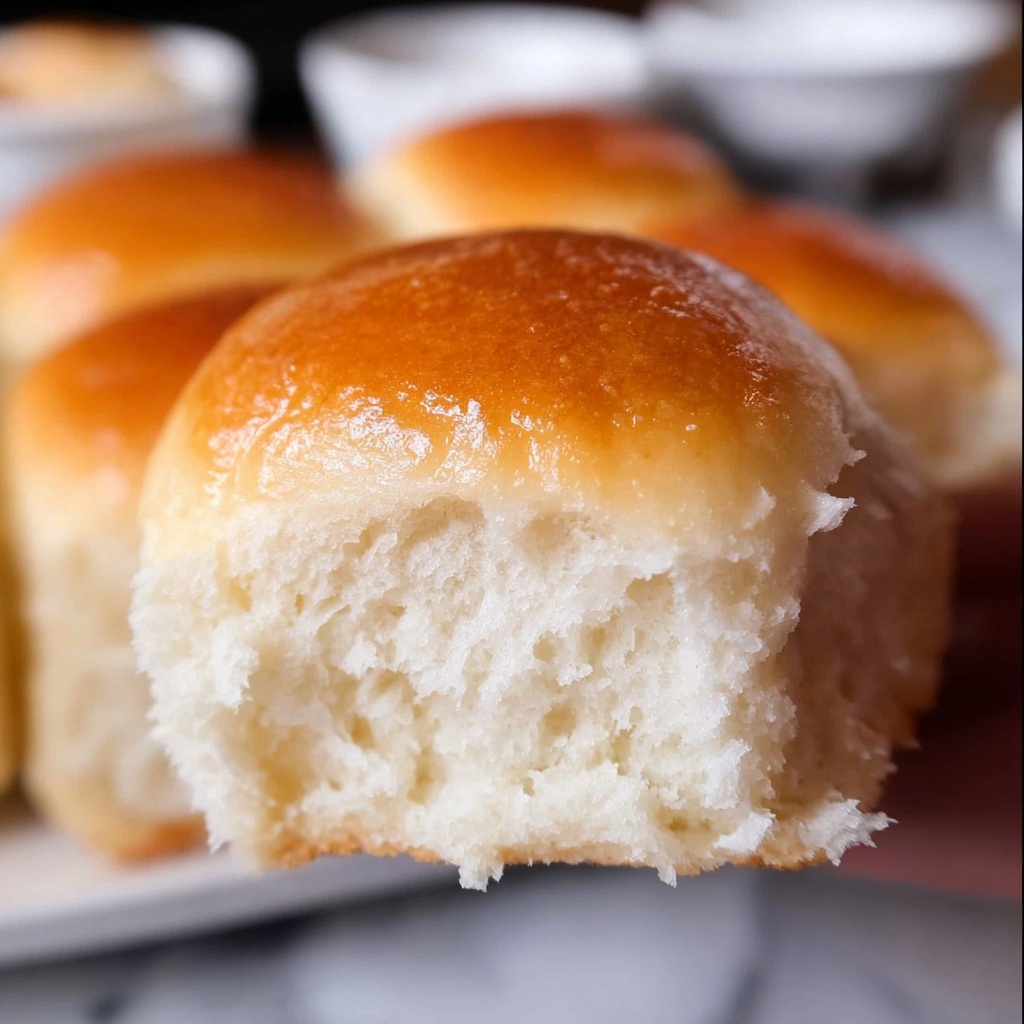
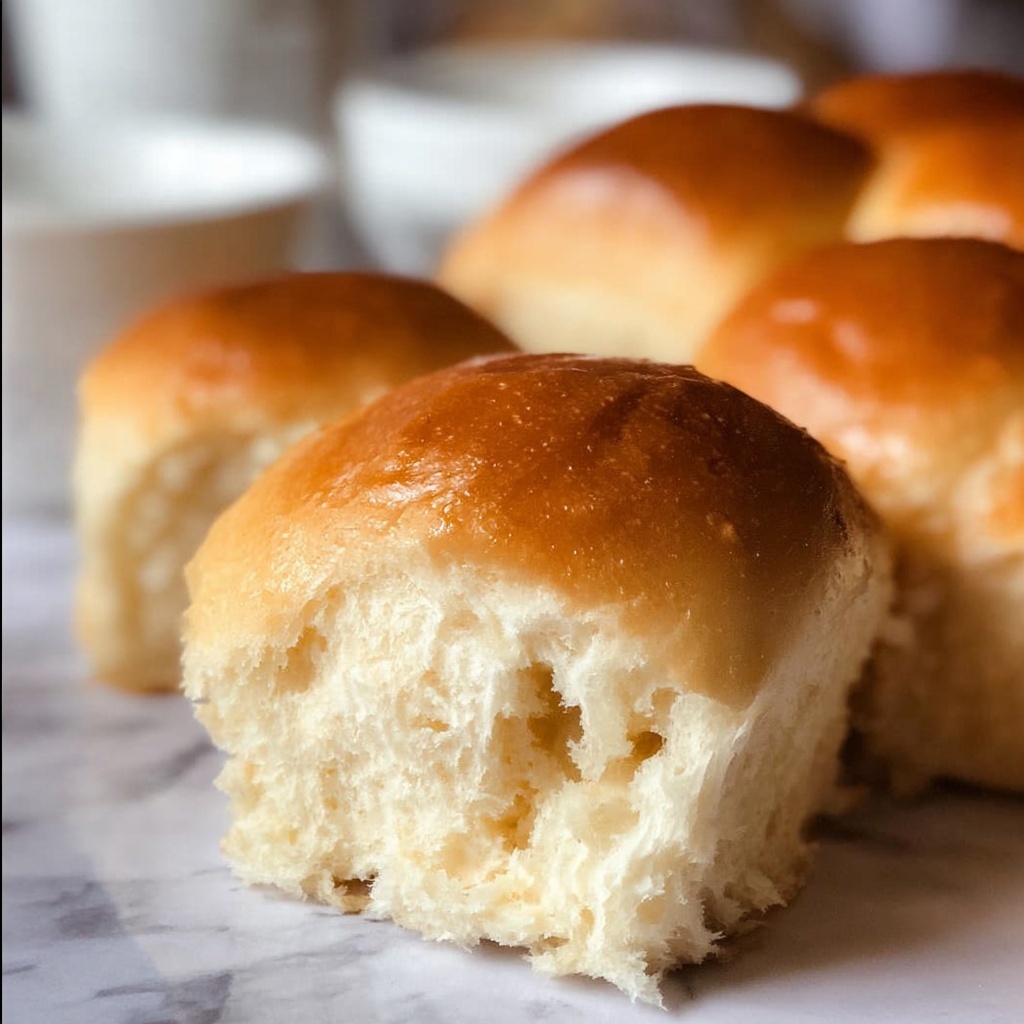
If you’ve ever wanted soft, fluffy, bakery-style rolls on the table fast, you are going to absolutely fall in love with this One Hour Quick Dinner Rolls Recipe. It’s perfect for when you want homemade bread without the usual all-day wait — the rolls are light, tender, and infused with warm buttery goodness in just about an hour. Whether for a weeknight dinner, a last-minute gathering, or just because, these rolls come together effortlessly and impress every single time. Let me walk you through making these delightful rolls that are as satisfying to bake as they are to devour.
Ingredients You’ll Need
The beauty of this One Hour Quick Dinner Rolls Recipe lies in its simplicity and the essential ingredients that create a perfect balance of flavor, texture, and color. Each element works behind the scenes to give you golden, tender rolls with a soft crumb and just the right hint of sweetness.
- Warm water: Activates the yeast gently without killing it, setting the foundation for a great rise.
- Active dry yeast: The magic starter that makes your rolls fluffy and airy.
- Sugar: Different amounts serve two purposes: one teaspoon to activate the yeast and three tablespoons to add a subtle sweetness to the dough.
- Kosher salt: Enhances flavor and balances the sweetness for a well-rounded taste.
- Shortening: Adds tenderness and richness while keeping the rolls soft for days.
- Milk: Enriches the dough with a creamy texture and improves the crust color.
- Large egg: Helps bind the dough and contributes to the roll’s softness and color.
- All-purpose flour: The backbone of the dough, providing structure and chewiness.
- Butter (to grease and top): For a golden crust and buttery finish that invites you to take another bite.
How to Make One Hour Quick Dinner Rolls Recipe
Step 1: Proof the Yeast for That Perfect Rise
Start by mixing 3 tablespoons of warm water—not hot! Think comfortably warm bath temperature—with one tablespoon of active dry yeast and a teaspoon of sugar in a small bowl. Give it a gentle stir and let it rest for about 5 minutes. You’ll know it’s ready when the surface starts bubbling and looks frothy, telling you your yeast is alive and kicking.
Step 2: Prepare Your Dough Base
While the yeast wakes up, combine 3 tablespoons sugar, 1 teaspoon kosher salt, 3 tablespoons shortening, and 1 cup of flour in a large bowl or your stand mixer. This mixture forms the core of your dough, giving it sweetness, flavor, and the soft texture we love.
Step 3: Warm Your Milk and Combine
Warm 3/4 cup of milk in 30-second increments until it’s the same pleasant temperature as the water. Add it to your flour mixture and stir it together until combined. I like using my hand with a dough attachment because it feels so natural, but a wooden spoon or paddle attachment works just as well.
Step 4: Add Yeast and Egg
By now, that bubbly yeast mixture is ready to join the party: add it to the flour and milk mix. Then, crack in one large egg and beat everything together until well incorporated. This enriches the dough and improves your rolls’ crumb.
Step 5: Incorporate Remaining Flour Gradually
Now, add the rest of your flour slowly, mixing after each addition. The dough should be soft and slightly sticky but coming together nicely—don’t overdo the flour or your rolls will turn out dense rather than pillowy. Use your judgment here; it’s all about that perfect soft ball of dough.
Step 6: Knead Until Smooth and Elastic
Knead your dough with a dough hook on medium speed for about 5 minutes, or if you’re working by hand, get ready for roughly 8 minutes of kneading on a floured surface. The goal is a smooth, elastic dough that’s slightly tacky but not wet. This development is key for that wonderful airy texture.
Step 7: Rest and Warm Your Oven with Butter
Form your dough into a ball and cover it with a cozy tea towel. Meanwhile, preheat your oven to 375°F and place 1 tablespoon of butter into your preferred baking pan (cast iron skillet or 9×13 inch pan). Put the pan in the oven just long enough for the butter to melt and the pan to warm, then turn the oven off and swirl the butter to coat.
Step 8: Shape the Rolls and Let Them Rise
Press down your dough gently to release any air bubbles, then divide it into 12 equal pieces—about 2 ounces each. Shape each into a round roll by tucking the edges underneath, then place them in your hot buttered pan with space between. Cover with a tea towel and place inside the turned-off, but still warm, oven. Let them rise for 15 minutes here.
Step 9: Final Rise and Bake
After the initial rise, remove the rolls from the oven and let them rest somewhere warm for another 10 to 15 minutes while you preheat the oven back to 375°F. The rolls should nearly double in size. When ready, bake for approximately 12 minutes until golden brown and a thermometer reads 190°F in the center of a roll.
Step 10: Butter Them Up and Enjoy
As soon as your rolls come out of the oven, brush them generously with melted butter. This finishing touch adds richness and makes the crust glossy and irresistible. Let them rest for 5 minutes before digging in—if you can resist!
How to Serve One Hour Quick Dinner Rolls Recipe
Garnishes
These rolls are delicious all on their own, but a pat of softened butter or a drizzle of cinnamon honey butter takes them over the top. Fresh herbs like rosemary or thyme sprinkled on melted butter add a fragrant twist perfect for dinner parties.
Side Dishes
They pair beautifully with virtually any meal—be it a cozy soup, a hearty roast, or a crisp salad. Their mild flavor and soft texture make them the perfect vehicle for soaking up gravy or sauces, turning any plate into a comforting feast.
Creative Ways to Present
Want to impress your guests? Serve your rolls in a woven basket lined with a colorful tea towel or warm them lightly before serving. You can even turn these rolls into sliders or mini sandwiches for a casual brunch or party platter.
Make Ahead and Storage
Storing Leftovers
If you have leftovers, keep your rolls in an airtight container at room temperature for up to 3 days. This keeps them soft and prevents any crust hardening while maintaining their fresh-baked charm.
Freezing
To freeze, wrap the rolls individually or all together in plastic wrap and tuck them into a freezer bag. When you’re ready, thaw at room temperature and warm in the oven for a few minutes to regain freshness—perfect for prepping ahead of time.
Reheating
For the best texture, reheat your rolls in a 350°F oven wrapped in foil for about 10 minutes. This warms them through while keeping the crust tender and the inside wonderfully soft.
FAQs
Can I use instant yeast instead of active dry yeast?
Yes, you can substitute instant yeast, but skip the proofing step. Simply add the instant yeast directly to your dry ingredients and proceed with the recipe. The rising times may be slightly shorter, so keep an eye on the dough.
What if I don’t have shortening? Can I use butter instead?
Butter can be used in place of shortening, but your rolls might be a bit less soft and more tender with a rich flavor. Substituting butter in equal amounts works well in this recipe.
Why are my rolls dense instead of fluffy?
Dense rolls often come from using too much flour or not kneading enough. Make sure your dough is soft and slightly sticky, and knead long enough to develop gluten. Also, giving the dough adequate rising time is essential for a light texture.
Can I make these rolls gluten-free?
This recipe relies heavily on gluten for structure, so a direct gluten-free substitution won’t work well. However, you can experiment with gluten-free bread flour blends designed for yeast baking, but expect different rising behavior and texture.
How do I store and reheat leftover rolls to keep them fresh?
Store leftover rolls in an airtight container at room temperature for up to 3 days or freeze for longer storage. Reheat in the oven wrapped in foil at 350°F for about 10 minutes to maintain softness and warmth.
Final Thoughts
This One Hour Quick Dinner Rolls Recipe has quickly become my go-to whenever I crave fresh, soft rolls without the usual waiting game. They’re incredibly approachable, rewarding to make, and perfect for any occasion that calls for a warm, homey touch. I can’t wait for you to try them and make these delightful rolls a beloved staple on your table too!
Print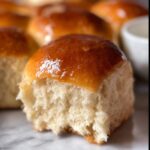
One Hour Quick Dinner Rolls Recipe
- Prep Time: 15 minutes
- Cook Time: 12 minutes
- Total Time: 1 hour
- Yield: 12 rolls
- Category: Bread
- Method: Baking
- Cuisine: American
Description
These One Hour Quick Dinner Rolls are soft, tender, and perfectly golden, ideal for a speedy homemade bread option. With a simple yeast proofing step and quick rising method in a warm oven, this recipe yields fluffy rolls with just about an hour from start to finish, perfect as a side for any dinner or enjoyed warm with butter.
Ingredients
For Yeast Mixture
- 3 tablespoons warm water (105-110°F)
- 1 tablespoon active dry yeast
- 1 teaspoon sugar (to activate yeast)
For Dough
- 3 tablespoons sugar
- 1 teaspoon kosher salt
- 3 tablespoons shortening
- 3/4 cup milk (warm, 105-110°F)
- 1 large egg
- 2 1/2 cups all-purpose flour (spooned and leveled)
For Pan and Finishing
- 1 tablespoon butter (to grease pan)
- 1 tablespoon butter (to top finished rolls)
Instructions
- Proof the Yeast: In a small bowl or mug, add 3 tablespoons of warm water (105-110°F), 1 tablespoon active dry yeast, and 1 teaspoon sugar. Stir and let sit for 5 minutes until the mixture is bubbly, indicating the yeast is active.
- Prepare the Dough Base: In a large bowl or stand mixer, combine 3 tablespoons sugar, 1 teaspoon kosher salt, 3 tablespoons shortening, and 1 cup of the all-purpose flour. Stir to mix.
- Add Warm Milk: Microwave 3/4 cup milk in 30-second intervals until warm (105-110°F). Add this milk to the flour mixture and stir together, either with a wooden spoon, dough hook, or paddle attachment.
- Incorporate Yeast Mixture and Egg: Once the yeast is bubbly, add it to the flour mixture. Then add 1 large egg and beat well until everything is combined.
- Add Remaining Flour and Knead: Add the remaining flour gradually, mixing continuously. The dough should be smooth, soft, and slightly sticky—not pulling away completely from the bowl. Knead with the dough attachment for about 5 minutes, or by hand for 8 minutes on a floured surface.
- First Rest: Scrape dough onto a floured surface, shape into a ball, and cover with a clean tea towel. Let rest 5-10 minutes.
- Preheat and Prepare Pan: Preheat oven to 375°F for 2-3 minutes. Butter a 10-inch cast iron skillet or 9×13-inch baking pan with 1 tablespoon butter, place in oven until butter melts and pan is hot, then turn oven off.
- Shape Rolls: Press down the dough to release air bubbles. Divide into 12 equal portions (~2 ounces each). Shape each into a round roll by pinching the dough on one side and rounding the other. Place rolls in the hot greased pan with space between each.
- Proof Rolls in Warm Oven: Cover rolls with a tea towel and place in the turned-off oven set to warm (touch rack to ensure it’s not too hot). Leave in oven for 15 minutes.
- Continue Rising: Remove rolls from oven, place in a warm spot, and preheat oven back to 375°F. Let rolls rise for another 10-15 minutes until doubled in size.
- Bake Rolls: Remove towel and bake rolls at 375°F for about 12 minutes until tops are deep golden brown and internal temperature reaches 190°F.
- Butter and Serve: Immediately brush rolls with 1 tablespoon melted butter. Let set for 5 minutes before serving warm with additional butter or honey butter.
Notes
- Water and milk temperature for yeast proofing is critical—should be warm but not hot (105-110°F) to activate yeast properly.
- When adding flour, dough should stay slightly sticky for tender rolls, but still hold together well.
- Proofing rolls in a turned-off warm oven helps speed up rising time while preventing uneven cooking.
- You can use a cast iron skillet or standard baking pan depending on preference; both yield excellent results.
- For best results, measure flour by spooning it into the measuring cup and leveling it rather than scooping, to avoid dense dough.


