“`html
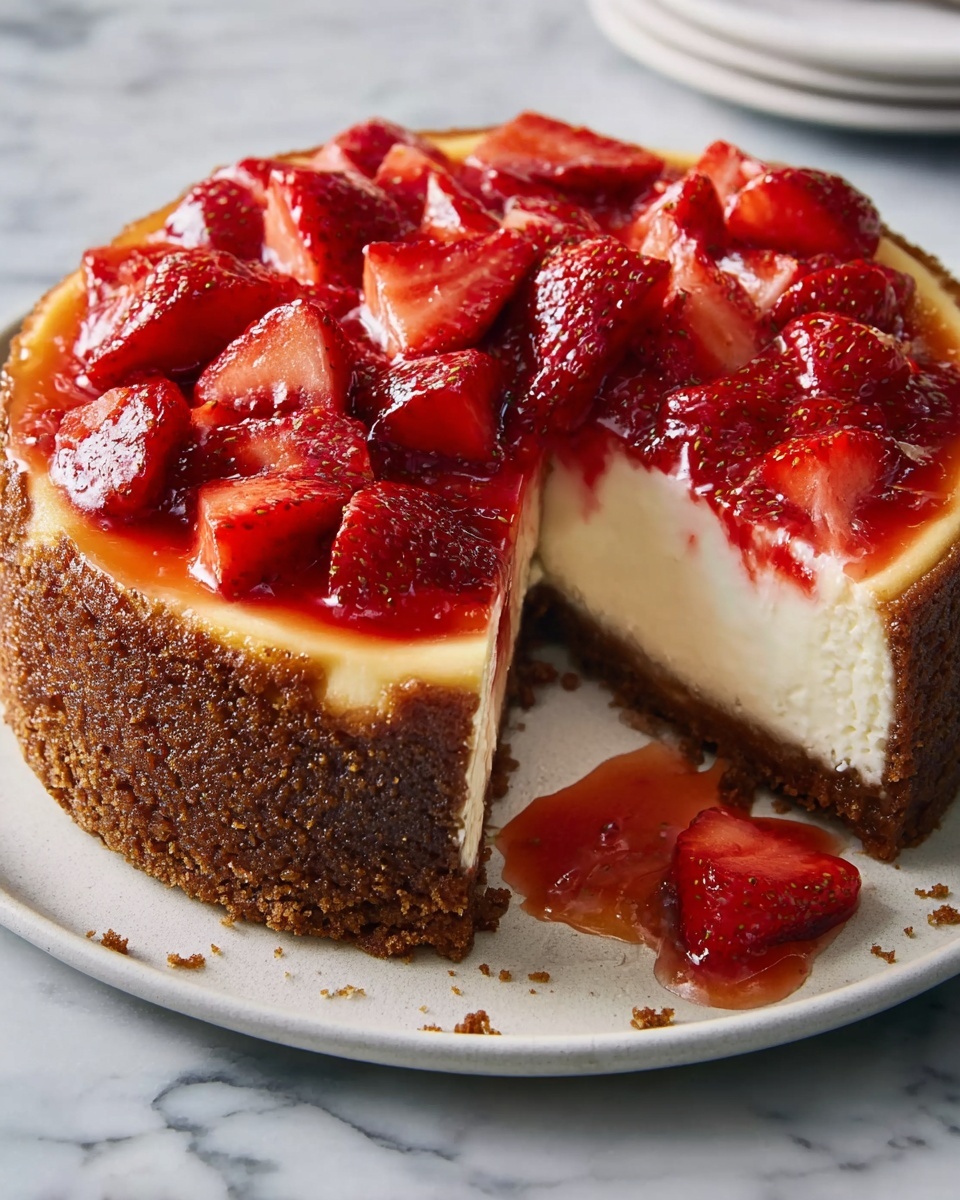
If you are craving a dessert that perfectly balances creamy, tangy, and sweet with a fresh fruity punch, you have got to try this Next Level Baked Strawberry Cheesecake Recipe. From a buttery, crisp biscuit crust to a velvety smooth cheesecake filling and a luscious homemade strawberry glaze on top, it’s a sensational treat that feels special but is surprisingly easy to make. Whether you’re baking for a crowd or just spoiling yourself, this cheesecake brings that wow factor every single time, turning an everyday dessert into a memorable experience.
Ingredients You’ll Need
Getting the ingredients just right is the secret to this cheesecake’s irresistible texture and flavor. Each component plays a crucial role, from the crunchy base to the silky filling and the vibrant strawberry topping.
- Digestive biscuits (or graham crackers), 1½ cups, crushed: Creates the perfect buttery crust with a gentle crunch to anchor the cheesecake.
- Unsalted butter, 6 tablespoons, melted: Binds the crust together and adds a rich depth without overpowering the other flavors.
- Cream cheese, 24 ounces (3 packages), softened: The creamy star of the show, providing that classic cheesecake tang and smooth mouthfeel.
- Granulated sugar, 1 cup: Sweetens the filling without masking the subtle sour cream notes.
- Sour cream, 1 cup: Adds luxurious creaminess and brightness that balances the richness of the cream cheese.
- Vanilla extract, 2 teaspoons: A small but essential boost of warmth and aroma.
- Eggs, 3 large, room temperature: Ensures the filling sets beautifully while staying smooth and dense.
- Cornstarch, 1 tablespoon: Helps stabilize the filling so it holds its shape perfectly after baking.
- Fresh strawberries, 2 cups, sliced: Brings natural sweetness and a burst of color at the top.
- Lemon juice, 1 tablespoon: Enhances the brightness and pierces through the richness of the topping.
- Strawberry jam, ¼ cup: Adds sweetness and a glossy finish for that picture-perfect look.
- Water, 2 tablespoons: Helps melt the jam smoothly into a luscious glaze.
How to Make Next Level Baked Strawberry Cheesecake Recipe
Step 1: Prepare Your Oven and Pan
First things first, preheat your oven to 325°F (160°C). It’s important to have a steady, moderate heat to ensure your cheesecake bakes evenly without cracking. Grease a 9-inch springform pan well, and to prevent any leaking, wrap the outside with foil. This tiny extra effort means your water bath keeps your cheesecake moist and tender while baking.
Step 2: Create the Biscuit Base
Mix those crushed digestive biscuits or graham crackers with melted butter until every crumb is coated. Press this mixture firmly into the bottom of your springform pan to form a sturdy, buttery crust that will hold up against all that creamy filling. Pop it into the fridge to chill while you prepare the filling—this step helps it firm up and prevents sogginess.
Step 3: Make the Cheesecake Filling
Using a large bowl, beat the softened cream cheese with sugar until it becomes smooth and dreamy. Add in the sour cream, vanilla extract, and cornstarch to deepen the tang and help give the cheesecake a beautiful, silky texture. Then, one at a time, gently mix in the eggs just until combined—overmixing can lead to cracks, so keep it gentle here!
Step 4: Assemble and Set into the Oven
Pour the luscious filling over your chilled crust and tap the pan lightly on the counter to release any trapped air bubbles—this little trick keeps your cheesecake gorgeous and smooth. Place the springform pan inside a larger baking pan and carefully add hot water around it for a water bath. This cozy bath creates a moist environment crucial for that creamy, crack-free perfection.
Step 5: Bake to Perfection
Bake your cheesecake for about 60 to 70 minutes. You’ll know it’s ready when the outer edges look set but the center still jiggles gently like gelatin. This wobble means the cheesecake will finish cooking as it cools, resulting in that melt-in-your-mouth texture. Turn off the oven and leave the door slightly open as it cools for an hour—this slow decrease in heat prevents sudden temperature changes that cause cracking.
Step 6: Chill and Prepare the Strawberry Topping
After cooling, pop your cheesecake into the fridge for at least 6 hours or overnight to fully set. While it chills, simmer fresh strawberries with strawberry jam, lemon juice, and water in a saucepan for about 10 minutes until glossy and syrupy. Once cooled, this glorious topping will crown your cheesecake with irresistibly fresh, vibrant flavor.
Step 7: Finish and Serve
Spread the completely cooled strawberry topping over the solid cheesecake and slice carefully. This is the step where you get to admire all your delicious hard work before indulging in a slice of pure joy.
How to Serve Next Level Baked Strawberry Cheesecake Recipe
Garnishes
Simple yet stunning garnishes add a finishing flourish. Fresh strawberry slices sprinkled atop the glaze bring an extra pop of color and freshness, while a light dusting of powdered sugar gives an elegant hint of sweetness. For a richer touch, a dollop of whipped cream or a sprinkle of chopped toasted almonds can add texture and visual appeal.
Side Dishes
This cheesecake is delightful on its own, but if you want to elevate the experience, serve alongside a scoop of vanilla bean ice cream or a few fresh berries. A cup of freshly brewed coffee or a glass of sparkling rosé complements the creamy richness and subtle fruitiness beautifully, making your dessert moment truly special.
Creative Ways to Present
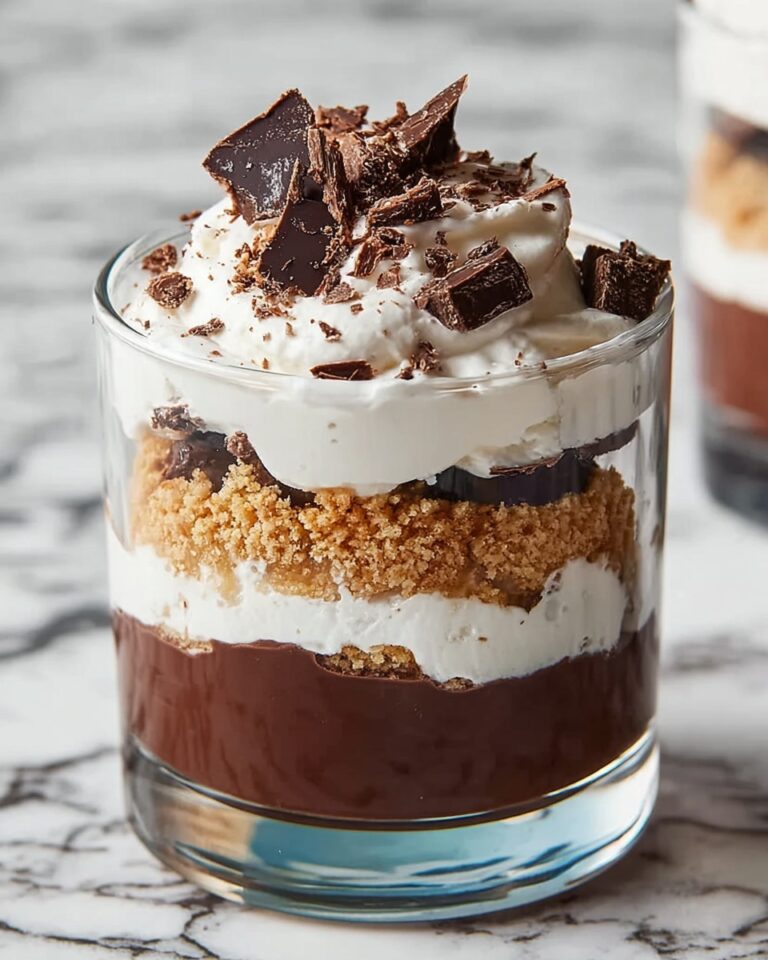
Presentation can turn a great dessert into a showstopper. Try placing individual slices on pretty plates, drizzle extra strawberry sauce artistically around the edges, or serve mini versions in clear glasses layered with additional strawberry pieces for a stunning visual effect. Whether family style or individual, the key is to let the vibrant strawberry topping shine.
Make Ahead and Storage
Storing Leftovers
Once baked and topped, this cheesecake stores beautifully in the refrigerator covered tightly with plastic wrap or in an airtight container. It stays fresh for up to 4 days while maintaining its creamy texture and bright strawberry flavor—perfect for enjoying a slice or two throughout the week.
Freezing
If you want to prepare the Next Level Baked Strawberry Cheesecake Recipe ahead of time, it freezes wonderfully. Wrap it tightly in plastic wrap followed by foil to protect it from freezer burn and store for up to 2 months. Thaw in the fridge overnight before serving and add the strawberry topping fresh if possible for best texture.
Reheating
This cheesecake is best enjoyed chilled, so reheating isn’t necessary. If you prefer it slightly less cold, let it sit at room temperature for 15 to 20 minutes before slicing to soften the texture without losing that creamy richness.
FAQs
Can I use frozen strawberries for the topping?
Absolutely! Just thaw them completely and drain excess liquid before cooking the topping to ensure it isn’t too watery. Frozen strawberries retain great flavor and make it easy to enjoy this recipe year-round.
What do I do if my cheesecake cracks after baking?
Cracks can happen but don’t worry! Often, they don’t affect the taste. To minimize cracking next time, avoid overmixing the batter, use a water bath, and cool the cheesecake gradually with the oven door slightly open.
Can I substitute the digestive biscuits with another type of cookie?
Yes! Graham crackers are a great swap and work just as well for the crust. Just make sure they’re finely crushed and mixed evenly with the melted butter for the best base texture.
Why is cornstarch used in this recipe?
Cornstarch acts as a stabilizer, helping the cheesecake set up with a nice, creamy firmness without becoming dry. It also helps reduce the chances of cracking during baking.
How long should the cheesecake chill before serving?
Chilling for at least 6 hours, preferably overnight, allows the flavors to develop and the texture to fully set. It’s worth the wait for that perfect slice!
Final Thoughts
There is something truly magical about this Next Level Baked Strawberry Cheesecake Recipe—it blends simple ingredients into a dessert that feels luxurious, fresh, and endlessly satisfying. Whether for a special occasion or a weekend treat, once you try it, you’ll never look at cheesecake the same way again. So go ahead, dive in and treat yourself to a slice of heaven!
“`
Print
Next Level Baked Strawberry Cheesecake Recipe
- Prep Time: 20 minutes
- Cook Time: 70 minutes
- Total Time: 7 hours 30 minutes
- Yield: 12 servings
- Category: Dessert
- Method: Baking
- Cuisine: American
Description
This Next Level Baked Strawberry Cheesecake features a creamy, smooth cream cheese filling over a buttery digestive biscuit crust, topped with a glossy, fresh strawberry compote. Baked in a water bath for perfect texture and chilled overnight, it offers a luscious and elegant dessert perfect for any occasion.
Ingredients
Crust
- 1½ cups digestive biscuits (or graham crackers), crushed
- 6 tablespoons unsalted butter, melted
Cheesecake Filling
- 24 ounces (3 packages) cream cheese, softened
- 1 cup granulated sugar
- 1 cup sour cream
- 2 teaspoons vanilla extract
- 3 large eggs, room temperature
- 1 tablespoon cornstarch
Strawberry Topping
- 2 cups fresh strawberries, sliced
- 1 tablespoon lemon juice
- ¼ cup strawberry jam
- 2 tablespoons water
Instructions
- Preheat and Prepare Pan: Preheat your oven to 325°F (160°C). Grease a 9-inch springform pan thoroughly, then wrap the outside tightly with foil to prevent water from seeping in during the water bath baking process.
- Make the Crust: Combine the crushed digestive biscuits with the melted butter until well combined. Press this mixture firmly into the base of the prepared springform pan to form an even crust layer. Place the crust in the refrigerator to chill and set while you prepare the filling.
- Prepare the Cheesecake Filling: In a large mixing bowl, beat the softened cream cheese and granulated sugar together until the mixture is smooth and creamy. Add the sour cream, vanilla extract, and cornstarch, mixing gently to combine. Then, incorporate the eggs one at a time, mixing only until just combined to avoid overmixing.
- Assemble for Baking: Pour the cream cheese filling evenly over the chilled crust. Tap the pan gently on the counter to release any trapped air bubbles. Place the springform pan into a larger baking dish or roasting pan, then carefully pour hot water into the larger pan to create a water bath that will surround the cheesecake to ensure even, gentle baking.
- Bake the Cheesecake: Bake for 60 to 70 minutes in the preheated oven. The cheesecake edges should be set, but the center will still wiggle slightly when you gently shake the pan. After baking, turn off the oven and leave the cheesecake inside with the oven door ajar for 1 hour to cool gradually and prevent cracking.
- Chill and Prepare Strawberry Topping: Remove the cheesecake from the oven and refrigerate for at least 6 hours to fully set. Meanwhile, in a small saucepan, combine the sliced strawberries, strawberry jam, lemon juice, and water. Cook over medium heat for about 10 minutes until the topping becomes glossy and thickened. Allow this mixture to cool completely.
- Finish and Serve: Once cooled, spread the strawberry topping evenly over the chilled cheesecake. Slice and serve this decadent, refreshing dessert chilled for the best experience.
Notes
- Using room temperature cream cheese and eggs ensures a smooth batter without lumps.
- Wrapping the springform pan with foil is essential to prevent water from leaking into the cheesecake while baking in a water bath.
- Do not overbake; the slight jiggle in the center ensures a creamy texture once set.
- The strawberry topping can be made a day in advance and stored in the refrigerator.
- For a gluten-free version, substitute digestive biscuits with gluten-free crackers.


