
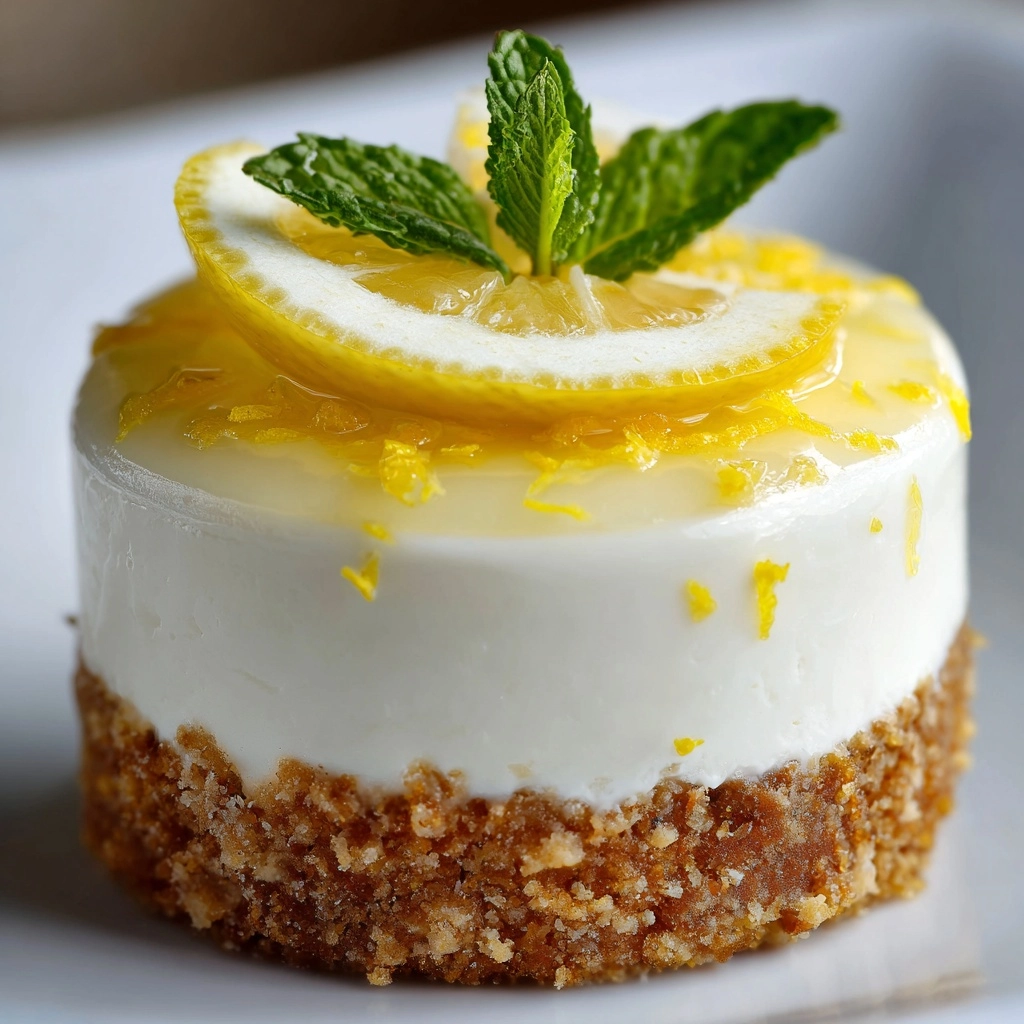
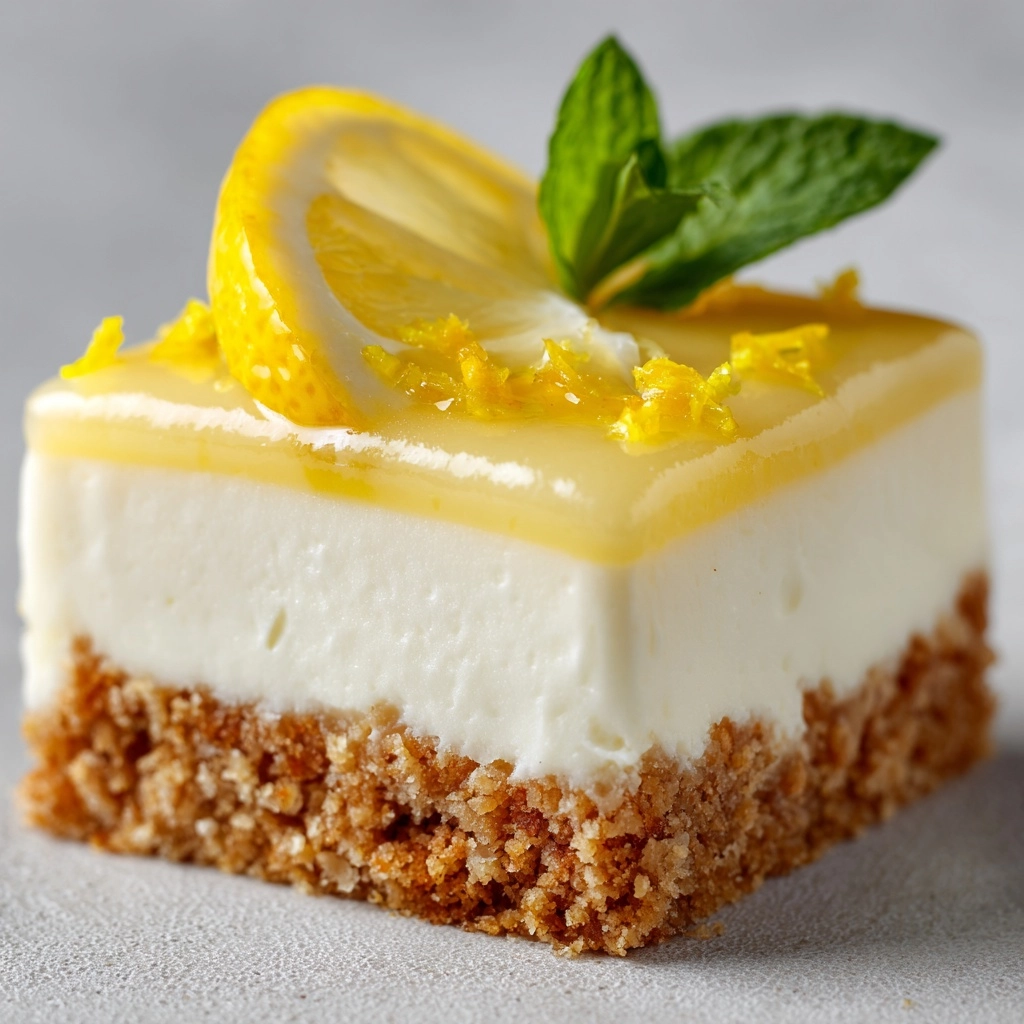
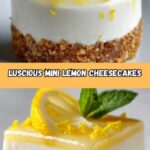
If you love the bright, zesty charm of citrus desserts, the Mini Lemon Cheesecakes Recipe is an absolute must-try that never fails to bring smiles. These delightful little cheesecakes capture the perfect balance of creamy richness and refreshing lemon tang, all nestled on a buttery graham cracker crust. Whether for a cheerful summer gathering or a cozy night in, these mini treats are irresistibly cute, deliciously satisfying, and surprisingly simple to make. Get ready to fall in love with every luscious bite!
Ingredients You’ll Need
The magic of this Mini Lemon Cheesecakes Recipe comes from a handful of simple, classic ingredients. Each one plays a key role, from the buttery crust to the luscious filling, creating layers of flavor and texture that dance on your tongue.
- Graham cracker crumbs: Provide that signature crisp and subtly sweet base for the crust.
- Granulated sugar: Balances the tartness of the lemon and sweetens the crust and filling perfectly.
- Unsalted butter, melted: Binds the graham crumbs together and adds rich flavor to the crust.
- Cream cheese, softened: The star ingredient that lends the filling its creamy, dreamy texture.
- Eggs: Bind the filling ingredients and help the cheesecakes set just right.
- Sour cream: Adds a slight tang and velvety smoothness to the filling.
- Fresh lemon juice: Brings bright, natural citrus zing that awakens the palate.
- Lemon zest: Intensifies lemon flavor with aromatic oils straight from the peel.
- Vanilla extract: Adds depth and complements the lemon beautifully.
- Pinch of salt: Enhances all the flavors and balances the sweetness.
- Whipped cream and lemon slices (optional): Perfect for garnishing and adding an elegant finish.
How to Make Mini Lemon Cheesecakes Recipe
Step 1: Prepare the Crust
Start by preheating your oven to 325°F (160°C) and lining a 12-cup muffin pan with paper liners to shape your mini cheesecakes. Next, blend your graham cracker crumbs with 2 tablespoons of sugar and melted butter until the mixture feels like damp sand. Press about a tablespoon of this mixture firmly into the bottom of each paper liner to create a deliciously crunchy base. Baking the crust for just 5 minutes gives it a slight toastiness and helps it hold together when filled.
Step 2: Make the Creamy Filling
In a large bowl, beat the softened cream cheese until it’s silky smooth, free of lumps. Then, add ½ cup sugar, eggs, sour cream, fresh lemon juice, lemon zest, vanilla extract, and a pinch of salt. Mix until all these heavenly ingredients come together in a creamy, luscious batter. This mixture is where the mini lemon cheesecakes’ signature tang and velvety texture develop.
Step 3: Bake the Cheesecakes
Divide the cheesecake batter evenly among the prepared muffin cups, filling each nearly to the top. Bake for 18 to 20 minutes, just until the centers are set but still slightly wobbly to the touch. This gentle baking preserves the smooth creaminess without cracking the tops. After baking, shut off the oven, slightly open the door, and let the cheesecakes rest inside for 10 minutes to slowly cool and prevent sudden temperature shocks.
Step 4: Chill and Finish
Once out of the oven, let your mini lemon cheesecakes cool to room temperature on a wire rack. Then, pop them into the refrigerator for at least 2 hours to chill thoroughly. This chilling step is crucial—it firms up their texture and lets the flavors meld into pure, citrusy bliss. When ready to serve, add whipped cream and lemon slices if desired for that extra touch of elegance.
How to Serve Mini Lemon Cheesecakes Recipe
Garnishes
Adding garnishes is a wonderful way to elevate these mini lemon cheesecakes visually and flavor-wise. A dollop of freshly whipped cream adds a light, airy contrast to the tangy richness, while thin lemon slices or twists provide a pop of color and an aromatic hint before the first bite.
Side Dishes
These delicate treats pair wonderfully with sides that complement their brightness. Fresh berries like raspberries or blueberries bring a juicy burst that balances the cheesecake’s creaminess, and a refreshing mint leaf adds herbal freshness to round out the experience perfectly.
Creative Ways to Present
For an eye-catching presentation, try serving these mini lemon cheesecakes in pretty cupcake liners or on a tiered dessert stand at your next gathering. You can even drizzle them with lemon curd for an extra layer of citrusy goodness. If you’re feeling adventurous, sprinkle a little finely chopped pistachio for a subtle crunch and a pop of green that’s as beautiful as it is tasty.
Make Ahead and Storage
Storing Leftovers
These mini lemon cheesecakes keep beautifully in the refrigerator for up to two days, making them great for prepping ahead of time. Store them in an airtight container to maintain their moist texture and fresh flavor—just take them out a few minutes before serving to soften slightly.
Freezing
You can freeze these cheesecakes for longer storage by placing them in an airtight, freezer-safe container. Wrap each cheesecake individually in plastic wrap before arranging them in the container to prevent freezer burn. When ready to enjoy, thaw overnight in the fridge to retain their creamy texture and lemony brightness.
Reheating
Since these are best served chilled, reheating isn’t recommended. However, if you prefer them slightly less cold, simply remove them from the refrigerator about 30 minutes before serving to reach the ideal temperature and creaminess.
FAQs
Can I use bottled lemon juice instead of fresh lemon juice?
While fresh lemon juice gives the brightest, most vibrant flavor, bottled juice can be used in a pinch. Just keep in mind that fresh juice has natural oils and brightness that really elevate this dessert.
What can I substitute for sour cream?
If you don’t have sour cream on hand, Greek yogurt is an excellent substitute that maintains the tangy creaminess without altering the texture too much.
How long do mini lemon cheesecakes take to bake?
They typically bake for 18 to 20 minutes at 325°F (160°C), which is enough time to set the filling while keeping it creamy and smooth.
Can I make these gluten-free?
Absolutely! Simply swap the graham cracker crumbs for a gluten-free alternative or finely ground nuts. This change won’t affect the delicious lemony taste or creamy texture.
Is it possible to double the recipe?
Yes, doubling the ingredients works great if you’re feeding a larger crowd. Just be sure to have enough muffin pans and bake in batches if needed.
Final Thoughts
There’s something truly special about the Mini Lemon Cheesecakes Recipe that makes it a standout dessert for any occasion. Their refreshing brightness, creamy texture, and perfectly buttery crust come together in a way that’s both comforting and exciting. Whether you want to impress guests or simply treat yourself to a sweet moment, these little gems are incredibly rewarding to make and delicious to eat. Give this recipe a try—you’re going to adore every tangy, creamy bite!
Print
Mini Lemon Cheesecakes Recipe
- Prep Time: 20 minutes
- Cook Time: 25 minutes
- Total Time: 45 minutes (plus at least 2 hours chilling time)
- Yield: 12 mini cheesecakes
- Category: Dessert
- Method: Baking
- Cuisine: American
- Diet: Vegetarian
Description
Delight in these Mini Lemon Cheesecakes, perfect bite-sized desserts bursting with fresh citrus flavor and creamy texture. Featuring a buttery graham cracker crust and a smooth lemon-infused cheesecake filling, these treats are ideal for summer gatherings or anytime you crave a tangy, sweet indulgence.
Ingredients
Crust
- 1 cup graham cracker crumbs
- 2 tablespoons granulated sugar
- 4 tablespoons unsalted butter, melted
Filling
- 16 oz cream cheese, softened
- ½ cup granulated sugar
- 2 large eggs
- ¼ cup sour cream
- ¼ cup fresh lemon juice
- 1 tablespoon lemon zest
- 1 teaspoon vanilla extract
- pinch of salt
Garnish (optional)
- Whipped cream
- Lemon slices
Instructions
- Prepare Oven and Pan: Preheat the oven to 325°F (160°C) and line a 12-cup muffin pan with paper liners to ensure easy removal and cleanup.
- Make the Crust: In a small bowl, mix together graham cracker crumbs, 2 tablespoons granulated sugar, and melted butter until evenly moistened. Press about 1 tablespoon of this mixture into the bottom of each muffin liner, creating a firm crust layer.
- Bake the Crust: Bake the crusts for 5 minutes to set them, then remove the pan from the oven and allow the crusts to cool slightly while you prepare the filling.
- Prepare the Filling: In a large bowl, beat the softened cream cheese until smooth. Add the remaining ½ cup sugar, eggs, sour cream, fresh lemon juice, lemon zest, vanilla extract, and a pinch of salt. Mix thoroughly until the mixture is creamy and well combined.
- Fill the Cups: Evenly divide the cheesecake filling among the prepared muffin cups over the baked crusts.
- Bake the Cheesecakes: Bake for 18 to 20 minutes, or until the centers are just set and slightly jiggly.
- Cool in Oven: Turn off the oven and crack the door open. Let the mini cheesecakes cool inside the oven for 10 minutes to prevent cracking.
- Final Cooling: Remove from the oven and cool to room temperature. Then transfer to the refrigerator to chill for at least 2 hours to set completely.
- Serve and Garnish: Before serving, optionally top with whipped cream and lemon slices for an extra touch of freshness and decoration.
Notes
- For extra sweetness and enhanced lemon flavor, consider topping the cheesecakes with lemon curd before serving.
- These mini cheesecakes can be made up to 2 days in advance and stored in the refrigerator, allowing the flavors to develop further.
