
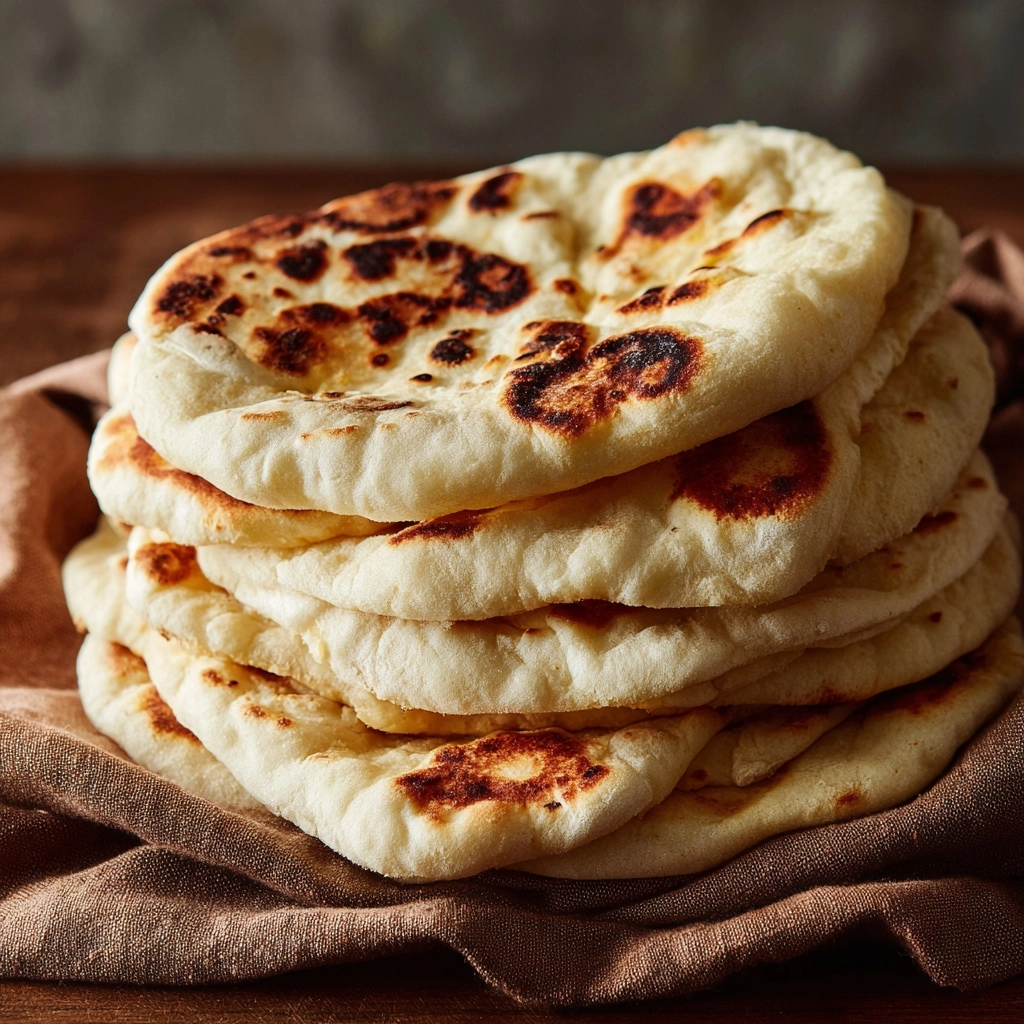
Imagine the aroma of warm, pillowy bread filling your kitchen and the satisfaction of pulling apart a pocket that’s soft, chewy, and ready for any delicious filling you dream up. That’s the joy of Homemade Pita Bread, a ridiculously simple yet transformative recipe that only takes a handful of pantry staples and a little hands-on time. Whether you’re scooping up hummus, wrapping up a fresh salad, or serving alongside your favorite stews, this flatbread brings a sense of homemade magic to every meal.
Ingredients You’ll Need
At its heart, Homemade Pita Bread is a minimalist wonder. Each ingredient plays a vital role—bringing flavor, structure, and that signature puff we all crave. Nothing fancy here, just tried-and-true staples you probably already have in your kitchen!
- Active dry yeast (2 1/4 teaspoons/1 packet): This is what gives your pita its rise and signature pocket. A little patience helps it work its magic.
- Granulated sugar (1 teaspoon): Just enough to feed the yeast, which helps your dough puff perfectly.
- Warm water (1 cup, about 110°F): Warm—but not hot—water wakes up the yeast and helps it bloom.
- All-purpose flour (2 1/2 cups, plus more for dusting): Go for a high-quality flour if you can, as it provides the best texture.
- Salt (1 teaspoon): Don’t skip this! Salt enhances flavor and strengthens the dough.
- Olive oil (1 tablespoon): A splash adds tenderness and a subtle richness to the bread.
How to Make Homemade Pita Bread
Step 1: Activate the Yeast
Pour your warm water into a large mixing bowl, then stir in the sugar and scatter the yeast on top. Wait about 5 to 10 minutes. The mixture will get foamy and bubbly, a sure sign your yeast is alive and ready to make magic happen.
Step 2: Mix and Knead the Dough
Add the flour, salt, and olive oil right into that yeast mixture. Stir until a rough, shaggy dough forms—don’t worry if it’s messy! Turn it out onto a lightly floured surface (or use a stand mixer with the dough hook) and knead for 8 to 10 minutes by hand, or about 6 to 7 minutes in the mixer. You’re aiming for a dough that’s smooth, elastic, and bounces back when poked.
Step 3: Let the Dough Rise
Shape your dough into a ball, place it in a lightly oiled bowl, and cover the top with a damp cloth or plastic wrap. Let it rest in a warm spot for 1 to 1.5 hours. It should puff up and double in size—a beautiful transformation that promises fluffy Homemade Pita Bread.
Step 4: Divide and Shape
Once risen, gently punch down the dough to release excess air. Cut it into eight equal pieces and roll each one into a ball. Working one at a time, roll each ball into a 6 to 7 inch circle. Keep them loosely covered with a towel so they don’t dry out while you finish rolling the rest.
Step 5: Rest and Preheat
Let the rolled-out pitas rest for 10 to 15 minutes. Meanwhile, preheat your skillet over medium-high heat or your oven to 475°F (place a baking stone or upside-down baking sheet inside to heat up). The resting helps the dough relax, giving you a better puff in the oven or pan.
Step 6: Cook the Pita
For stovetop method: Lay a circle of dough onto the hot skillet. In just 1 to 2 minutes per side, watch as it puffs up and browns lightly. For the oven: Slide the rounds onto the hot stone or tray, and bake for 2 to 3 minutes until they balloon and turn lightly golden. Once finished, wrap your warm pitas in a clean towel—they’ll stay soft and pliable.
How to Serve Homemade Pita Bread

Garnishes
A sprinkle of za’atar, a drizzle of olive oil, or a scattering of sesame seeds can elevate Homemade Pita Bread from simple to stunning. For a herby twist, brush the warm breads with garlic-infused olive oil and chopped parsley right as they come off the heat.
Side Dishes
Serve your pitas with classic sides like creamy hummus, baba ganoush, fresh tabbouleh, or a cool cucumber-yogurt salad. This bread is the ultimate scoop for dips or a sturdy wrap for nourishing grain salads and kebabs. It’s also perfect alongside stews or soups for a Mediterranean-inspired feast.
Creative Ways to Present
Cut Homemade Pita Bread into triangles for dippers at your next party platter, or stuff the pockets with colorful roasted vegetables, falafel, or shawarma for grab-and-go lunches. Try using them as mini pizza bases—kids absolutely love this—or even as a base for breakfast wraps.
Make Ahead and Storage
Storing Leftovers
Tuck your cooled Homemade Pita Bread into an airtight container or zip-top bag, and keep it on the counter for up to two days. This helps the bread stay soft and fresh, ready to enjoy whenever hunger strikes.
Freezing
To freeze, simply layer parchment or wax paper between each pita, then seal tightly in a freezer bag. Homemade Pita Bread freezes beautifully for up to one month. To thaw, just leave on your countertop for an hour or two or defrost gently in the microwave.
Reheating
Refresh leftover or thawed pitas by wrapping them in a damp paper towel and microwaving for 15–20 seconds. Alternatively, warm them in a skillet or oven for a few minutes. The bread softens and regains that just-baked aroma and texture every time.
FAQs
Why didn’t my pita bread puff up?
The most common reason is that the cooking surface wasn’t hot enough. Be sure your oven or skillet is fully preheated. Rolling your dough evenly and not over-flouring helps the steam create perfect pockets.
Can I make Homemade Pita Bread with whole wheat flour?
Absolutely! Substitute up to half the all-purpose flour with whole wheat flour. You might need an extra tablespoon or two of water, and expect a slightly nuttier flavor and denser texture.
Do I need a stand mixer for this recipe?
Not at all! Homemade Pita Bread is delightfully hands-on. Kneading by hand just takes a little more effort and time, but it’s incredibly rewarding and a bit therapeutic.
How do I keep pita bread soft after baking?
As soon as the pitas come off the heat, wrap them in a clean kitchen towel. The trapped steam keeps them soft and pliable instead of dry or brittle.
Is Homemade Pita Bread vegan?
Yes! This recipe is naturally vegan, so everyone at your table can enjoy it without a second thought.
Final Thoughts
Once you’ve tasted Homemade Pita Bread fresh from your own kitchen, it’s hard to settle for anything store-bought again. It’s one of those soulful, satisfying recipes that always draws a crowd and has everyone reaching for seconds. Give it a try—you’ll be amazed at how simple and rewarding it is!
Print
Homemade Pita Bread Recipe
- Prep Time: 20 minutes
- Cook Time: 15 minutes
- Total Time: 1 hour 45 minutes (includes rise time)
- Yield: 8 pitas
- Category: Bread
- Method: Baking or Stovetop
- Cuisine: Middle Eastern
- Diet: Vegan
Description
Learn how to make delicious homemade pita bread with this simple recipe. These soft and fluffy pitas are perfect for sandwiches, dipping, or filling with your favorite ingredients.
Ingredients
For the Pita Bread:
- 2 1/4 teaspoons active dry yeast (1 packet)
- 1 teaspoon granulated sugar
- 1 cup warm water (about 110°F)
- 2 1/2 cups all-purpose flour (plus more for dusting)
- 1 teaspoon salt
- 1 tablespoon olive oil
Instructions
- Prepare the Dough: In a large mixing bowl, combine warm water, sugar, and yeast. Let sit until foamy. Add flour, salt, and olive oil. Mix until a dough forms.
- Knead the Dough: Knead on a floured surface or with a stand mixer until smooth.
- Rise the Dough: Place in an oiled bowl, cover, and let rise until doubled.
- Shape and Cook: Divide dough, roll into balls, flatten into circles. Cook on stovetop or in the oven.
Notes
- To help the pitas puff, ensure a hot oven or pan and avoid over-flouring the dough.
- Pitas can be stored at room temperature for 2 days or frozen for up to 1 month.
Nutrition
- Serving Size: 1 pita
- Calories: 160
- Sugar: 0g
- Sodium: 230mg
- Fat: 3g
- Saturated Fat: 0.5g
- Unsaturated Fat: 2.5g
- Trans Fat: 0g
- Carbohydrates: 29g
- Fiber: 1g
- Protein: 4g
- Cholesterol: 0mg


