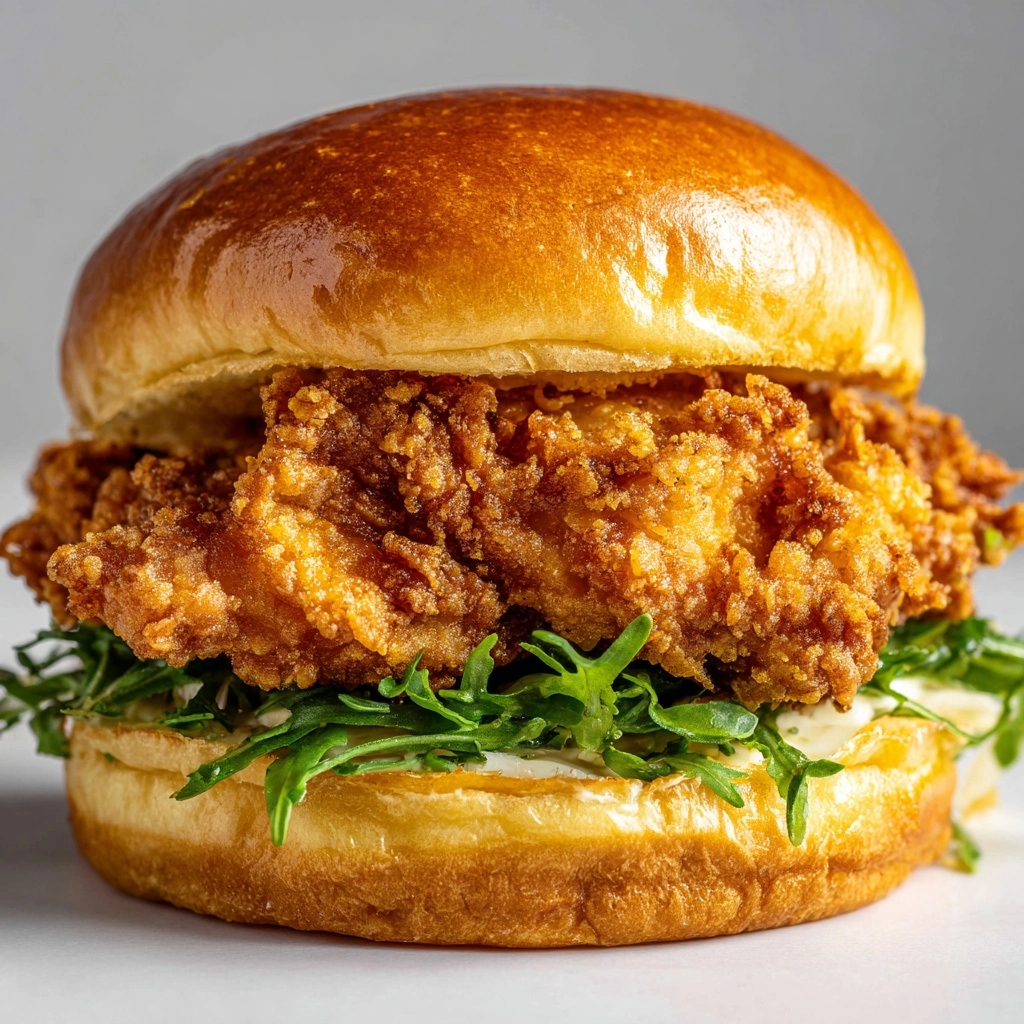
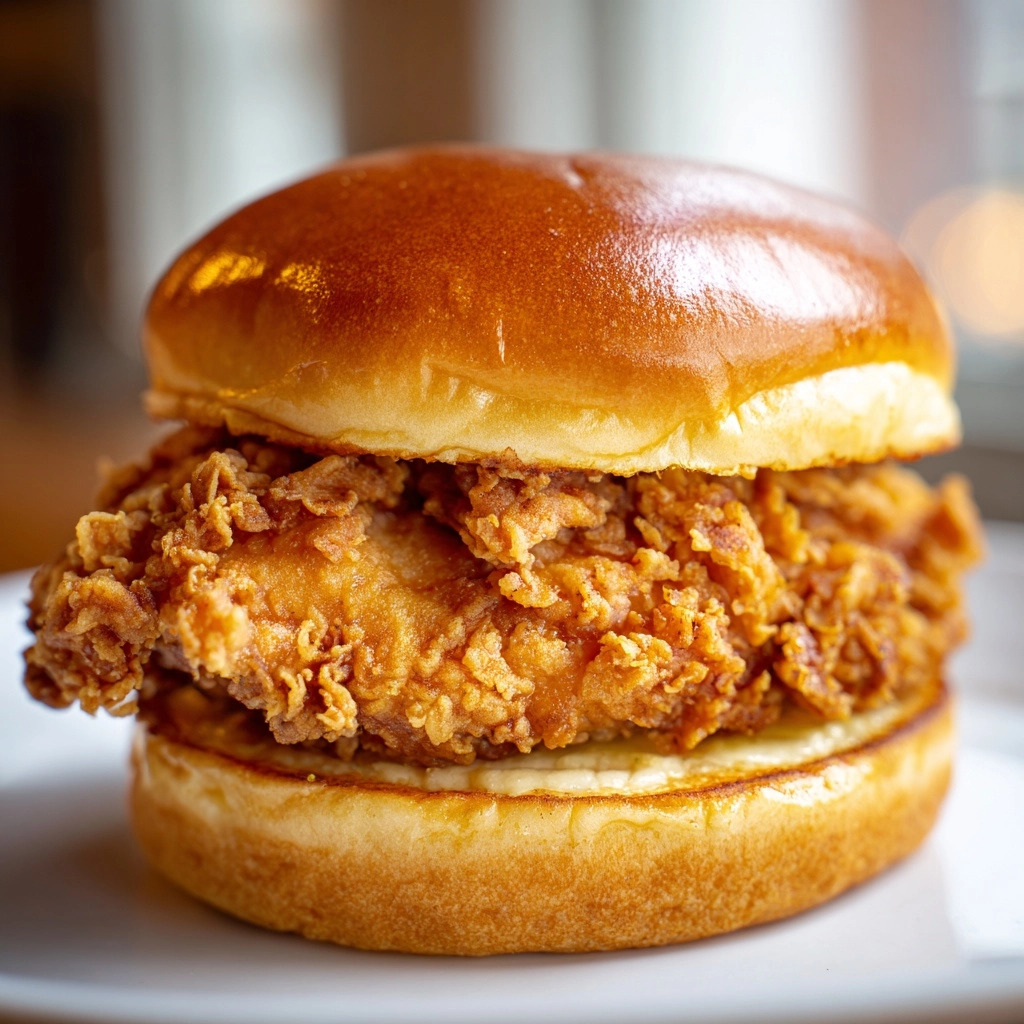
If you have ever craved that perfect crispy, juicy chicken sandwich that combines a tender bite of chicken with a crunchy golden crust and tangy pickles, look no further than this Homemade Chick-Fil-A Chicken Sandwich Recipe. Recreating this fast-food favorite at home is surprisingly simple, and the reward is a melt-in-your-mouth sandwich that tastes just as good, if not better, than the original. From the secret marinade in pickle juice to the perfectly seasoned, crisp coating, every element works together to deliver a flavor-packed experience that will have you reaching for seconds.
Ingredients You’ll Need
Getting the ingredients right is the foundation of any great dish, and this recipe is no exception. Each item is chosen to build layers of flavor and that signature crispy texture, while keeping everything straightforward and accessible.
- Boneless, skinless chicken breasts: The star of the show, providing tender, juicy meat perfect for sandwich-sized portions.
- Dill pickle juice: The secret to that tangy, subtle brine flavor that sets this sandwich apart and keeps chicken juicy.
- Egg and milk: These create the perfect wet batter to help the seasoned flour coating stick to the chicken.
- All-purpose flour: The essential base for a crisp, golden crust when fried to perfection.
- Powdered sugar: Adds a subtle sweetness that balances the spices and tang.
- Spices (paprika, salt, black pepper, garlic powder, onion powder, cayenne pepper): A carefully blended mix that adds smoky, savory, and slightly spicy notes for deep, complex flavor.
- Vegetable oil: For frying, ensuring a crunchy exterior while locking in juices.
- Hamburger buns: Soft and slightly toasted to create the perfect sandwich vessel.
- Butter: Melted and brushed on buns for richness and a golden finish.
- Dill pickle slices: Classic topping that adds crisp texture and bursts of brightness.
How to Make Homemade Chick-Fil-A Chicken Sandwich Recipe
Step 1: Prepare and Marinate the Chicken
Start by pounding the chicken breasts to an even half-inch thickness to ensure they cook evenly and stay juicy. Cutting each breast in half creates the perfect sandwich-sized portions. Then, place the chicken pieces in a bowl or resealable bag with dill pickle juice and refrigerate for at least 30 minutes. This marinade not only tenderizes the chicken but also infuses it with that signature tangy flavor that sets this sandwich apart.
Step 2: Mix the Batter and Seasoning
While the chicken marinates, whisk together the egg and milk in a shallow bowl for the wet coating. In another bowl, combine the flour, powdered sugar, paprika, salt, black pepper, garlic powder, onion powder, and cayenne pepper. This seasoning mix brings the perfect balance of sweet, savory, and just a hint of heat to the crust.
Step 3: Coat the Chicken Pieces
Once the chicken has marinated, remove it from the pickle juice and pat dry to help the coating stick better. Dip each piece first into the egg mixture, letting the excess drip off, then dredge thoroughly in the seasoned flour, pressing gently to ensure a thick, even coating that’ll crisp up beautifully when fried.
Step 4: Fry to Golden Perfection
Heat about one inch of vegetable oil in a deep skillet to 350°F (175°C). Fry the chicken in batches so the oil temperature stays consistent, cooking each piece for 3 to 4 minutes per side until golden brown and perfectly cooked through with an internal temperature of 165°F. Transfer the chicken to a paper towel-lined plate to drain any excess oil.
Step 5: Toast and Prepare the Buns
Brush the insides of the hamburger buns with melted butter and toast them lightly in a skillet or under the broiler. This step adds a wonderful buttery crunch that perfectly contrasts the crispy chicken.
Step 6: Assemble the Sandwiches
Finally, layer the crispy fried chicken onto the toasted buns and top with several dill pickle slices. Feel free to add your favorite extras or sauces, but even plain, this sandwich is pure magic.
How to Serve Homemade Chick-Fil-A Chicken Sandwich Recipe

Garnishes
A few crisp dill pickle slices are a must-have for adding tang and crunch, but feel free to elevate the sandwich with fresh lettuce, juicy tomato slices, or a drizzle of honey mustard or spicy mayo for a personalized twist.
Side Dishes
Serve your Homemade Chick-Fil-A Chicken Sandwich Recipe with classic sides like crispy waffle fries, coleslaw, or a fresh garden salad. These complement the sandwich’s rich flavors and make for a satisfying, well-rounded meal.
Creative Ways to Present
For a fun twist, try serving open-faced sandwiches or mini sliders using slider buns for entertaining. You could also wrap your sandwiches in parchment paper tied with twine for a charming picnic presentation.
Make Ahead and Storage
Storing Leftovers
Leftover fried chicken can be stored in an airtight container in the refrigerator for up to 3 days. Keep buns and pickles separate for best texture when reheating.
Freezing
You can freeze the cooked chicken pieces by wrapping them individually in plastic wrap and placing them in a freezer-safe bag for up to 2 months. Thaw overnight in the fridge before reheating.
Reheating
To keep the chicken crispy, reheat in a preheated oven at 375°F for about 10 minutes or until warmed through. Avoid microwaving, which tends to make the breading soggy.
FAQs
Can I use chicken thighs instead of breasts?
Absolutely! Chicken thighs are juicier and more forgiving, though you may want to adjust frying time slightly as thighs can be thicker or vary in size.
Why is pickle juice used in the marinade?
Pickle juice tenderizes the meat while infusing a distinctive tangy flavor that’s essential to achieving that authentic Chick-Fil-A taste.
Is it possible to bake the chicken instead of frying?
Yes, for a healthier alternative, bake the coated chicken on a wire rack at 400°F for about 25-30 minutes, flipping halfway, but keep in mind the texture will be less crispy.
What type of oil is best for frying?
Use a neutral oil with a high smoke point, like vegetable or canola oil, to achieve the perfect golden crust without burning.
Can I make this recipe spicy?
Definitely! Simply increase the cayenne pepper in the flour mixture and add hot sauce to the egg wash for an extra kick of heat.
Final Thoughts
Trying this Homemade Chick-Fil-A Chicken Sandwich Recipe is like bringing a beloved fast-food classic right into your own kitchen, but with the joy and satisfaction of making it yourself. With simple ingredients and straightforward steps, you get to enjoy that irresistible combo of juicy, seasoned chicken, crispy crust, and tangy pickles anytime you want. So, roll up your sleeves and get ready to impress yourself and your loved ones with this unforgettable sandwich experience.
Print
Homemade Chick-Fil-A Chicken Sandwich Recipe
- Prep Time: 20 minutes (plus marinating time)
- Cook Time: 15 minutes
- Total Time: 35 minutes (not including marinating)
- Yield: 4 sandwiches
- Category: Main Course
- Method: Frying
- Cuisine: American
Description
This Homemade Chick-Fil-A Chicken Sandwich recipe recreates the classic fast-food favorite with juicy, tender chicken breasts marinated in pickle juice, coated in a flavorful seasoned flour mixture, and fried to golden perfection. The sandwich is served on lightly toasted, buttered buns with crisp dill pickle slices, delivering a perfect balance of savory, crispy, and tangy flavors right at home.
Ingredients
Chicken and Marinade
- 2 boneless, skinless chicken breasts
- 1 cup dill pickle juice
Breading and Coating
- 1 large egg
- ½ cup milk
- 1 cup all-purpose flour
- 2 tablespoons powdered sugar
- 1 teaspoon paprika
- 1 teaspoon salt
- ½ teaspoon black pepper
- ½ teaspoon garlic powder
- ½ teaspoon onion powder
- ¼ teaspoon cayenne pepper
Frying and Assembly
- Vegetable oil, for frying (about 1 inch deep)
- 4 hamburger buns
- 2 tablespoons butter, melted
- Dill pickle slices, for serving
Instructions
- Pound and Cut Chicken: Pound the chicken breasts to an even ½-inch thickness and cut each breast in half to create four sandwich-sized pieces.
- Marinate: Place the chicken pieces in a bowl or resealable bag with 1 cup of dill pickle juice. Refrigerate and marinate for at least 30 minutes and up to 4 hours to tenderize and infuse flavor.
- Prepare Wet and Dry Mixtures: In a shallow bowl, whisk together 1 large egg and ½ cup milk. In a separate bowl, combine 1 cup all-purpose flour, 2 tablespoons powdered sugar, 1 teaspoon paprika, 1 teaspoon salt, ½ teaspoon black pepper, ½ teaspoon garlic powder, ½ teaspoon onion powder, and ¼ teaspoon cayenne pepper.
- Coat Chicken: Remove the chicken from the marinade and pat dry with paper towels. Dip each piece into the egg and milk mixture, then dredge in the seasoned flour mixture, pressing to coat thoroughly.
- Heat Oil and Fry: Heat about 1 inch of vegetable oil in a deep skillet to 350°F (175°C). Fry the chicken in batches, cooking each side for 3–4 minutes until golden brown and the internal temperature reaches 165°F.
- Drain: Transfer the fried chicken pieces to a paper towel-lined plate to drain excess oil.
- Toast Buns: Brush the insides of the hamburger buns with melted butter and lightly toast them in a skillet or under a broiler until golden.
- Assemble Sandwiches: Place each piece of fried chicken on the toasted bun, top with dill pickle slices, and serve immediately.
Notes
- Add lettuce, tomato, or your favorite sauce such as mayo or mustard for variation.
- For a spicy version, double the cayenne pepper in the flour mixture and add hot sauce to the egg and milk mixture.


