
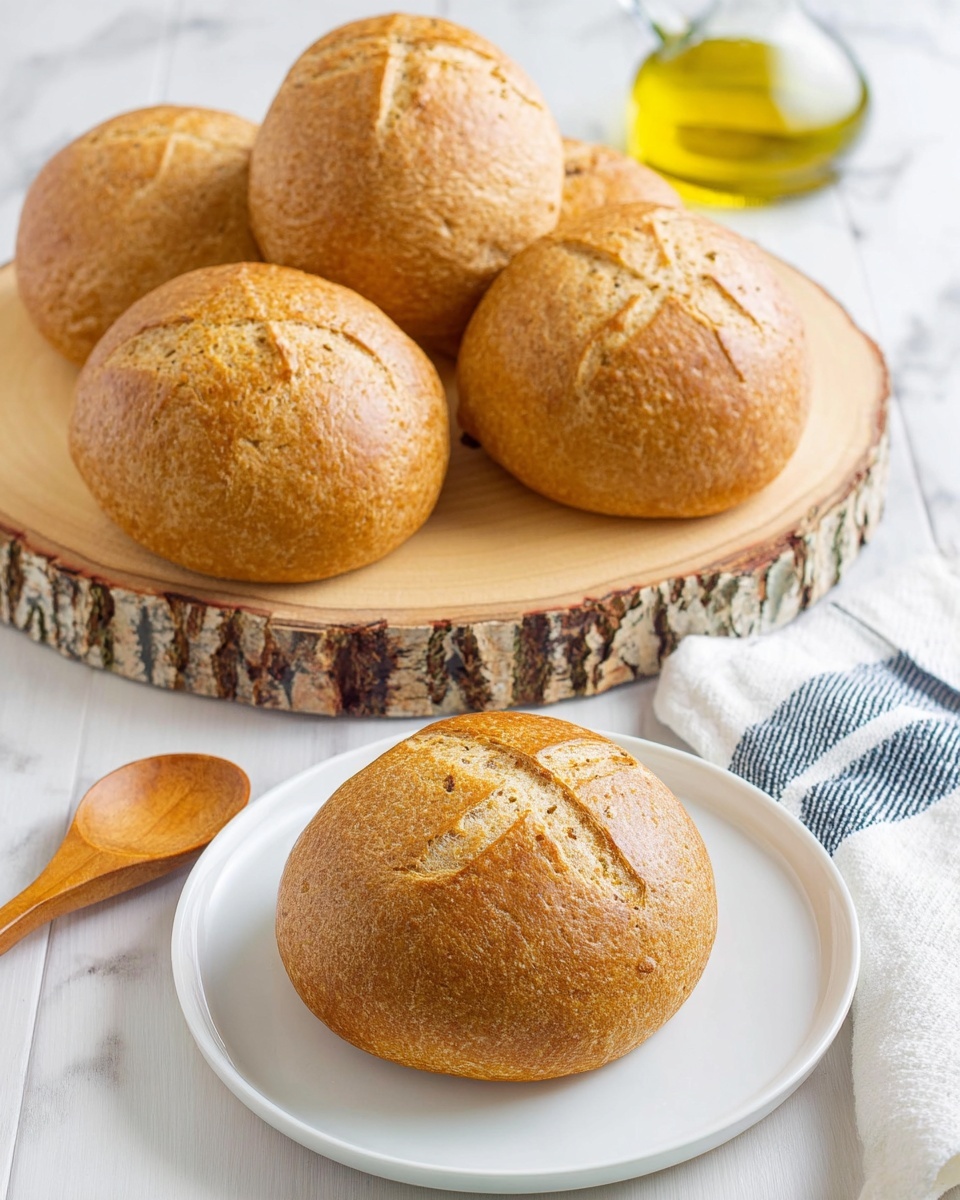
If you’ve ever wanted to impress your family or guests with a meal that’s both charming and delicious, then this Homemade Bread Bowls Recipe is going to become your new kitchen essential. These perfectly crusty yet soft bread bowls cradle your favorite soups or stews in the most delightful way, elevating simple comfort food into a memorable dining experience. From the moment you mix the fragrant dough to the satisfied smile as you scoop out the last bit of soup, this recipe brings so much joy and warmth to your table.
Ingredients You’ll Need
Although this recipe uses a handful of basic ingredients, each one plays a starring role, contributing to the incredible texture, flavor, and color that make these bread bowls irresistible.
- 2 packets of Active Dry Yeast: This is the magic behind the rise and fluffiness of your bowls; ensure it’s fresh for the best results.
- 2 ½ cups of warm water (about 110 degrees): Perfect temperature to activate the yeast without killing it, so keep it warm but not hot.
- 1 tablespoon of granulated sugar: Feeds the yeast and adds a subtle sweetness to balance the bread’s flavor.
- 2 teaspoons of salt: Enhances all the flavors and strengthens the dough’s structure.
- 6-7 cups of bread flour: Bread flour’s higher protein content creates that chewy, satisfying bite you want.
- 1 tablespoon of olive oil: Adds tenderness and a hint of richness to the dough.
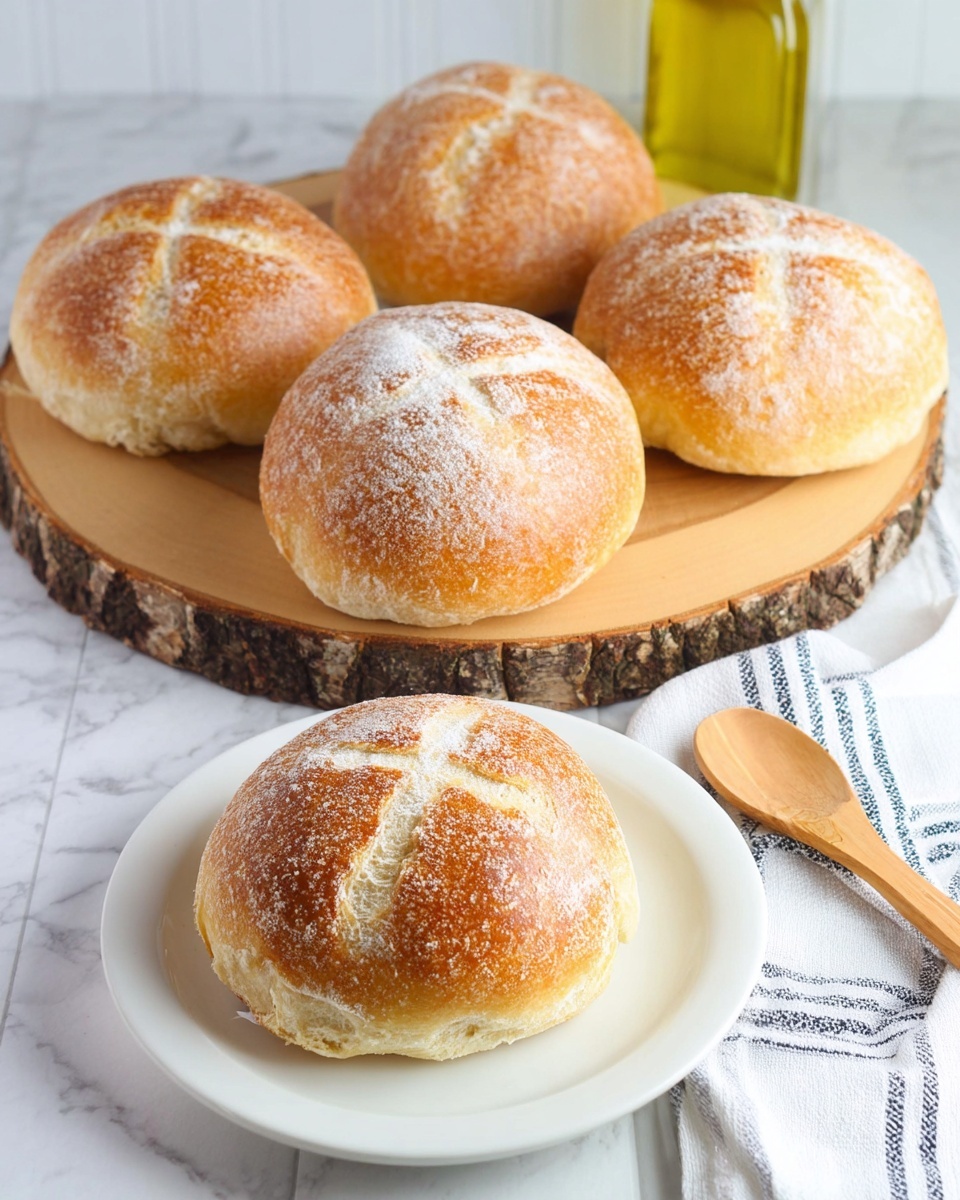
- Egg wash (one egg + splash of milk): Gives the bread bowls that gorgeous golden, shiny finish once baked.
How to Make Homemade Bread Bowls Recipe
Step 1: Activate the Yeast
Start by combining your active dry yeast with warm water in a bowl. Cover it with a towel and let the mixture rest for 5 to 10 minutes until it becomes bubbly and frothy—this tells you the yeast is alive and ready to work its magic in your dough.
Step 2: Mix in Sugar and Salt
Once the yeast has activated, whisk in the granulated sugar and salt. These ingredients will not only flavor the bread but will also interact with the yeast during rising, helping develop a beautiful crumb texture.
Step 3: Begin Combining the Dough
In a large bowl, start by adding 3 cups of bread flour. Pour in your yeast mixture and mix well until you get a shaggy dough. This initial mix sets the foundation for your homemade bread bowls.
Step 4: Add Flour and Knead
Keep adding flour a bit at a time until your dough no longer sticks to the bowl. Knead it for 6 to 8 minutes until it forms a smooth, elastic ball. Kneading builds the gluten network, which gives your bread its chewy texture and structure.
Step 5: First Rise
Lightly spray a clean bowl, rub olive oil over the dough, and place it inside. Cover and let it rise in a warm spot for about 1 hour and 30 minutes. If your kitchen feels chilly, preheat your oven to 200 degrees, then turn it off and set the dough inside with the door slightly cracked—this creates the perfect toasty nest for your rising dough.
Step 6: Punch and Shape the Dough
Once the dough has doubled in size, punch down to expel any large air bubbles. Roll the dough out on a floured surface into a long loaf shape, which makes portioning easier.
Step 7: Portion into Balls
Cut the dough into 6 equal pieces, then roll each into a smooth ball. Getting the surface nice and smooth helps the bread bowls rise evenly and develop a beautiful crust.
Step 8: Second Rise
Place the dough balls on a parchment-lined baking sheet and cover them lightly with a towel. Let them rest on the stove while you preheat your oven to 400 degrees. This second rise should take about 20 minutes, allowing your bread bowls to puff up beautifully.
Step 9: Egg Wash and Scoring
Brush each dough ball with your prepared egg wash, which promotes a shiny golden crust. Then carve an X into the top of each ball. This step helps release any trapped air bubbles while baking and creates a handy guide for cutting the tops off later.
Step 10: Baking
Bake the bread balls in the oven for about 30 minutes until they glow golden brown. Once out of the oven, transfer to a cooling rack. Letting them cool longer makes cutting easier and prevents the bread from crumbling when hollowing out.
Step 11: Hollow Out the Bread Bowls
With a serrated bread knife, carefully cut around the X on top to remove a perfect circular lid. Gently remove the bread inside, leaving a thick enough wall to hold your favorite soups without leaking.
Step 12: Fill and Enjoy
Fill your homemade bread bowls with soup, chowder, or chili, and dive into a meal that’s as fun to eat as it is delicious. These bowls truly add that wow factor to any cozy meal.
How to Serve Homemade Bread Bowls Recipe
Garnishes
Adding fresh garnishes like chopped parsley, shredded cheese, or a swirl of sour cream can make your soup-filled bread bowls look restaurant-worthy while boosting the flavor and texture.
Side Dishes
Serve with a crisp side salad or roasted vegetables to balance the hearty bread and filling. A light, tangy vinaigrette pairs especially well and keeps the meal feeling fresh.
Creative Ways to Present
Try placing each bread bowl on a rustic wooden board with accompaniments like artisan cheese, olives, or charcuterie for an eye-catching spread. You can also carve smaller bite-sized bread bowls as fun appetizer vessels for parties.
Make Ahead and Storage
Storing Leftovers
If you have any leftover bread bowls, store them in an airtight container or plastic bag at room temperature for up to two days to keep the crust crisp and the interior soft.
Freezing
Wrap cooled bread bowls tightly in plastic wrap and then in foil before freezing. They’ll keep well for up to three months. Thaw at room temperature before reheating or refilling.
Reheating
Warm your bread bowls in a preheated oven at 350 degrees for about 5-7 minutes to revive their crusty exterior and soft, pillowy inside—perfect for serving leftovers or prepping ahead of time.
FAQs
Can I use all-purpose flour instead of bread flour?
Absolutely! While bread flour gives you that extra chewiness, all-purpose flour will still produce tasty bread bowls. Just expect a slightly softer texture.
How do I know if my yeast is still good?
If your yeast bubbles and froths after sitting in warm water with sugar, it’s alive and ready. If nothing happens, it’s best to get new yeast to ensure your bread rises properly.
Can I make the dough in a stand mixer?
Yes, mixing and kneading the dough in a stand mixer with a dough hook saves time and effort. Just knead until the dough is smooth and elastic, about 6-8 minutes on low speed.
Is it necessary to do two rises?
The two-stage rising process develops flavor and texture and helps the bread bowls hold up well when filled. Skipping the second rise might lead to denser, less airy bread.
What soups go best in homemade bread bowls?
Thick, hearty soups like clam chowder, broccoli cheddar, chili, or creamy tomato are perfect. The bread bowl soaks up the soup without falling apart, adding to the experience.
Final Thoughts
Making this Homemade Bread Bowls Recipe is such a rewarding experience that brings an extra bit of magic to any meal. Whether it’s a cozy weeknight dinner or something special for friends, these bread bowls are sure to make everyone smile. Trust me, once you’ve mastered this recipe, you’ll find yourself craving soup nights more often just to enjoy these edible bowls of joy!
Print
Homemade Bread Bowls Recipe
- Prep Time: 120 minutes
- Cook Time: 50 minutes
- Total Time: 170 minutes
- Yield: 6 bread bowls
- Category: Bread
- Method: Baking
- Cuisine: American
Description
This Homemade Bread Bowls recipe guides you through creating warm, crusty bread bowls perfect for serving your favorite soups or stews. Made from scratch using active dry yeast and bread flour, these bread bowls are soft inside with a golden crust outside, providing an impressive and edible serving vessel that adds rustic charm and delicious flavor to any meal.
Ingredients
Yeast Mixture
- 2 packets of Active Dry Yeast (about 2 Tablespoons)
- 2 ½ cups of warm water (about 110°F, warm but not hot)
- 1 tablespoon of granulated sugar
- 2 teaspoons of salt
Dough
- 6–7 cups of bread flour
- 1 tablespoon of olive oil
Egg Wash
- 1 egg
- A splash of milk
Instructions
- Activate the Yeast: Place your two packets of active dry yeast into your warm water. Place a towel over the bowl and allow it to sit for 5-10 minutes until it bubbles and is frothy, indicating the yeast is active.
- Mix in Sugar and Salt: Once your yeast is activated, whisk in the granulated sugar and salt to the yeast mixture.
- Combine with Flour: In a large mixing bowl, scoop in 3 cups of bread flour and pour in your yeast mixture. Mix well to combine.
- Add Remaining Flour and Knead: Gradually add the remaining flour until the dough no longer sticks to the sides of the bowl. Knead the dough for 6-8 minutes until it forms a smooth, elastic ball.
- First Rise: Remove the dough from the bowl, spray the inside of the bowl with non-stick spray, rub olive oil over the dough ball, and place it back into the bowl. Cover and set in a warm environment to rise for about 1.5 hours. For a warm environment, preheat your oven to 200°F, turn it off, and place the dough inside with the door slightly cracked.
- Deflate and Shape: Once risen, knead the dough down to remove air bubbles. Roll it out into a long loaf shape on a floured surface.
- Portion into Balls: Cut the loaf into 6 equal pieces and roll each piece into a ball.
- Second Rise: Preheat the oven to 400°F. Place the dough balls onto a parchment-lined baking sheet, cover them with a clean towel, and allow them to rise at room temperature for 20 minutes while the oven preheats.
- Prepare for Baking: After the second rise, brush each dough ball with the egg wash mixture made from one beaten egg and a splash of milk. Carve an ‘X’ on top of each dough ball to release air bubbles and create a guide for cutting the tops off later.
- Bake the Bread Bowls: Bake the dough balls in the preheated oven for 30 minutes, or until golden brown and crusty.
- Cool the Bread: Remove the bread bowls from the oven and cool them on a wire rack. Cooling thoroughly makes them easier to cut without crushing.
- Create the Bowls: Using a bread knife, cut around the ‘X’ to remove the top of each bread bowl. Hollow out the interior by removing the soft bread from inside, leaving the walls of the bowl thick enough to hold soups.
- Serve and Enjoy: Fill your homemade bread bowls with your favorite soup or stew and enjoy a warm, hearty meal presented in an edible bowl.
Notes
- Ensure your water is warm (around 110°F) but not hot to avoid killing the yeast.
- Kneading thoroughly develops gluten, which results in a better bread structure.
- The second rise is important for a fluffy bread bowl interior and a good crust.
- The egg wash helps give the bread a beautiful golden, glossy crust.
- Cooling completely before hollowing prevents the bread from becoming soggy.
- You can use these bread bowls for any soup, chili, or dip of your choice.
- If your kitchen is cold, use the warmed and turned-off oven method to create a perfect rising spot.
