
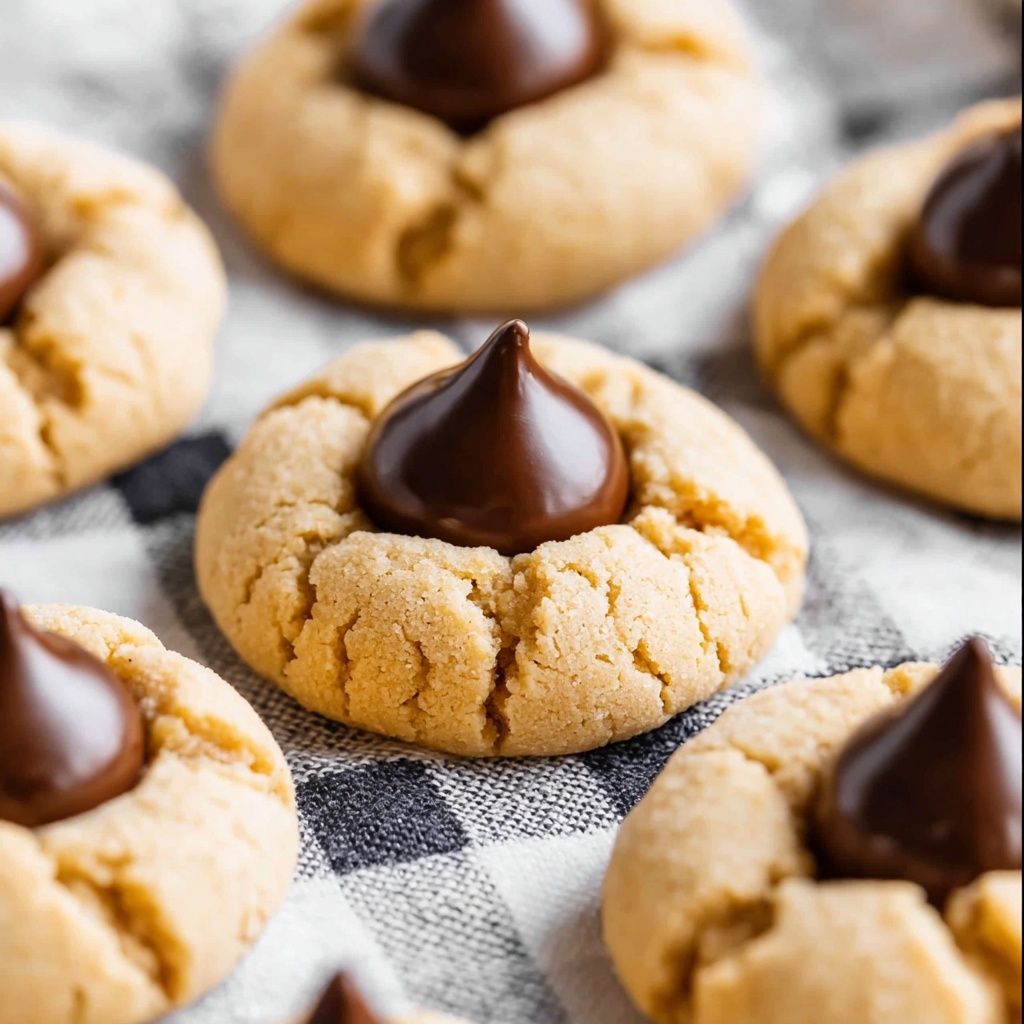
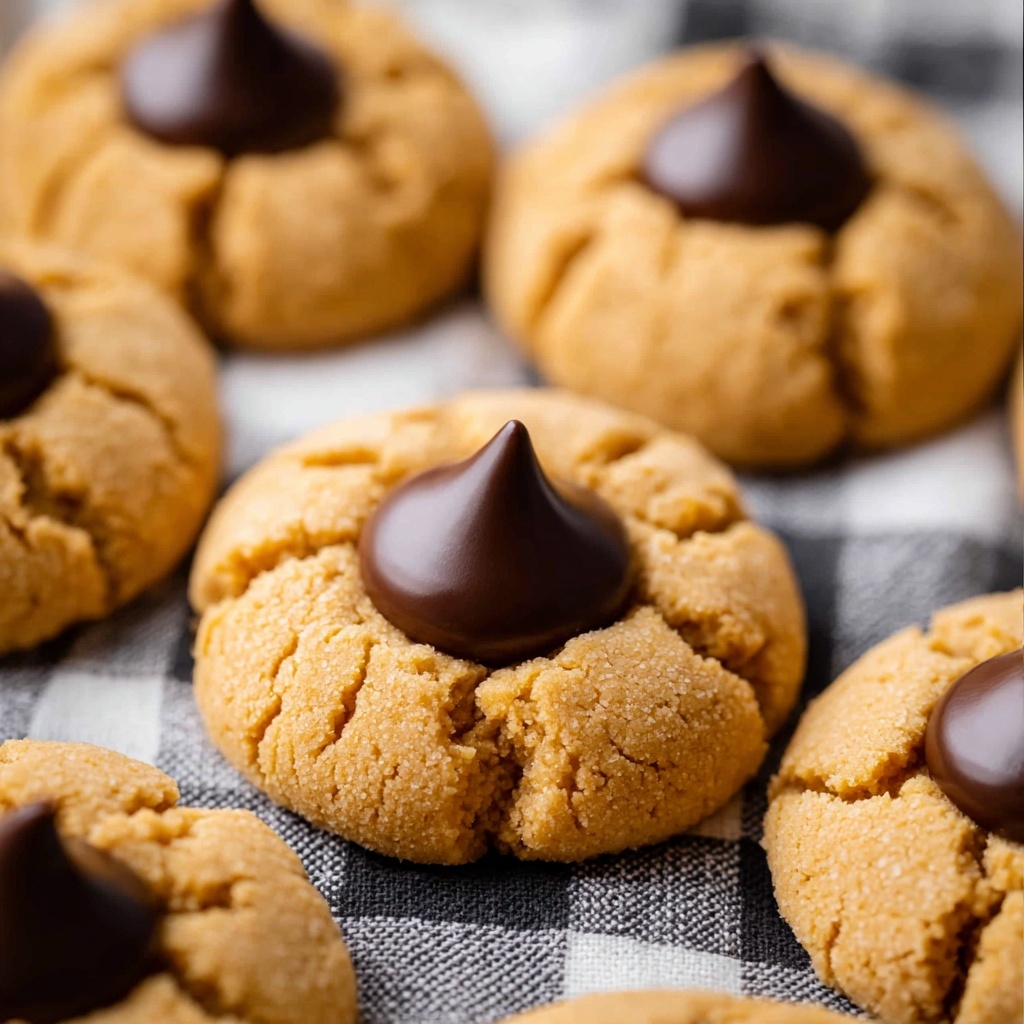
If you have a sweet tooth and love the perfect combination of peanut butter and chocolate, you’re going to adore this Hershey Kiss Cookies Recipe. These cookies are buttery, chewy, and topped with the iconic Hershey’s Kisses that melt slightly to create a beautiful, glossy finish. Whether you’re baking for a holiday treat, a special occasion, or just because, these cookies bring a warm, nostalgic feeling with every bite. Plus, they’re surprisingly easy to make, so even if you’re new to baking, you’ll feel like a pro with this delightful recipe.
Ingredients You’ll Need
Getting this Hershey Kiss Cookies Recipe right depends on simple but essential ingredients. Each element contributes its unique role, creating that tender crumb, rich flavor, and perfect balance you’ll want every time you bake these treats.
- 3 cups all-purpose flour: Provides the sturdy, chewy base for the cookies.
- ½ teaspoon baking soda: Helps the cookies rise just enough to stay soft and light.
- ½ teaspoon baking powder: Adds a slight lift for an airy texture.
- 1 teaspoon kosher salt: Enhances the sweetness and deepens the flavor.
- 1 cup unsalted butter, room temperature: Offers richness and tenderness in every bite.
- 1 cup creamy peanut butter: Brings that classic nutty flavor, smooth and irresistible.
- ⅔ cup dark brown sugar: Gives moisture and a hint of caramel complexity.
- ⅔ cup granulated sugar: Adds sweetness and helps with the cookie’s texture.
- 2 large eggs, room temperature: Binds the dough and adds moisture.
- 2 teaspoons pure vanilla extract: Elevates the flavors with a warm, aromatic touch.
- 1 tablespoon milk (optional): Just in case the dough needs a little softening to be easy to handle.
- 2 pounds Hershey’s Kisses, wrappers removed: The iconic chocolate topping that makes these cookies unforgettable.
How to Make Hershey Kiss Cookies Recipe
Step 1: Prepare Your Baking Sheets
Start by lining two baking sheets with parchment paper. This little prep step prevents sticking and ensures easy cleanup later, which honestly, makes the whole process more enjoyable.
Step 2: Mix the Dry Ingredients
Grab a medium bowl and whisk together the flour, baking soda, baking powder, and kosher salt. Mixing these dry ingredients upfront helps guarantee that your cookies bake evenly and develop their best texture.
Step 3: Cream Butter and Peanut Butter
Using a stand mixer fitted with a paddle attachment, beat the unsalted butter and creamy peanut butter together until the mixture is smooth and luscious, about 2 minutes. This is where the cookie’s rich, peanutty foundation begins.
Step 4: Add Sugars
Next, add the dark brown sugar and granulated sugar to the bowl. Beat these in until the mixture lightens in color and turns silky, which usually takes about 2 to 3 minutes. This step is key for a moist, tender crumb.
Step 5: Incorporate Eggs and Vanilla
Throw in the eggs and vanilla extract, beating until everything is fully combined and creamy, about 1 minute. These ingredients add flavor depth and hold the dough together.
Step 6: Combine Dry Mix with Wet Ingredients
Turn off the mixer and add your whisked dry ingredients. Then, mix on the lowest speed just until the flour disappears into the dough. Over-mixing here could develop gluten, which we definitely want to avoid for fluffy cookies.
Step 7: Adjust Moisture if Needed
If your dough feels stiff and tough to handle, add one tablespoon of milk to loosen it up just a bit. This additional moisture ensures your dough is easy to roll and won’t dry out in the oven.
Step 8: Chill the Dough
Cover your dough and pop it into the fridge for at least 30 minutes. Chilling firms it up, making rolling into balls easier and helping the cookies hold their shape when baked. Meanwhile, preheat your oven to 375°F.
Step 9: Shape the Cookies
Roll the chilled dough into ¾-inch balls and place them about 1½ inches apart on your prepared sheets. This spacing lets the cookies spread just right without sticking together—about 20 per half-sheet pan works perfectly.
Step 10: First Bake, Then Add Kisses
Bake the cookies for 8 minutes. As soon as they come out, carefully press a Hershey’s Kiss into the center of each cookie. Be gentle—just enough to set the candy without pushing it all the way to the baking sheet.
Step 11: Final Bake
Pop them back in the oven for another 2 minutes. This time, the heat slightly melts the base of the Hershey’s Kisses, helping them stick beautifully while keeping that classic shape and glossy finish.
Step 12: Cool and Enjoy
Let your cookies cool on the baking sheet for 2 minutes before transferring them to a wire rack to cool completely. This prevents breakage and helps them firm up perfectly for serving.
How to Serve Hershey Kiss Cookies Recipe
Garnishes
Although these cookies shine on their own, you can jazz them up with a sprinkle of flaky sea salt to contrast the sweetness or a little grated almond for extra crunch and nuttiness. Simple additions like powdered sugar dusting also add a festive touch.
Side Dishes
Savory or sweet, these cookies pair wonderfully with a cold glass of milk or a scoop of vanilla ice cream for dessert. Warm cocoa or a fresh cup of coffee can also bring out the peanut butter and chocolate notes beautifully.
Creative Ways to Present
Arrange these Hershey Kiss Cookies on a festive platter for holiday cookie exchanges or stack them in a clear jar tied with a ribbon for a charming homemade gift. Even sandwiching them with a layer of cream cheese frosting can add a special twist for parties!
Make Ahead and Storage
Storing Leftovers
Once cooled, store your cookies in an airtight container at room temperature for up to a week. This keeps them soft and chewy while preserving that delicious peanut butter and chocolate flavor.
Freezing
You can freeze unbaked dough balls by placing them on a tray until firm and then transferring them to a freezer bag. When ready, bake directly from frozen with a minute or two added to baking time. Baked cookies also freeze well in airtight containers for up to three months.
Reheating
Warm your cookies slightly in the microwave for 10 to 15 seconds to bring out that just-baked softness. This little trick revives the chocolate’s melty goodness and the dough’s tender texture perfect for an irresistible treat anytime.
FAQs
Can I use crunchy peanut butter instead of creamy?
Absolutely! You can substitute all creamy peanut butter or use a half-and-half mix of crunchy and creamy. The crunch adds a fun texture contrast, but creamy peanut butter helps the dough stick together more smoothly.
Do the Hershey Kisses melt completely during baking?
They soften and slightly melt at the base but keep their signature shape and glossy appearance, creating that beautiful finishing touch that sets these cookies apart.
Is it necessary to chill the dough?
Chilling the dough helps the cookies hold their shape during baking and enhances the flavors. If you’re in a rush, you can skip this step, but the texture and handling might differ slightly.
Can I make these cookies gluten-free?
To make a gluten-free version, substitute the all-purpose flour with a reliable gluten-free blend. Be sure to check for a blend that includes xanthan gum or add it separately for proper texture.
How long will the cookies stay fresh?
Stored properly in an airtight container, these cookies will stay fresh for up to a week at room temperature. If you want to keep them longer, freezing is the best option.
Final Thoughts
There’s something so comforting about the classic Hershey Kiss Cookies Recipe — the way peanut butter and chocolate come together in those soft, chewy bites is pure magic. Whether you’re baking for family, friends, or just for yourself, these cookies never disappoint. I really encourage you to try making them; once you do, I bet they’ll become one of your go-to favorites too!
Print
Hershey Kiss Cookies Recipe
- Prep Time: 10 minutes
- Cook Time: 8 minutes + 2 minutes additional bake
- Total Time: 40 minutes (including chilling)
- Yield: 96 cookies
- Category: Dessert
- Method: Baking
- Cuisine: American
- Diet: Vegetarian
Description
Hershey Kiss Cookies are soft, peanut butter-flavored cookies topped with the classic Hershey’s Kisses chocolate, delivering a delightful combination of creamy, nutty, and chocolaty flavors. Perfect for parties, holidays, or any sweet craving, this recipe yields a large batch of delicious cookies that are simple to prepare and bake.
Ingredients
Dry Ingredients
- 3 cups all-purpose flour (360 grams)
- ½ teaspoon baking soda (3 grams)
- ½ teaspoon baking powder (2 grams)
- 1 teaspoon kosher salt (3 grams)
Wet Ingredients
- 1 cup unsalted butter (226 grams, room temperature, 2 sticks)
- 1 cup creamy peanut butter (270 grams, or ½ cup creamy & ½ cup crunchy)
- ⅔ cup dark brown sugar (142 grams)
- ⅔ cup granulated sugar (133 grams)
- 2 large eggs (100 grams, room temperature)
- 2 teaspoons pure vanilla extract (8 grams)
- 1 tablespoon milk (14 grams, only if batter is too stiff)
Topping
- 2 pounds Hershey’s Kisses (907 grams, wrappers removed)
Instructions
- Prepare Baking Sheets: Line two baking sheets with parchment paper and set them aside to ensure the cookies do not stick during baking.
- Mix Dry Ingredients: In a medium bowl, whisk together all-purpose flour, baking soda, baking powder, and kosher salt. Set this mixture aside for later.
- Cream Butter and Peanut Butter: Using a stand mixer fitted with a paddle attachment, cream the unsalted butter and peanut butter together until the blend is smooth, which should take about 2 minutes.
- Add Sugars: Incorporate the dark brown sugar and granulated sugar into the creamed mixture, beating until the mixture is lighter in color and smooth, about 2 to 3 minutes.
- Incorporate Eggs and Vanilla: Beat in the eggs and vanilla extract until the mixture is fully combined and smooth, approximately 1 minute.
- Add Dry Ingredients: Turn off the mixer, add the dry flour mixture to the wet ingredients, then mix on the lowest speed just until flour is incorporated. Avoid overmixing.
- Adjust Dough Consistency: If the dough feels too stiff, add 1 tablespoon of milk and mix just until incorporated to achieve the right consistency.
- Chill Dough: Cover the dough and refrigerate for 30 minutes to firm it up, making it easier to shape. While chilling, preheat the oven to 375°F (190°C).
- Shape Dough Balls: Roll the dough into ¾-inch balls and place them about 1½ inches apart on the prepared baking sheets. Each half-sheet (18×13 inches) should hold around 20 balls.
- First Bake: Bake the cookies for 8 minutes. This initial baking sets the cookie but leaves room for proper kiss placement.
- Add Hershey’s Kisses: Remove the baking sheets from the oven and gently press one Hershey’s Kiss into the center of each cookie, pressing just enough to adhere but not so much that the candy touches the pan.
- Final Bake: Return the cookies to the oven and bake for an additional 2 minutes to meld the chocolate with the warm cookie base.
- Cool: Transfer the cookies to a cooling rack after letting them rest on the baking sheet for 2 minutes to firm up before removing.
Notes
- For a variation, try mixing half creamy and half crunchy peanut butter to add texture.
- If the dough is too sticky to work with, place it back in the fridge for an additional 10-15 minutes.
- Ensure the Hershey’s Kisses are unwrapped before placing them on the cookies to avoid melting wrappers.
- Use parchment paper or silicone baking mats to prevent sticking and ease cleanup.
- Store cookies in an airtight container at room temperature for up to 5 days or freeze for longer storage.


