
There is nothing quite as charming and delightful as the Heart-Shaped Sugar Cookies with Buttercream Roses Recipe when it comes to homemade treats that wow your guests and warm your heart. These cookies strike the perfect balance between sweet, tender sugar cookie bases and the luxuriously creamy, colorful buttercream roses that top them. Whether you’re baking for Valentine’s Day, a bridal shower, or simply because you adore baking beautiful confections, this recipe is a showstopper that tastes just as wonderful as it looks.

Ingredients You’ll Need
Each ingredient in this recipe plays an essential role in creating that perfect texture, flavor, and appearance of the Heart-Shaped Sugar Cookies with Buttercream Roses Recipe. From the basics like flour and sugar to the special touches like almond extract and food coloring, every component makes a difference.
- All-purpose flour (2 3/4 cups, 340g): Provides structure and that tender crumb every sugar cookie needs.
- Baking powder (1 tsp): Gives just a slight lift so your cookies stay soft and not too dense.
- Salt (1/2 tsp): Enhances all the sweet flavors and balances the dough perfectly.
- Unsalted butter (2 cups, 460g total, softened): The star of richness in both cookie and buttercream for creamy texture and flavor.
- Granulated sugar (1 cup, 200g): Sweetens the dough and helps achieve that tender bite.
- Large egg (1): Binds ingredients while adding moisture for a soft chewy texture.
- Vanilla extract (2 tsp total): Brings warmth and depth to both cookie dough and frosting.
- Almond extract (1/2 tsp, optional): Adds a subtle nutty note that makes these cookies extra special.
- Powdered sugar (4 cups, 480g): Creates the fluffy sweetness of the buttercream roses.
- Heavy cream or milk (2 tbsp): Helps smooth out the frosting’s texture for easy piping.
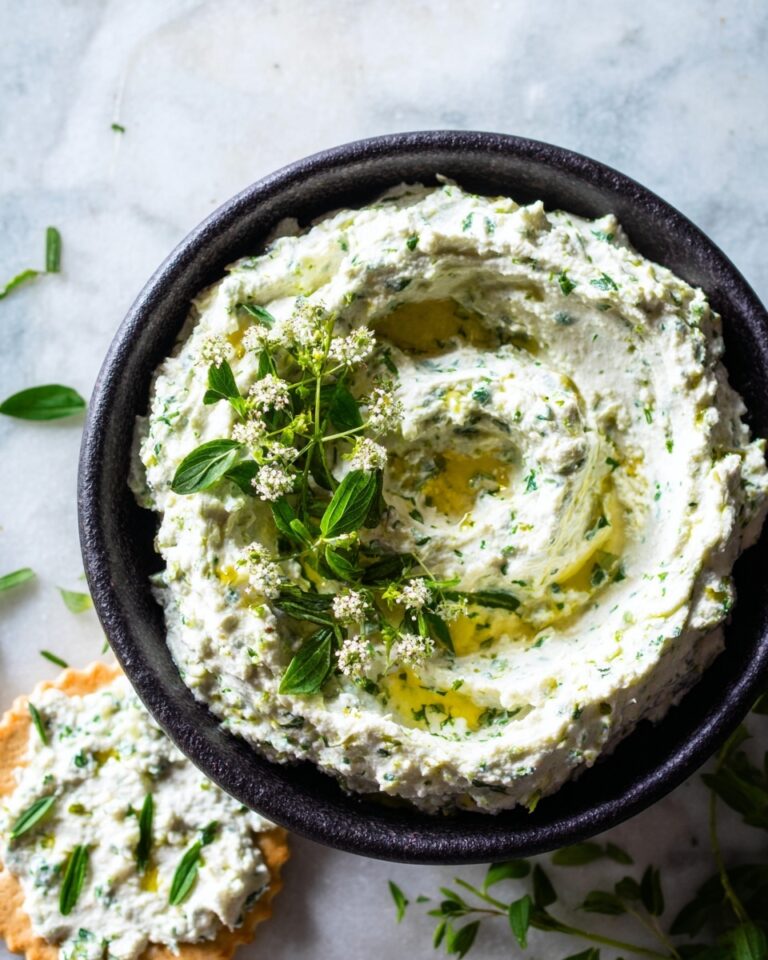
- Food coloring (red, pink, or other preferred colors): Brings your buttercream roses to life with vibrant, romantic hues.
How to Make Heart-Shaped Sugar Cookies with Buttercream Roses Recipe
Step 1: Prepare Your Baking Supplies and Dry Ingredients
Start by preheating your oven to 350°F (175°C) and lining two baking sheets with parchment paper or silicone mats to ensure your cookies don’t stick. Meanwhile, whisk together the flour, baking powder, and salt in a medium bowl. This step guarantees that your dry ingredients are evenly distributed, setting the foundation for deliciously consistent cookies.
Step 2: Cream Butter and Sugar
In a large bowl, use a hand or stand mixer to beat the softened butter and granulated sugar until the mixture turns light and fluffy. This process takes about 2 to 3 minutes and is crucial for creating a tender, melt-in-your-mouth texture. It’s that fluffy creaminess that gives your cookies body and subtle airiness.
Step 3: Add the Egg and Extracts
Beat in the egg, vanilla extract, and almond extract if you’re using it. These ingredients bring flavor and moisture, melding beautifully into the buttery base. Almond extract is optional but highly recommended for a subtle boost in flavor that’s elegant and unique.
Step 4: Combine Wet and Dry Ingredients
Gradually add the dry flour mixture into your wet ingredients, mixing just until everything comes together. Be careful not to overmix here — stopping as soon as the dough forms helps keep cookies tender rather than tough.
Step 5: Chill the Dough
Divide your dough into two portions and wrap each tightly in plastic wrap before refrigerating for at least 30 minutes. Chilling makes the dough easier to handle and roll, plus it helps your cookies keep their perfect heart shape during baking.
Step 6: Roll and Cut Cookies
Once chilled, lightly flour your surface and roll the dough out to about 1/4-inch thickness. Use a heart-shaped cookie cutter for that charming silhouette. This part is where the magic starts to take shape – these hearts will soon transform into edible works of art.
Step 7: Bake to Perfection
Place the cut cookies on your prepared baking sheets and bake for 8 to 10 minutes or until the edges just begin to turn golden. Keep an eye on them — the goal is soft edges with a slight golden kiss, not crispy brown.
Step 8: Cool Completely
Allow the cookies to cool entirely on a wire rack before you move on to decorating. This is important because warm cookies can melt or smear your lovely buttercream roses, and we want every petal to be picture perfect.
Step 9: Prepare Buttercream Frosting
Beat the softened butter with a mixer on medium speed until it becomes light and fluffy, about 2 to 3 minutes. Then add powdered sugar a half cup at a time on low speed until it’s fully blended. Mix in the heavy cream, vanilla extract, and a pinch of salt, then bump the speed back up to medium to whip the frosting into a smooth, luscious cloud.
Step 10: Color and Pipe Buttercream Roses
Divide the buttercream into bowls and tint each with your chosen food colors. Fit a piping bag with a large rose tip, like a Wilton 1M, and fill it with your colorful buttercream. Hold the bag at a 45-degree angle and pipe swirling rose shapes starting from the center outward on every cookie. Each swirl turns your sugar cookies into charming little bouquets.
How to Serve Heart-Shaped Sugar Cookies with Buttercream Roses Recipe

Garnishes
Enhance these treats with delicate, edible glitter or tiny sugar pearls to add extra sparkle and depth to your buttercream roses. Fresh mint leaves or even a light dusting of powdered sugar around the plate can elevate presentation and add a fresh contrast to the sweet richness.
Side Dishes
Serve these cookies alongside a cup of hot tea, fresh berries, or even a chilled glass of sparkling rosé for a sophisticated sweet pairing. Their buttery, floral flavor complements refreshing drinks and light dishes perfectly, making them excellent for afternoon tea parties or celebratory brunches.
Creative Ways to Present
Arrange your decorated cookies in a pretty box with tissue paper for an irresistible gift. Or stack them in layers separated by parchment paper on a pretty plate or cake stand to create a stunning centerpiece. You might even attach a little note to each cookie for a personal touch at weddings or Valentine’s gatherings.
Make Ahead and Storage
Storing Leftovers
Keep your cookies fresh by storing them in an airtight container at room temperature. Properly stored, they will stay soft and flavorful for up to five days. Be sure the buttercream decorations have fully set before stacking to prevent smudging.
Freezing
You can freeze undecorated cookie dough wrapped in plastic wrap for up to 3 months. When you want cookies, thaw overnight in the fridge, then roll, cut, and bake as usual. For fully decorated cookies, freezing is possible but best done with care in single layers separated by parchment paper inside a sealed container or bag.
Reheating
Because these cookies are best enjoyed soft, avoid reheating the cookies themselves which might dry them out. Instead, enjoy them fresh from the container at room temperature. If your buttercream feels a bit firm after refrigeration, let cookies sit at room temperature for 30 minutes before serving.
FAQs
Can I use other extracts instead of almond?
Absolutely! While almond extract adds a lovely subtle note, feel free to experiment with lemon, orange, or even coconut extracts to customize your cookies’ flavor profile. Just use a small amount so it doesn’t overpower the vanilla base.
What if I don’t have a heart-shaped cookie cutter?
No worries at all. You can use any cookie cutter shape you love, or carefully shape the dough by hand into hearts with a knife. The buttercream roses are the real showstopper, so the shape is flexible to match your occasion.
How do I prevent my buttercream roses from melting?
Be sure your cookies have cooled completely before frosting, and keep finished cookies in a cool, dry place. Avoid decorating in very warm or humid environments, which can soften the buttercream. Refrigeration before serving can help firm them if needed.
Can I make the buttercream roses ahead of time?
Yes, you can pipe the roses onto wax paper in advance and freeze them. Once frozen, carefully transfer the piped roses to a sealed container and keep them frozen until you’re ready to decorate the cookies. This saves time on the day of serving.
Are these cookies gluten-free?
This specific recipe uses all-purpose wheat flour, so it’s not gluten-free. However, you can try substituting a gluten-free flour blend designed for baking in equal measure. Just note that texture may vary slightly.
Final Thoughts
Trying out the Heart-Shaped Sugar Cookies with Buttercream Roses Recipe is truly a rewarding experience, both for your baking skills and for the joy it brings to those lucky enough to taste them. From the tender cookie bases to the vibrant and creamy rose decorations, every bite is a celebration of love and care in the kitchen. Trust me, once you make these, you’ll want to keep this recipe close for every special occasion and spontaneous sweet craving alike. So grab your piping bag and heart cutter—your kitchen is about to become the coziest, most beautiful spot in the house!
Print
Heart-Shaped Sugar Cookies with Buttercream Roses Recipe
- Prep Time: 1 hour 30 minutes
- Cook Time: 10 minutes
- Total Time: 1 hour 40 minutes
- Yield: 24 cookies
- Category: Dessert
- Method: Baking
- Cuisine: American
- Diet: Vegetarian
Description
Delight in these charming Heart-Shaped Sugar Cookies topped with elegant Buttercream Roses, perfect for special occasions or just a sweet treat. The tender, buttery cookies are infused with vanilla and a hint of almond, baked to golden perfection, and decorated with silky, colored buttercream piped into beautiful rose designs.
Ingredients
For the Sugar Cookies
- 2 3/4 cups (340g) all-purpose flour
- 1 tsp baking powder
- 1/2 tsp salt
- 1 cup (230g) unsalted butter, softened
- 1 cup (200g) granulated sugar
- 1 large egg
- 1 tsp vanilla extract
- 1/2 tsp almond extract (optional, for flavor)
For the Buttercream Roses
- 1 cup (230g) unsalted butter, softened
- 4 cups (480g) powdered sugar
- 2 tbsp heavy cream (or milk)
- 1 tsp vanilla extract
- Food coloring (red, pink, or other desired colors)
Instructions
- Preheat and Prepare Baking Sheets: Preheat your oven to 350°F (175°C). Line two baking sheets with parchment paper or silicone baking mats to ensure the cookies bake evenly and don’t stick.
- Mix Dry Ingredients: In a medium bowl, whisk together the flour, baking powder, and salt, then set aside to be incorporated later.
- Cream Butter and Sugar: In a large bowl, use a mixer to cream the softened butter and granulated sugar until the mixture is light and fluffy, about 2-3 minutes, which helps create tender cookies.
- Add Wet Ingredients: Beat in the egg, vanilla extract, and optional almond extract until fully combined, adding flavor and binding the ingredients.
- Combine Dry and Wet Ingredients: Gradually add the dry flour mixture to the wet ingredients, mixing only until just combined to avoid overworking the dough.
- Chill the Dough: Divide the dough into two portions, wrap each in plastic wrap, and refrigerate for at least 30 minutes. Chilling firms the dough, making it easier to roll and helps prevent spreading during baking.
- Roll and Cut Cookies: On a lightly floured surface, roll out the chilled dough to approximately 1/4-inch thickness. Use a heart-shaped cookie cutter to cut out the cookies, creating festive shapes.
- Bake the Cookies: Place the cut cookies on prepared baking sheets and bake for 8-10 minutes or until the edges are lightly golden, indicating they are perfectly baked.
- Cool the Cookies: Transfer the cookies to a wire rack and allow them to cool completely before decorating, ensuring the buttercream doesn’t melt.
- Prepare Buttercream: In a large bowl, beat the softened butter with a mixer on medium speed for 2-3 minutes until light and fluffy, creating a smooth base for the frosting.
- Add Powdered Sugar: Gradually add powdered sugar in 1/2 cup increments while mixing on low speed to avoid a sugar cloud, mixing until fully incorporated.
- Add Cream and Vanilla: Stir in the heavy cream, vanilla extract, and a pinch of salt, then increase the speed to medium and beat until the frosting is smooth, creamy, and fluffy.
- Color the Buttercream: Divide the buttercream into separate bowls and tint each with desired food coloring to create vibrant, beautiful roses.
- Fill Piping Bag: Fit a piping bag with a large rose tip such as Wilton 1M, then fill it with the colored buttercream for decorating.
- Pipe Buttercream Roses: Hold the piping bag at a 45-degree angle over the center of each cookie. Begin piping with a swirl from the middle outward to form a delicate rose shape.
- Decorate All Cookies: Repeat the piping technique on all cookies, alternating colors as desired to create a lovely variety of buttercream roses.
Notes
- Chilling the dough is crucial for handling and helps maintain cookie shape during baking.
- Ensure cookies are completely cooled before decorating to prevent buttercream from melting.
- Almond extract is optional but adds a lovely subtle flavor to the cookies.
- For different flower designs, try using other piping tips and techniques.
- Store decorated cookies in an airtight container at room temperature for up to 3 days.

