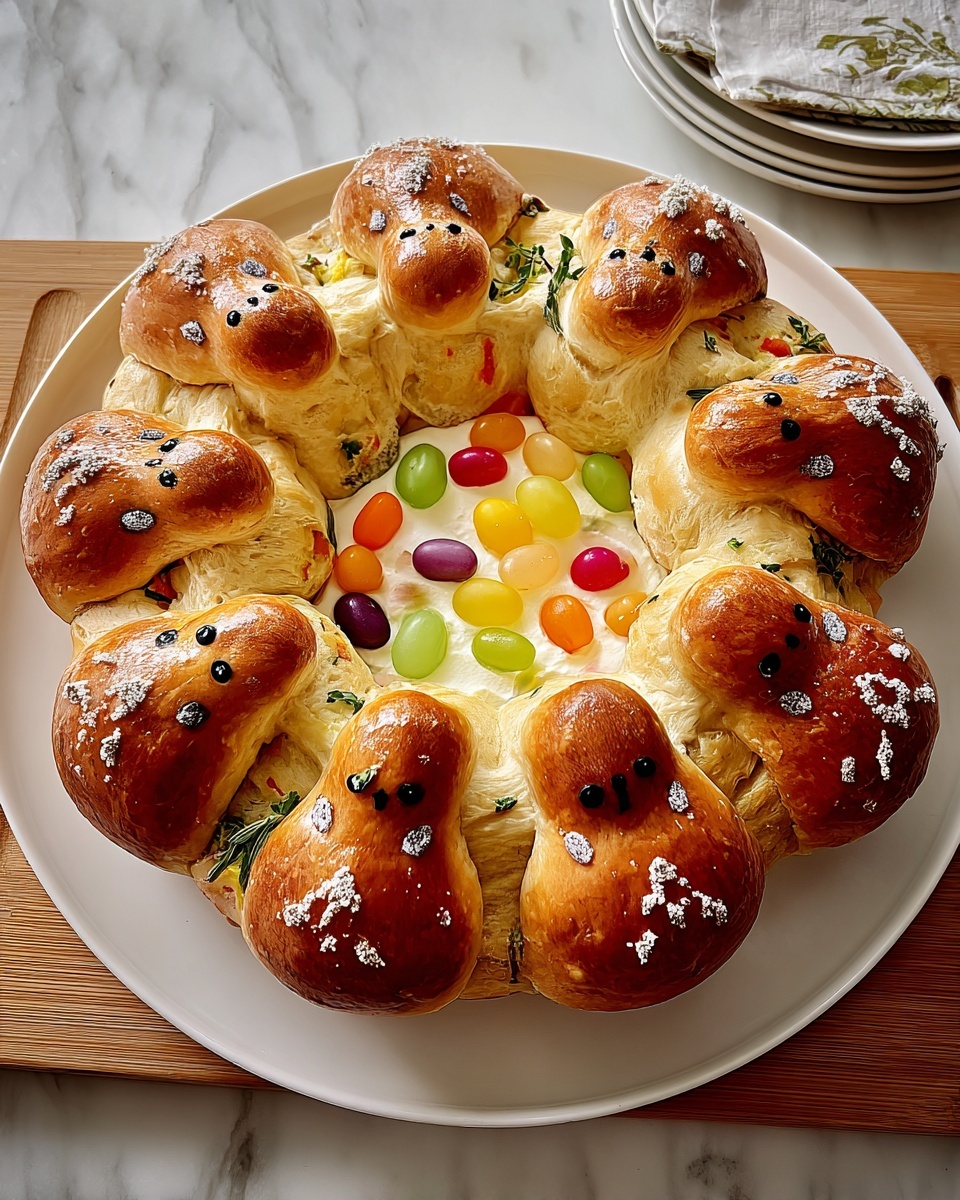
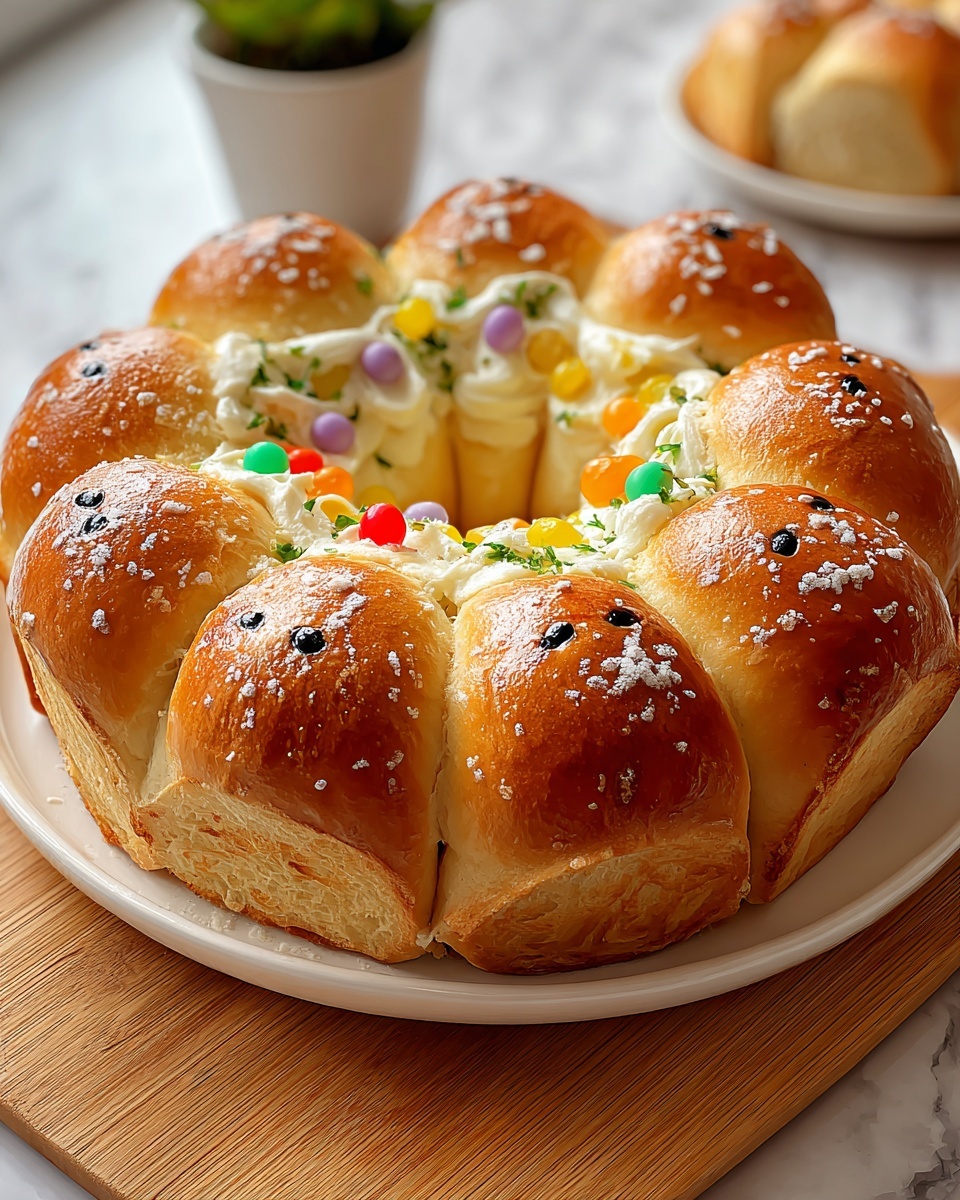
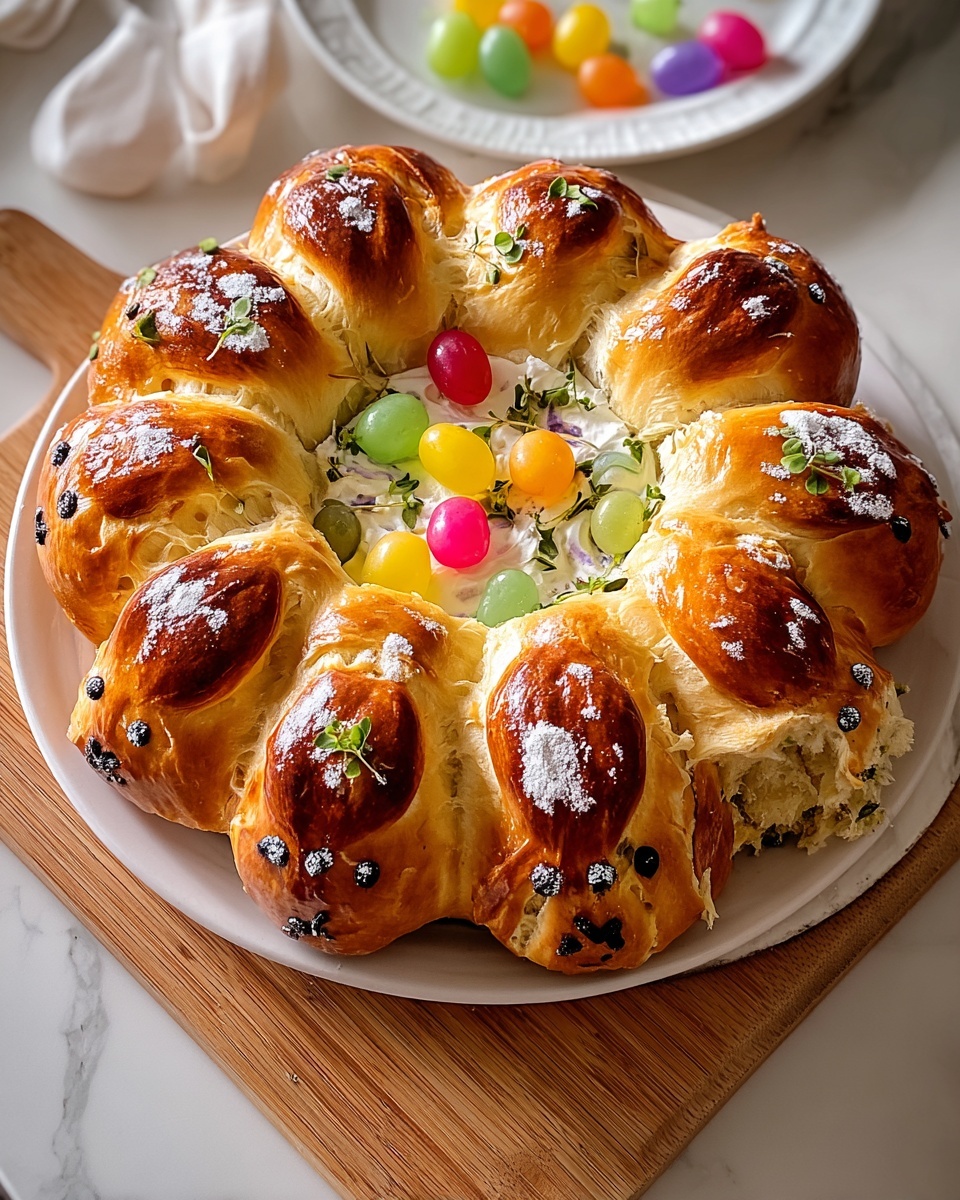
If you are looking to wow friends and family with a delightful centerpiece that tastes just as good as it looks, this Easter Bunny Bread Recipe is exactly what you need. This charming, soft bread shaped like an adorable bunny brings a festive touch to your table while filling your home with the warm, comforting scent of freshly baked bread. With simple ingredients and a fun shaping technique, it’s a joyous baking project that will make your Easter celebrations truly special and memorable.
Ingredients You’ll Need
The secret to perfect Easter Bunny Bread Recipe lies in combining straightforward, wholesome ingredients that create a soft, tender bread with a perfectly golden crust. Each ingredient plays its role, contributing to the texture, flavor, and overall enjoyment of this delightful treat.
- 4 cups all-purpose flour: Provides the sturdy base and structure for the bread while keeping it soft and fluffy inside.
- 2 ¼ tsp active dry yeast: The magic ingredient that makes the bread rise beautifully and develop that light, airy texture.
- ¼ cup sugar: Adds just the right amount of sweetness to balance the bread and feed the yeast for an active rise.
- 1 tsp salt: Enhances all the flavors and strengthens the dough for a perfect crumb.
- 1 cup warm milk (110°F/43°C): Warms the yeast and hydrates the flour for a tender dough—make sure it’s warm, not hot!
- ½ cup unsalted butter, melted: Brings richness and a soft crumb to the bread.
- 2 large eggs: Adds moisture, color, and binds the dough beautifully for easy shaping.
How to Make Easter Bunny Bread Recipe
Step 1: Activate Your Yeast
Begin by whisking the warm milk, sugar, and active dry yeast in a bowl. Set this mixture aside for about 5 minutes until it becomes bubbly and frothy. This little pause wakes up the yeast, ensuring your bread will rise nicely and have that delightful, light texture that’s so pleasant to bite into.
Step 2: Combine Dry and Wet Ingredients
In another bowl, whisk together the flour and salt. Then gradually add the yeast mixture, melted butter, and eggs to the dry ingredients. Stir gently until a shaggy dough forms. This step is where all your simple ingredients start coming together, ready to transform into a festive bread.
Step 3: Knead for a Perfect Dough
Turn your dough out onto a floured surface and knead it with care for 8 to 10 minutes. This process builds strength in the dough, making it elastic and smooth, which helps the bread hold its bunny shape during baking. Kneading may be a workout for your arms, but the reward is well worth it!
Step 4: First Rise
Place the kneaded dough into a greased bowl, cover it with a damp cloth to keep moisture in, and leave it in a warm spot. Patience is key as the dough doubles in size, which typically takes between 1 and 2 hours. This rise not only puffs the dough but also deepens its flavor.
Step 5: Shape Your Easter Bunny
After the dough has risen, punch it down gently to release excess air. Shape one large piece into the oval body of the bunny while using smaller dough portions to fashion ears and feet. This step is where creativity shines—you can make your bunny as simple or as detailed as you like.
Step 6: Bake to Golden Perfection
Preheat your oven to 350°F (175°C). Place your bunny-shaped dough onto a parchment-lined baking sheet. Bake for 25 to 30 minutes, watching for that glorious golden-brown crust. Once baked, your Easter Bunny Bread Recipe will be ready to charm everyone at the table with its adorable shape and irresistible aroma.
How to Serve Easter Bunny Bread Recipe
Garnishes
Enhance the festive look by brushing the top of your bunny bread with melted butter after baking to add shine. You can also sprinkle a little powdered sugar or light cinnamon for a subtle touch of sweetness and color that makes your bunny even more appealing.
Side Dishes
Easter Bunny Bread pairs wonderfully with both sweet and savory accompaniments. Try serving it alongside fruit preserves, honey butter, or a creamy cheese spread. For a savory twist, offer it with soups or salads for a complete and festive meal experience.
Creative Ways to Present
Bring extra smiles by placing your Easter Bunny Bread on a decorative platter surrounded by fresh spring flowers or pastel-colored eggs. For a playful touch, add small olive “eyes” or use tiny bits of dough to make a nose and whiskers before baking. Presentation can elevate this bread from delicious staple to charming holiday centerpiece.
Make Ahead and Storage
Storing Leftovers
Once cooled, wrap your Easter Bunny Bread Recipe tightly in plastic wrap or store it in an airtight container to keep it fresh. Stored properly, it can stay soft and tasty for up to three days at room temperature, perfect for enjoying throughout your holiday weekend.
Freezing
This bread freezes beautifully if you want to prepare early. Wrap it well in plastic wrap followed by aluminum foil to protect it from freezer burn, then freeze for up to one month. Thaw it overnight in the fridge, then bring it to room temperature before serving.
Reheating
To revive the fresh-from-the-oven taste and texture, warm your leftover Easter Bunny Bread Recipe in a preheated oven at 325°F (160°C) for about 10 minutes. This will refresh the crust and make it soft and inviting once again—just like the first time you baked it.
FAQs
Can I use whole wheat flour instead of all-purpose flour?
Yes, you can substitute whole wheat flour, but keep in mind that the bread might be denser and have a nuttier flavor. You might also want to add a bit more water as whole wheat absorbs more liquid than all-purpose flour.
How do I prevent my dough from sticking during shaping?
Lightly flour your work surface and your hands before shaping the dough. Avoid using too much flour, as it can dry out the dough; just enough to keep it manageable is perfect.
What if my dough doesn’t rise properly?
Make sure your milk is warm, not hot, to avoid killing the yeast. Also, yeast can lose potency if expired or stored improperly, so always check the freshness before starting.
Can I add decorations to my Easter Bunny Bread?
Absolutely! Feel free to use raisins, nuts, seeds, or edible flowers to decorate your bunny before or after baking, adding personality and extra flavor to your bread.
Is this bread suitable for sandwich making?
While it’s soft and fluffy, the shape may not lend itself well to sandwiches, but it’s perfect for serving alongside dips, soups, or simply enjoyed with butter and jam.
Final Thoughts
Making this Easter Bunny Bread Recipe is not just about baking bread, it’s about creating a joyful and memorable experience that brings warmth to your kitchen and smiles to your table. With its simple ingredients and playful shape, it’s a wonderful way to celebrate the season and share homemade goodness with your loved ones. Grab your apron and give it a try—you’ll be delighted with every soft, golden bite!
Print
Easter Bunny Bread Recipe
- Prep Time: 20 minutes
- Cook Time: 30 minutes
- Total Time: 1 hour 50 minutes
- Yield: 12 servings
- Category: Bread
- Method: Baking
- Cuisine: American
Description
This delightful Easter Bunny Bread recipe is a fun and festive yeast bread shaped like an adorable bunny, perfect for celebrating the holiday with family and friends. Soft, fluffy, and slightly sweet, this bread uses basic pantry ingredients and is baked to a golden brown perfection. Its charming presentation makes it a centerpiece on any Easter table.
Ingredients
Dough Ingredients
- 4 cups all-purpose flour
- 2 ¼ tsp active dry yeast
- ¼ cup sugar
- 1 tsp salt
- 1 cup warm milk (110°F/43°C)
- ½ cup unsalted butter, melted
- 2 large eggs
Instructions
- Activate Yeast: In a bowl, mix warm milk, sugar, and yeast; let sit for 5 minutes until bubbly. This activates the yeast and ensures it’s alive and ready to help the dough rise.
- Combine Dry and Wet Ingredients: In another bowl, whisk together flour and salt; gradually combine with the yeast mixture along with melted butter and eggs until forming a shaggy dough. Mixing these together forms the base of your bread.
- Knead the Dough: Knead the dough on a floured surface for 8-10 minutes until smooth and elastic. This develops the gluten which is essential for a soft, airy texture.
- First Rise: Place dough in a greased bowl, cover with a damp cloth, and let rise in a warm area until doubled in size, about 1-2 hours. This rising period is crucial for flavor and lightness.
- Shape the Bunny: Punch down the dough to release air. Shape one large piece into an oval for the body, and form smaller pieces for the ears and feet. Assemble the pieces together to create the bunny shape on a lined baking sheet.
- Bake: Preheat oven to 350°F (175°C). Bake the shaped bunny bread for 25-30 minutes until golden brown. The bread is baked until it achieves a beautiful crust and is cooked through.
Notes
- Ensure the milk is warm, not hot, to avoid killing the yeast.
- Kneading time is important for the right texture; do not rush this step.
- For a shinier crust, brush the baked bread with melted butter right after it comes out of the oven.
- Let the bread cool completely before slicing to prevent it from becoming gummy.
- You can add raisins or chocolate chips for extra flavor when shaping the bunny.


