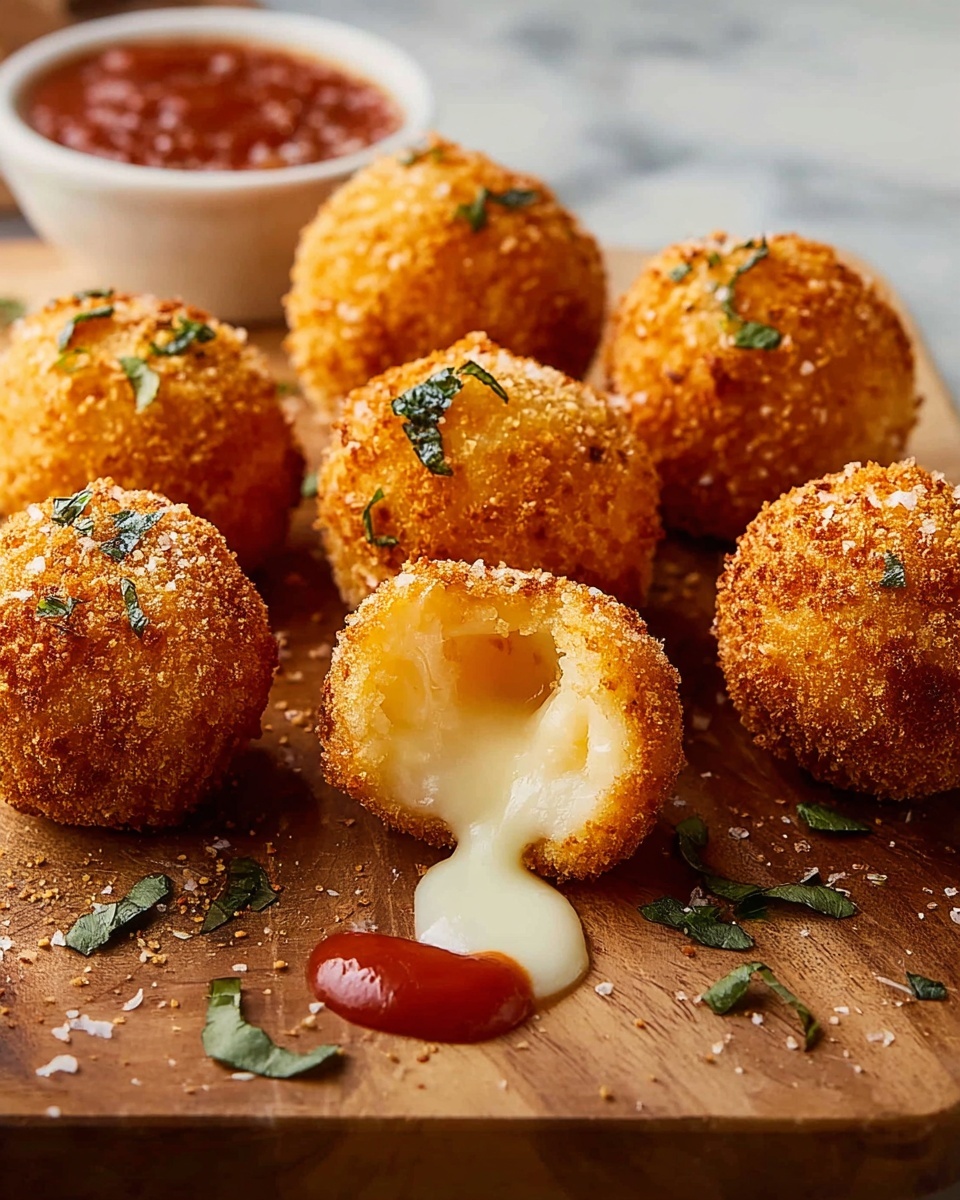
If you are craving an irresistible snack that’s crispy on the outside and gooey, cheesy on the inside, then you absolutely have to try this Crispy Fried Cheese Balls Recipe That’s Better Than Takeout Recipe. It’s a mouthwatering crowd-pleaser with perfectly seasoned cheese nestled in a golden, crunchy shell. Every bite delivers that amazing combination of textures and bold flavors, making it a favorite for game days, parties, or simply whenever you’re in the mood for a little comfort food indulgence. Trust me, once you make these, you’ll never want to order fried cheese balls from takeout again!
Ingredients You’ll Need
These ingredients are straightforward but absolutely essential to getting those perfect flavorful, crispy cheese balls. Each element is picked to complement the rich cheese while contributing to texture, spice, and that golden crunch you’ll crave.
- 4 cups grated cheese or vegan cheese: The star of the dish, choose a good melting variety for gooey cheesy centers.
- 2 eggs: Acts as a binder to hold everything together and ensure a smooth texture.
- 4 tbsp all-purpose flour: Helps absorb moisture so the balls don’t fall apart when frying.
- 2 tsp garlic powder: Adds a savory kick to enhance the cheese’s flavor.
- 2 tsp onion powder: Brings in a subtle depth and sweetness.
- 2 tsp oregano: Offers an earthy, herbal touch that ties all the seasonings together.
- 1 tsp black pepper: Gives a gentle heat and sharpness for balance.
- 1 tsp smoked paprika: Imparts warmth and a smoky note for extra complexity.
- 1 tsp chili flakes: Just enough to add a hint of spice and excitement.
- 1 cup bread crumbs: Essential for that irresistible crunchy coating outside the cheese balls.
- 6-8 cups vegetable oil: For perfectly deep-frying the balls to a golden crisp.
How to Make Crispy Fried Cheese Balls Recipe That’s Better Than Takeout Recipe
Step 1: Prepare Your Workspace
Start by lining a baking tray with parchment paper. This is where your coated cheese balls will rest before frying, so make sure it’s ready to keep things tidy and prevent sticking.
Step 2: Mix the Cheese Ball Batter
In a large bowl, toss together the grated cheese, eggs, flour, and all those wonderful spices. Using a hand mixer will save you time and make sure everything is thoroughly combined, giving you a smooth, flavorful mixture to work with.
Step 3: Shape the Cheese Balls
Use about 2 tablespoons of the cheese mixture and roll it gently between your hands to form small, tight balls. Keeping them uniform helps them cook evenly and look extra tempting.
Step 4: Coat with Bread Crumbs
Roll each ball evenly in the breadcrumb mixture, ensuring every inch gets covered. This coating is the secret to that unbeatable crunch that makes this Crispy Fried Cheese Balls Recipe That’s Better Than Takeout Recipe so memorable.
Step 5: Chill Before Frying
Place the breaded balls on your lined baking tray and refrigerate for 30 to 45 minutes. This step firms them up and prevents them from bursting open when they hit the hot oil.
Step 6: Get Ready to Fry
Line another tray with paper towels — this will be your resting spot for the fried cheese balls to drain off excess oil and stay perfectly crisp.
Step 7: Heat the Oil
Fill a sturdy deep pan with 6 to 8 cups of vegetable oil and heat it up to 350–355°F. Using a thermometer is the best way to get that ideal frying temperature for golden, crispy results every time.
Step 8: Fry the Cheese Balls
Carefully drop 4 to 5 cheese balls at a time into the hot oil. Fry each for about 30 seconds per side or until they turn a gorgeous golden brown. Keep an eye on them to avoid overcooking, as the cheese inside should stay melty and dreamy.
Step 9: Drain the Excess Oil
Remove the cheese balls with a slotted spoon and place them on your paper towel-lined tray. This allows any extra oil to drip off so your bites remain crisp rather than greasy.
Step 10: Serve Immediately
Serve these crispy wonders fresh and hot with marinara sauce and some fresh basil sprinkled on top for a vibrant flavor contrast. Nothing beats biting into these cheese balls right out of the fryer!
How to Serve Crispy Fried Cheese Balls Recipe That’s Better Than Takeout Recipe
Garnishes
Simple garnishes like freshly chopped basil, a sprinkle of Parmesan cheese, or even a drizzle of balsamic glaze can add an extra pop of color and flavor that perfectly complements the crispy fried cheese balls.
Side Dishes
Pair your crispy cheese balls with a zesty marinara dipping sauce, garlic aioli, or a fresh, tangy salad to balance out the richness. They also make a great appetizer alongside soups or pasta dishes for a fuller meal.
Creative Ways to Present
For parties, serve these on a decorative platter with small bowls of assorted dips like spicy sriracha mayo, ranch, or sweet chili sauce. You could even skewer them with toothpicks for easy grabbing, making your appetizer table irresistible.
Make Ahead and Storage
Storing Leftovers
If you happen to have leftovers, store the unfried cheese balls in an airtight container in the refrigerator for up to 2 days. This keeps them fresh and ready to fry whenever you’re craving a quick snack.
Freezing
These cheese balls freeze beautifully! After shaping and coating, place them on a baking sheet in a single layer to freeze solid, then transfer to a freezer-safe container. They can be frozen for up to 1 month and fried straight from the freezer—no thawing needed.
Reheating
The best way to reheat your leftover fried cheese balls is in a hot oven or air fryer at 350°F for about 5-7 minutes to regain their crispiness. Microwave reheating tends to make them soggy, which nobody wants!
FAQs
Can I use different types of cheese for these cheese balls?
Absolutely! Feel free to experiment with cheeses like mozzarella, cheddar, or even a blend. Just choose ones that melt well for that gooey center everyone loves.
Is it necessary to chill the cheese balls before frying?
Yes, chilling them helps the balls firm up, preventing them from falling apart when fried and ensuring a crisp outer shell.
Can I bake these instead of frying?
While frying gives you that unbeatable crispiness, you can bake them at 400°F for 12-15 minutes, turning halfway through. They won’t be quite as crunchy but still delicious!
What dipping sauces go well with the Crispy Fried Cheese Balls Recipe That’s Better Than Takeout Recipe?
Marinara sauce is a classic choice, but garlic aioli, ranch, or spicy sriracha mayo also pair beautifully with these cheese balls, adding delicious flavor variety.
Are these cheese balls suitable for vegans?
Yes! Simply swap in vegan cheese and use a flax or chia egg as a binder for a vegan-friendly version that’s just as tasty.
Final Thoughts
If you’re ready to wow your taste buds and guests, give this Crispy Fried Cheese Balls Recipe That’s Better Than Takeout Recipe a try. It’s a simple, fun dish that delivers maximum flavor and a perfect crispy-cheesy combo all from the comfort of your kitchen. Once you taste these, they will definitely become your go-to snack for any occasion — I promise you won’t be disappointed!
Print
Crispy Fried Cheese Balls Recipe That’s Better Than Takeout Recipe
- Prep Time: 15 minutes
- Cook Time: 10 minutes
- Total Time: 25 minutes plus 30-45 minutes chilling time
- Yield: 24 cheese balls
- Category: Snack
- Method: Frying
- Cuisine: American
Description
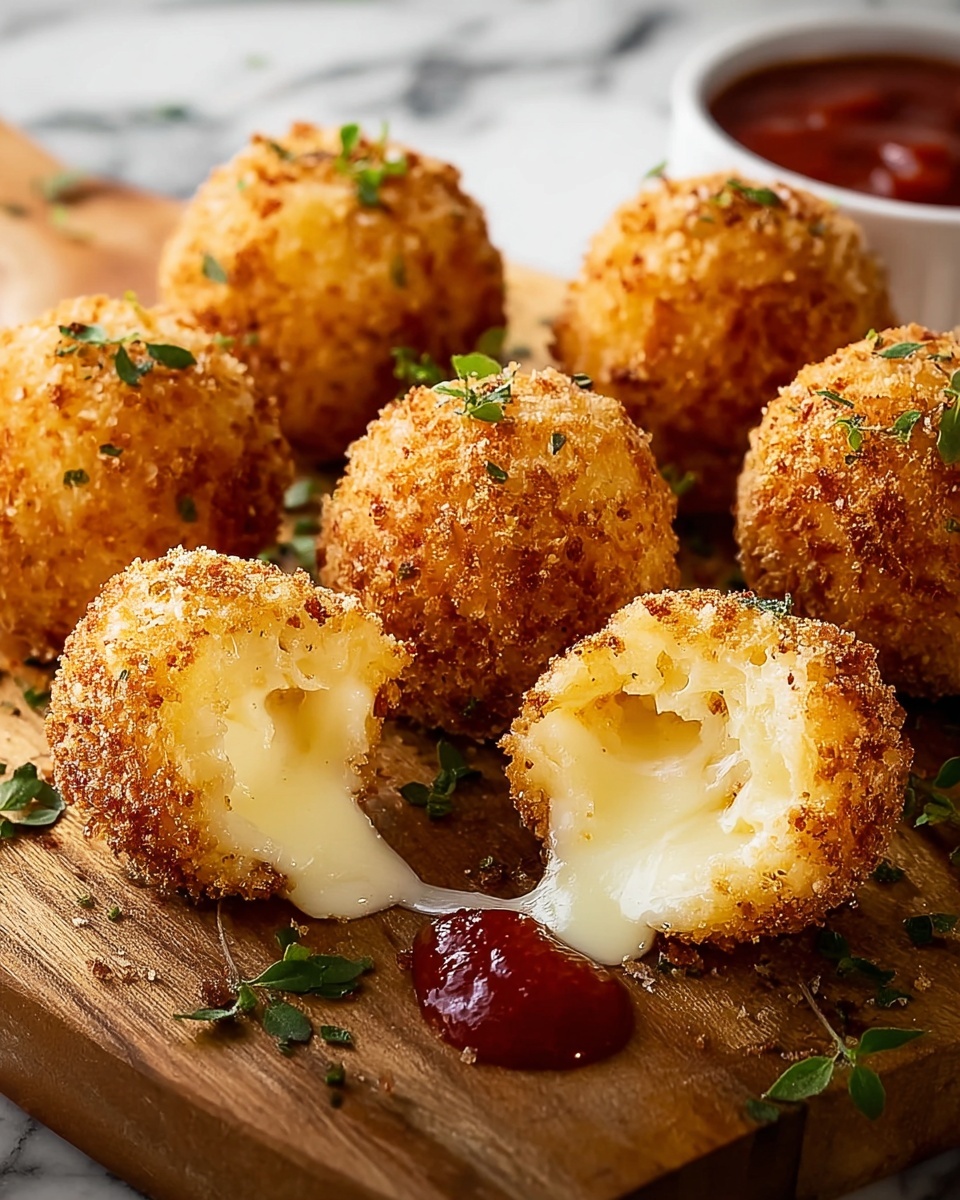
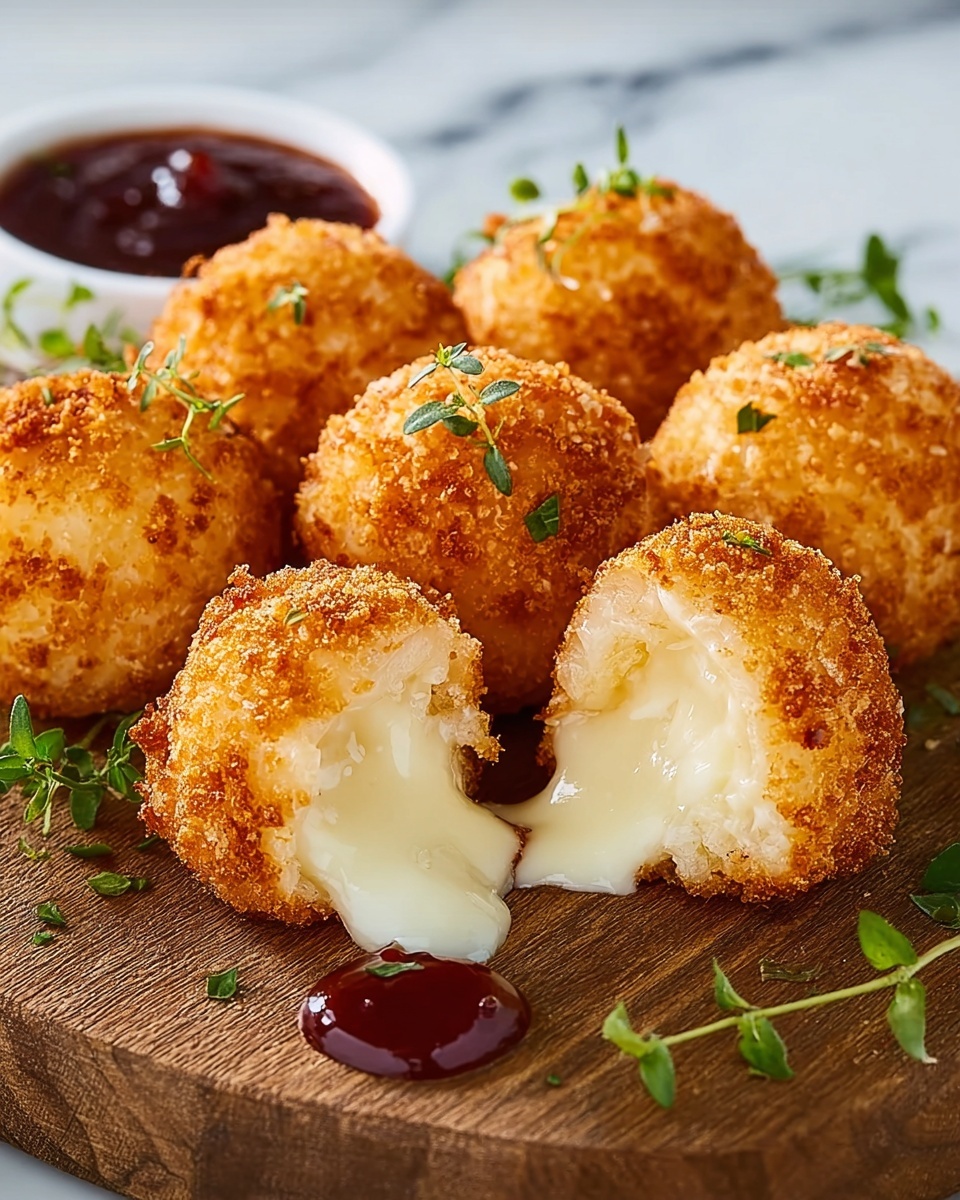
These Crispy Fried Cheese Balls are a delicious snack that’s perfectly golden and crunchy on the outside with a gooey, cheesy center. Easy to make at home, they offer a tastier and fresher alternative to takeout cheese balls, flavored with garlic, onion, oregano, smoked paprika, and chili flakes for a savory kick.
Ingredients
Cheese Ball Mixture
- 4 cups grated cheese or vegan cheese
- 2 eggs
- 4 tbsp all-purpose flour
- 2 tsp garlic powder
- 2 tsp onion powder
- 2 tsp oregano
- 1 tsp black pepper
- 1 tsp smoked paprika
- 1 tsp chili flakes
Coating
- 1 cup bread crumbs
Frying
- 6–8 cups vegetable oil
Instructions
- Prepare Tray: Line a baking tray with parchment paper and set it aside to place the coated cheese balls later.
- Mix Ingredients: In a large bowl, combine grated cheese, eggs, all-purpose flour, garlic powder, onion powder, oregano, black pepper, smoked paprika, and chili flakes. Use a hand mixer to blend everything thoroughly until fully incorporated.
- Form Balls: Scoop about 2 tablespoons of the cheese mixture and roll it between your hands to form small cheese balls.
- Coat with Bread Crumbs: Roll each cheese ball evenly in bread crumbs to coat thoroughly, then place them on the prepared tray.
- Chill: Refrigerate the coated cheese balls for 30–45 minutes to firm up and help them hold shape during frying.
- Prepare Oil for Frying: Line another tray with paper towels to drain excess oil after frying. Heat 6 to 8 cups of vegetable oil in a deep pot to 350–355°F, checking the temperature with a thermometer.
- Fry Cheese Balls: Fry 4 to 5 cheese balls at a time, cooking each side for about 30 seconds until the outside is golden brown and crispy.
- Drain and Serve: Remove the fried cheese balls from oil and place them on the paper towel-lined tray to drain excess oil. Serve them immediately with marinara sauce and fresh basil for a savory dipping experience.
Notes
- Make sure the oil temperature is maintained between 350–355°F for perfect crispiness.
- Do not overcrowd the pot while frying to avoid lowering the oil temperature.
- Use parchment paper for easy cleanup and to prevent sticking.
- Serve immediately for best texture and flavor.
- Vegan and regular cheese options can be used interchangeably depending on dietary preference.


