
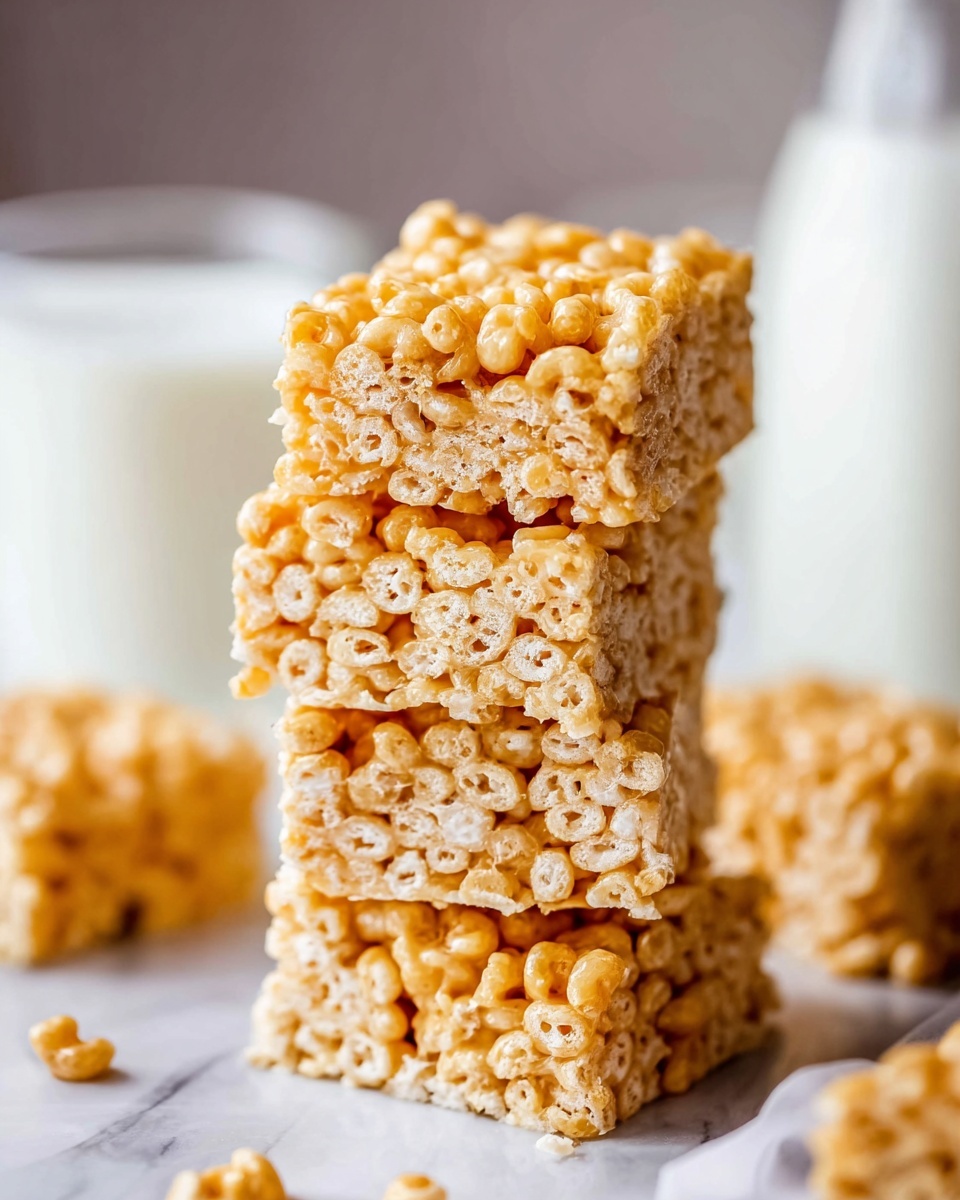
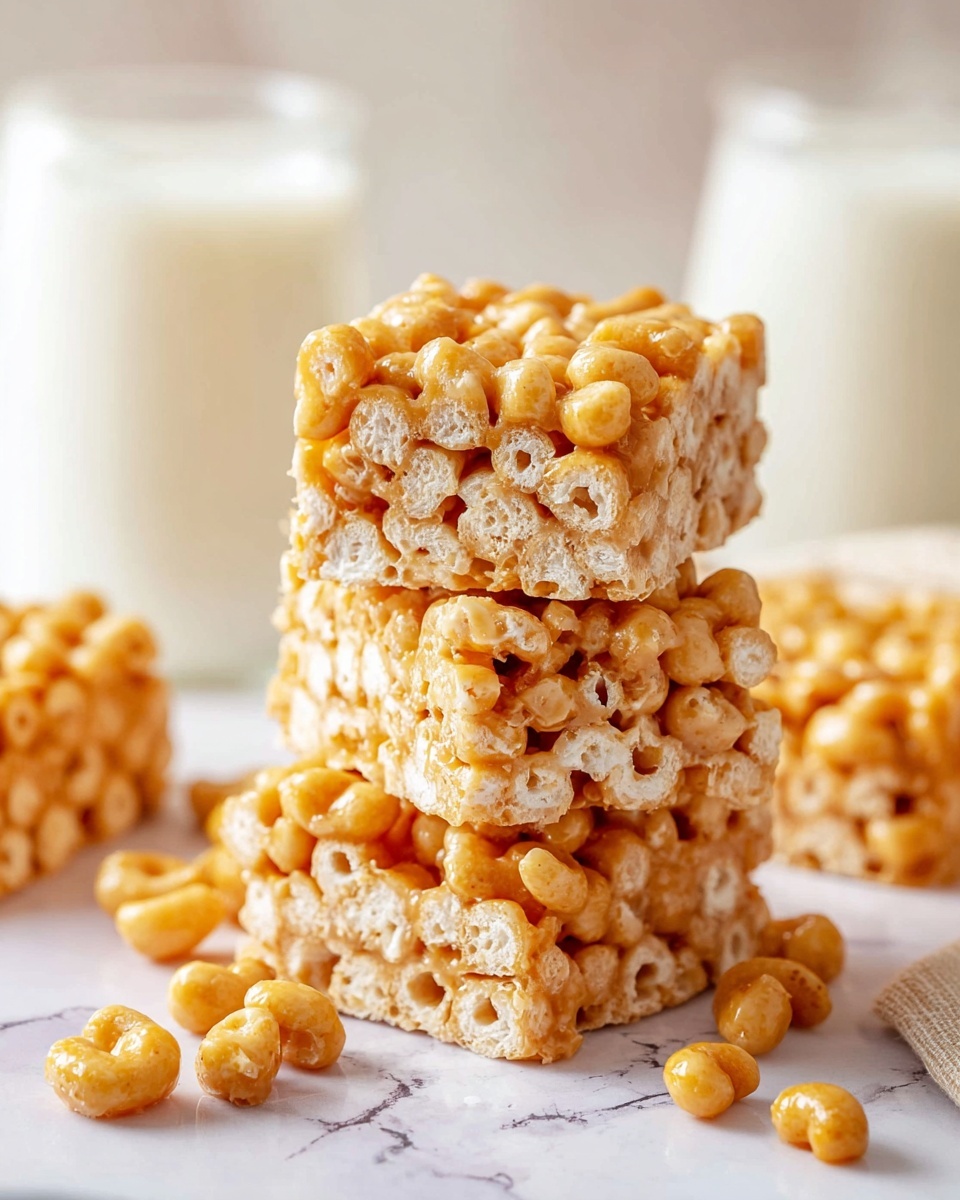
If you are looking for a simple, nostalgic treat that always hits the spot, this Cereal Bars Recipe is exactly what you need. It combines the crisp, sweet crunch of corn pops cereal with the irresistibly gooey softness of melted marshmallows and butter, creating a perfect balance of textures and flavors that both kids and adults adore. These bars are quick to whip up, require just a few pantry staples, and make for an ideal snack or dessert that feels homemade and comforting every time.
Ingredients You’ll Need
These ingredients are wonderfully straightforward but essential for achieving that classic Cereal Bars Recipe texture and taste. Each one plays its part, from the richness of butter to the fluffy marshmallows and the sweet crunch of corn pops cereal.
- 6 tablespoons (84 g) unsalted butter: Adds creaminess and helps create that smooth, bound-together base for the bars.
- 10 ounce (284 g) bag of large marshmallows: These melt down into a sweet, gooey binder that brings everything together with a delightful chew.
- 7 cups (196 g) corn pops cereal: The crunchy star ingredient, giving the bars their delightful crisp texture and classic corn sweetness.
How to Make Cereal Bars Recipe
Step 1: Prepare Your Pan
Start by lining the bottom of a 9×13 inch baking pan with parchment paper. This little prep step makes removing your bars a breeze once they’re set and ensures clean edges—so much better than sticky fingers at the end!
Step 2: Melt Butter and Marshmallows
Next, melt the butter in a large pot over medium-high heat. Once the butter has melted, add the marshmallows. Stir constantly to combine everything evenly, giving you a luscious, smooth marshmallow mixture. Be sure to stir often to avoid burning and to get that silky texture that makes the bars so divine.
Step 3: Incorporate the Cereal
Remove the pot from the heat and quickly pour in the corn pops cereal. Stir thoroughly so every piece of cereal is coated in that sweet, sticky marshmallow mix. If you prefer a slightly less gooey bar, tossing in an extra half cup of cereal is a great way to give more crunch without losing any flavor.
Step 4: Transfer to Pan and Press
Pour the cereal mixture into your prepared pan. Use the back of a silicone spatula to gently spread and press the mixture evenly but don’t compact it too much—keeping some lightness preserves the perfect chew-to-crunch ratio that makes this recipe so delightful.
Step 5: Let Cool and Set
Let your bars cool completely in the pan for about two hours. Once set, lift them out easily by the parchment paper and cut into squares. These bars are ready to enjoy immediately or to pack for a fun snack on the go!
How to Serve Cereal Bars Recipe
Garnishes
While these bars are delightful all on their own, you can sprinkle mini chocolate chips, colorful sprinkles, or even a drizzle of melted white or dark chocolate on top before they fully set to add a fun personal touch and extra flavor dimension.
Side Dishes
Pair your cereal bars with a glass of cold milk, a fresh fruit salad, or a scoop of vanilla ice cream for a balanced treat that covers all your bases: crispy, creamy, sweet, and refreshing.
Creative Ways to Present
Try cutting the bars into fun shapes using cookie cutters or layering them with peanut butter spread or Nutella in between for an indulgent sandwich. Wrapping them individually in parchment paper makes them perfect for lunchboxes or on-the-go munching.
Make Ahead and Storage
Storing Leftovers
Store any leftover cereal bars in an airtight container at room temperature. This keeps them fresh for up to five days, maintaining their chewy and crunchy texture perfectly.
Freezing
If you want to make these ahead of time, freeze the bars by wrapping them tightly in plastic wrap and placing them in a freezer-safe bag or container. They freeze well for up to two months—just thaw at room temperature before serving.
Reheating
While these bars are best served at room temperature, if you prefer a warm, melty version, pop a bar in the microwave for 10-15 seconds—it’s like a cozy hug in snack form!
FAQs
Can I use a different cereal instead of corn pops?
Absolutely! While corn pops give that signature crunch and sweetness, you can swap in Rice Krispies, Cheerios, or even multigrain cereals for a different twist. Just keep in mind the texture and sweetness may vary slightly with substitutions.
What if I don’t have unsalted butter?
You can use salted butter, but reduce any additional salt in your recipe or skip adding salt elsewhere to balance the flavors. Unsalted butter is preferred to better control the sweetness and saltiness.
How do I prevent the marshmallows from burning?
Maintaining medium to medium-high heat and stirring constantly are key. Never walk away while melting marshmallows—they can go from perfect to burnt quickly. Patience ensures that smooth, gooey texture.
Can I add mix-ins like nuts or chocolate chips?
Yes! Adding chocolate chips, nuts, dried fruit, or even coconut flakes can elevate this Cereal Bars Recipe. Stir them in right after mixing the cereal with marshmallows for even distribution.
Why do some cereal bars turn out dense and hard?
Pressing the mixture too firmly into the pan can cause density. Aim for gentle, even pressing to keep the bars light and chewy instead of rock hard.
Final Thoughts
This Cereal Bars Recipe is truly a kitchen classic that never gets old. It’s fast, fuss-free, and packed with nostalgic goodness that brings smiles with every bite. I warmly encourage you to try making these bars—it’s a wonderful treat to share with friends and family that always feels like a sweet hug from childhood.
Print
Cereal Bars Recipe
- Prep Time: 5 minutes
- Cook Time: 10 minutes
- Total Time: 2 hours 15 minutes (includes cooling time)
- Yield: 12 bars
- Category: Snack
- Method: Stovetop
- Cuisine: American
Description
This simple and delicious Cereal Bars recipe combines buttery melted marshmallows with crunchy corn pops cereal to create the perfect chewy and crispy treat. Ready in just 15 minutes plus cooling time, these bars make a fantastic snack or dessert for all ages.
Ingredients
Ingredients
- 6 tablespoons (84 g) unsalted butter
- 10 ounce (284 g) bag of large marshmallows
- 7 cups (196 g) corn pops cereal
Instructions
- Prepare the Pan: Line the bottom of a 9×13-inch baking pan with parchment paper. Set the pan aside to have it ready for the cereal mixture.
- Melt Butter and Marshmallows: In a large pot, melt the butter over medium-high heat. Add the marshmallows to the melted butter and stir continually to ensure even melting without burning. Stir frequently for a smooth and gooey mixture.
- Add Cereal: Once the marshmallows have completely melted and are combined with the butter, remove the pot from heat. Immediately pour in the corn pops cereal and mix thoroughly so every cereal piece is coated with the marshmallow mixture. For a less gooey texture, optionally add an extra 1/2 cup of cereal at a time.
- Transfer to Pan: Pour the coated cereal mixture into the prepared baking pan. Using the back of a silicone spatula, gently press down and evenly distribute the mixture without compacting it too much, to maintain a light texture.
- Cool and Set: Allow the mixture to cool and set in the pan for about 2 hours. Once completely firm, lift the bars out using the parchment paper and cut into 12 equal squares to serve.
Notes
- Do not over-stir the marshmallows to avoid burning or tough texture.
- Use parchment paper to make removing the bars easier after setting.
- Store bars in an airtight container to keep them fresh.
- For added flavor, consider mixing in chocolate chips or nuts with the cereal.


