There is nothing quite as comforting and energizing as waking up to a warm, fluffy breakfast that also packs a hefty protein punch. This Baked Protein Pancake Bowls Recipe is a delightful way to enjoy your pancakes with a twist—baked into a bowl that’s perfect for filling up and fueling your day. Each bite is a harmonious blend of soft, tender crumb and rich protein goodness, making it an ideal option whether you are after a quick weekday breakfast or a relaxed weekend treat. The simplicity of the ingredients combined with the ease of preparation will have you wondering why you didn’t try this sooner!
Ingredients You’ll Need
Let’s talk about the ingredients because they are the true heroes that make this Baked Protein Pancake Bowls Recipe so irresistible. Each component plays a crucial role—some add fluff and structure, others contribute flavor and moisture, and a few bring that satisfying protein boost to keep you full all morning long.
- 1/4 cup all-purpose flour: This is the base that provides the classic pancake texture, but you can switch it up with spelt, oat, gluten-free, or buckwheat flour depending on your preference or dietary needs.
- 1/4 cup protein powder: Choose a delicious flavor like Caramelised White Chocolate Premium Protein for a sweet twist that amps up the nutrition.
- 1/2 teaspoon baking powder: Essential for lightness, it helps the pancake bowl rise and stay fluffy.
- 1 tablespoon sugar-free granulated sweetener: Or use honey, maple syrup, or regular sugar for just a touch of natural sweetness.
- 1 large egg: Acts as a binder and adds richness, helping the pancake bowls hold their shape beautifully.
- 1/4 cup high-protein vanilla Greek yogurt: Adds moisture and tang while boosting the protein content even further.
- 2 tablespoons soy milk: Or any milk of your choice to bring the batter to the perfect consistency.
How to Make Baked Protein Pancake Bowls Recipe
Step 1: Preheat the Oven
Begin by preheating your oven to 350°F (180°C). This ensures that when your batter is ready, you can pop it straight in for perfectly even baking from start to finish.
Step 2: Mix the Dry Ingredients
In a mixing bowl, combine the flour, protein powder, baking powder, and your chosen sweetener. Mixing these dry ingredients first distributes everything evenly, setting a solid foundation for your pancake bowl texture.
Step 3: Whisk the Wet Ingredients
In a separate bowl, whisk together your egg, high-protein vanilla Greek yogurt, and soy milk. These wet ingredients bring moisture, richness, and tenderness to your baked pancake bowl, making it irresistibly soft.
Step 4: Combine Wet and Dry
Now, pour the wet ingredients into the bowl with the dry mix. Stir gently until you have a smooth batter. Be careful not to overmix; just enough to bring everything together is perfect for a tender crumb.
Step 5: Add Mix-Ins (Optional)
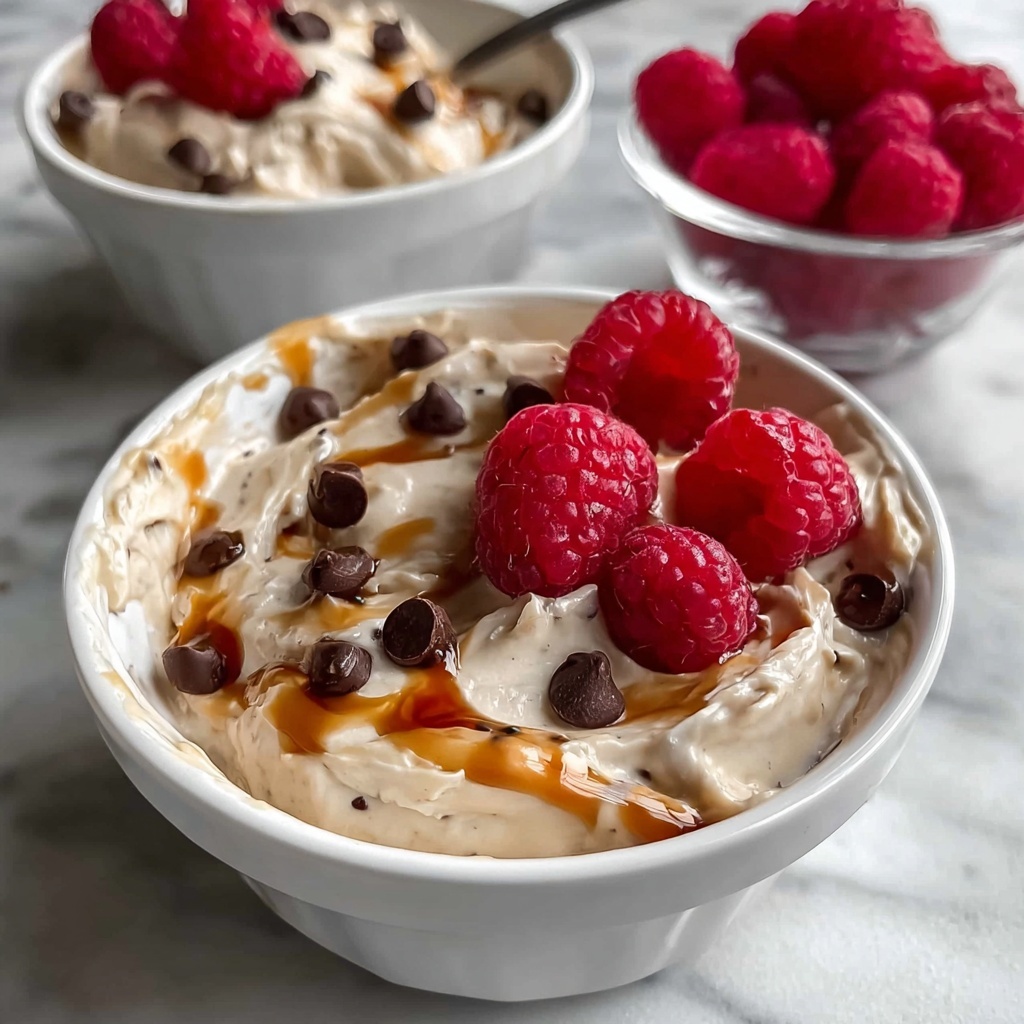
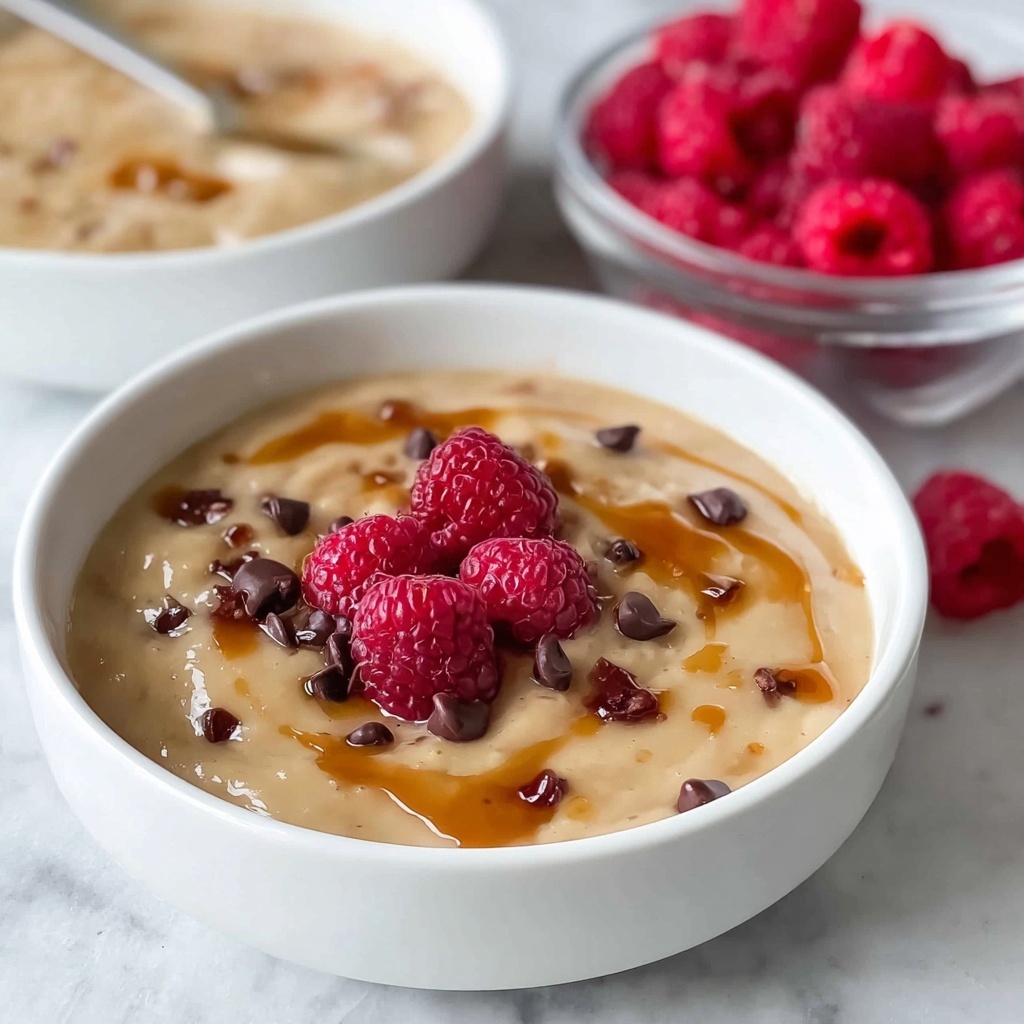
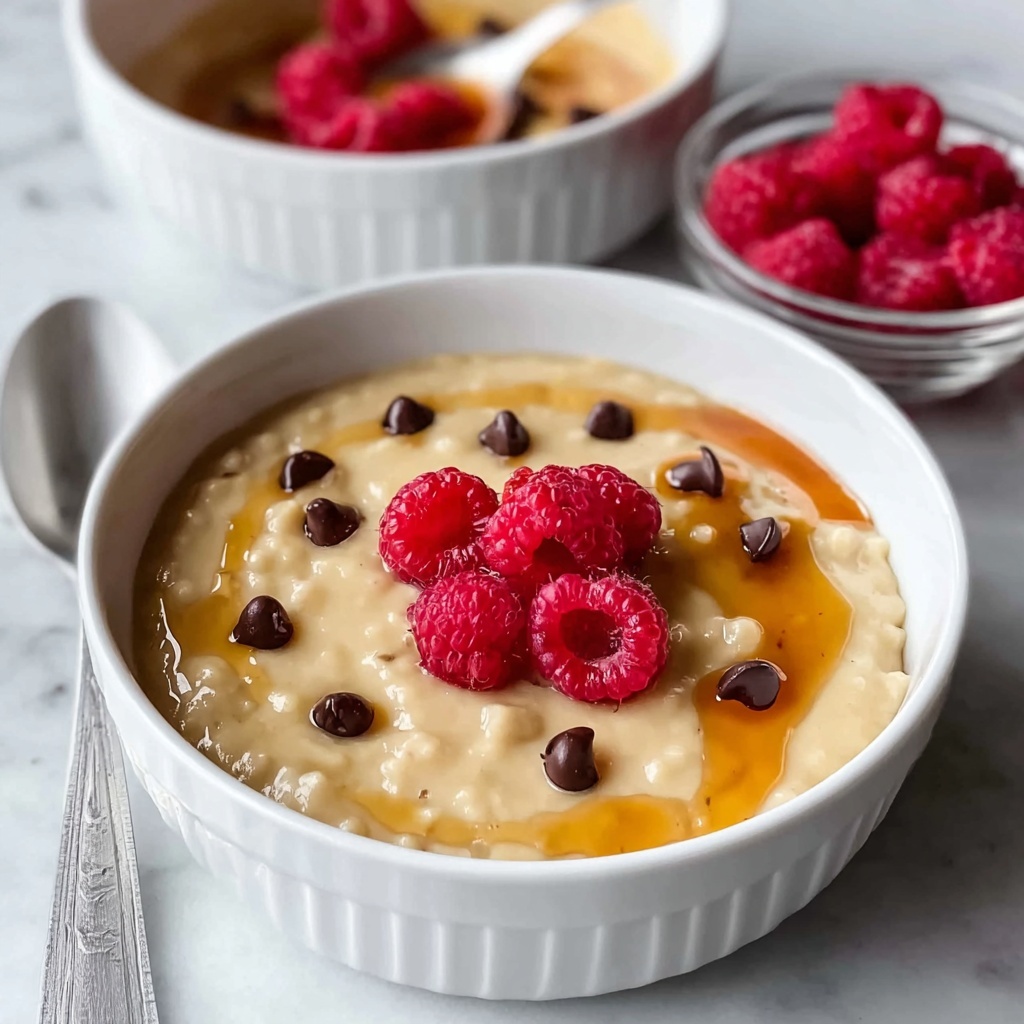
If you’re feeling adventurous, fold in some fresh berries or sugar-free chocolate chips. These add bursts of flavor and delightful texture that bring your Baked Protein Pancake Bowls Recipe to a whole new level of deliciousness.
Step 6: Bake the Pancake Bowl
Pour the batter into an oven-safe bowl or ramekin. Bake for about 20 to 22 minutes until the center is set and a skewer inserted comes out clean. This method ensures your pancake bowl is perfectly cooked and holds its shape beautifully.
Step 7: Cool and Refrigerate
Allow your baked pancake bowl to cool completely. Then refrigerate it for up to 3 to 4 days, giving you a grab-and-go protein-packed meal any time you need it.
Step 8: Reheat and Enjoy
When you’re ready to eat, simply microwave your pancake bowl for 40 to 60 seconds. Top with extra Greek yogurt or sugar-free maple syrup to elevate flavors and textures even more, making your breakfast experience blissful every time.
How to Serve Baked Protein Pancake Bowls Recipe
Garnishes
The beauty of this Baked Protein Pancake Bowls Recipe lies in its versatility, especially when it comes to garnishes. Fresh berries, a dollop of creamy Greek yogurt, a drizzle of sugar-free maple syrup, or crushed nuts can turn your pancake bowl into a work of art that’s both tasty and nutrient-packed.
Side Dishes
Pair your protein pancake bowl with some crisp fresh fruit or a small serving of nut butter to add different textures and flavors, creating a well-rounded meal that keeps hunger at bay well past lunch.
Creative Ways to Present
For a fun twist, serve your baked pancake bowl in colorful ramekins or even edible bread bowls to surprise and delight your family or guests. You might also layer it with yogurt and granola parfait-style for a playful breakfast presentation.
Make Ahead and Storage
Storing Leftovers
Store any leftover baked protein pancake bowls in an airtight container in the refrigerator for up to 3 to 4 days. This makes them perfect for meal prep or a quick boost after a workout.
Freezing
If you want to keep these pancake bowls longer, freeze them individually wrapped in plastic wrap or foil, then place in a freezer-safe bag. They can last up to a month without losing much flavor or texture.
Reheating
Reheat frozen or refrigerated pancake bowls in the microwave for about 40 to 60 seconds. This quick method retains the softness you love while warming everything through, ready to eat in no time.
FAQs
Can I use different protein powders for this recipe?
Absolutely! This Baked Protein Pancake Bowls Recipe is versatile. You can use whey, plant-based, or any flavored protein powder you prefer. Just keep in mind that flavors and sweetness may vary slightly.
Is it possible to make this recipe vegan?
Yes, with a few swaps! Use a flax or chia egg instead of a regular egg, plant-based yogurt, and your favorite plant milk. This will create a vegan-friendly pancake bowl that’s still packed with protein.
Can I add fruits or chocolate chips directly to the batter?
Definitely! Adding fresh berries or sugar-free chocolate chips lifts the flavor and makes every bite more exciting. Just fold them in gently before baking to avoid overmixing.
How do I ensure the pancake bowl cooks evenly?
Using an oven-safe ramekin or bowl helps the batter cook uniformly. Make sure your oven is preheated properly and avoid opening the oven door frequently, so the heat stays consistent.
Is this recipe suitable for meal prepping?
For sure! The Baked Protein Pancake Bowls Recipe refrigerates well and can be quickly reheated. It’s a fantastic way to have a healthy, protein-rich breakfast ready any day of the week.
Final Thoughts
I can honestly say this Baked Protein Pancake Bowls Recipe has become one of my go-to breakfasts whenever I want something both delicious and nourishing. Its simplicity, coupled with incredible flavor and portability, makes it a winner for busy mornings or relaxed brunches alike. Give it a try—you might just find yourself loving breakfast a little more every day!
Print
Baked Protein Pancake Bowls Recipe
- Prep Time: 5 minutes
- Cook Time: 20-22 minutes
- Total Time: 25-27 minutes
- Yield: 1 serving
- Category: Breakfast
- Method: Baking
- Cuisine: American
- Diet: Low Fat
Description
Delicious and nutritious baked protein pancake bowls made with a blend of flour, protein powder, Greek yogurt, and soy milk. This easy recipe yields a single serving that’s perfect for a high-protein breakfast or snack, with an option to customize by adding fresh berries or sugar-free chocolate chips.
Ingredients
Dry Ingredients
- 1/4 cup all-purpose flour (or spelt, oat, gluten-free, or buckwheat flour)
- 1/4 cup protein powder (e.g., Caramelised White Chocolate Premium Protein from MacroMike)
- 1/2 teaspoon baking powder
- 1 tablespoon sugar-free granulated sweetener (or regular sugar, honey, or maple syrup)
Wet Ingredients
- 1 large egg
- 1/4 cup high-protein vanilla Greek yogurt (e.g., Yopro High Protein Vanilla Greek yogurt)
- 2 tablespoons soy milk (or any preferred milk)
Instructions
- Preheat the Oven: Preheat your oven to 350°F (180°C) to ensure it reaches the perfect temperature for baking your protein pancake bowl.
- Mix Dry Ingredients: In a mixing bowl, combine the all-purpose flour, protein powder, baking powder, and sweetener if using. Stir these together until evenly mixed.
- Whisk Wet Ingredients: In a separate bowl, whisk the large egg, vanilla Greek yogurt, and soy milk together until smooth and fully combined.
- Combine Wet and Dry: Pour the wet ingredient mixture into the dry ingredients bowl. Stir gently until the batter is smooth with no lumps.
- Optional Add-ins: If desired, fold fresh berries or sugar-free chocolate chips into the batter for added flavor and texture.
- Bake: Pour the batter into an oven-safe bowl or ramekin. Place it in the preheated oven and bake for 20 to 22 minutes, or until the center is fully set and cooked through.
- Cool and Store: Remove the bowl from the oven and allow it to cool completely. Once cooled, refrigerate the baked pancake bowl for up to 3 to 4 days.
- Reheat and Serve: When ready to eat, reheat in the microwave for 40 to 60 seconds. Top with additional Greek yogurt or sugar-free maple syrup as desired and enjoy.
Notes
- You can substitute the all-purpose flour with spelt, oat, gluten-free, or buckwheat flour depending on your dietary preferences.
- Choose your favorite protein powder flavor to customize the taste of your pancake bowl.
- Sweetener options include sugar-free granulated sweetener, regular sugar, honey, or maple syrup to suit your sweetness preference.
- Adding fresh berries or sugar-free chocolate chips can add extra flavor without adding many calories.
- Refrigerated leftovers last 3 to 4 days, making it a great make-ahead breakfast option.
- Microwaving gently warms the bowl without drying it out.
